14 DAY TRIAL //
 Folder Lock is a professional security application that uses 256-bit AES encryption to protect your data with passwords. It can lock and hide files and folders, deny access to drives, as well as create lockers as virtual drives for storing information in a secure environment, even on USB flash drives.
We're breaking down Folder Lock in the following guide to show you how it works. It has a surprisingly rich set of practical options wrapped in an intuitive interface. Scroll down to the end of this article to play our video guide.
Master Password
After firing up Folder Lock, you can Set a Master Password that will be required every time you want to access the application. If you want the tool to request the master key only when you're trying to lock files, then tick the Ask Master Password for 'Lock Files' only box.
If you fear that keyloggers may be installed on your PC, you can avoid the risk of unintentionally giving away your password by using the virtual keyboard, in order to click the keys instead of typing them. To do this, click the keyboard button near the password box. After entering the key, click Ok to apply it, then retype the password for confirmation and click Ok.
The master password can be later changed from Settings -> Password Security. Moreover, you can set the program to automatically lock after a certain amount of time has passed since the last mouse or keyboard activity (Settings -> Auto Protection), quit to the desktop, log off or shut down the PC after a certain number of failed attempts at entering the password (Settings -> Hack Security), as well as run the app only using hotkeys and hide shortcuts (Settings -> Stealth Mode).
Lock Folders tab
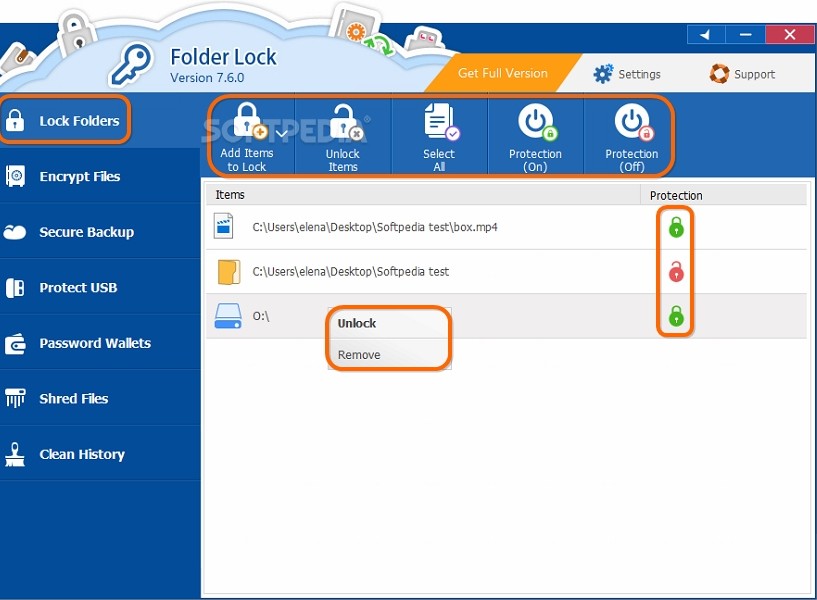
To lock files, folders or entire drives, go to the Lock Folders tab, click the Add Items to Lock button in the toolbar, choose the type of objects you wish to secure from Add File(s), Add Folder(s) and Add Drive(s), then indicate the items on your computer and click Ok. Also, you can drag and drop them from Windows Explorer.
How it works: the objects added to the Lock Folders list are automatically locked. Locked files and folders become invisible on the PC while access to locked drives is denied. To unlock objects, right-click an entry from the list and select Unlock or Protection (Off) from the toolbar.
The objects will remain on the list unless you select Remove from the context menu or Unlock Items from the toolbar. You can find out if items are locked or unlocked by taking a look at the color of the corresponding lockers in the Protection column: green for locked (secure) and red for unlocked (insecure).
Encrypt Files tab
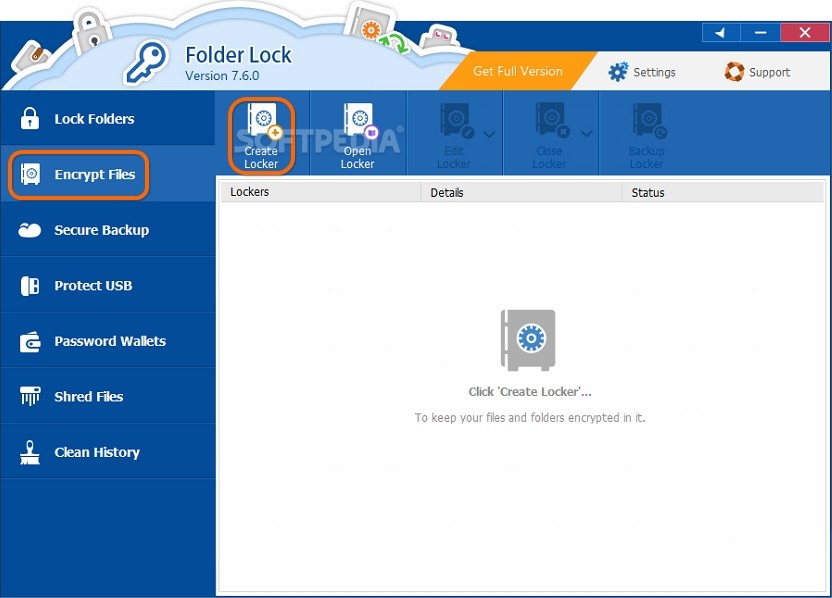
To create a locker (virtual drive) and keep your files and folders stored inside, go to the Encrypt Files tab, and click Create Locker on the toolbar. The application pops up a wizard, where you can start by specifying the Locker Name and directory to Create In (click Browse, select the destination, click Ok). Click Next to proceed.
In the following step, it's necessary to Set Locker Password and Confirm Password. The app measures the Password Strength and indicates it via color-coded bars to let you know how difficult it would be to decrypt by hackers.
Just like in the case of the master password, you can type the keys using a virtual keyboard instead of pressing them on your physical device to avoid the risk of being monitored by keyloggers (click the keyboard buttons next to the Set Locker Password and Confirm Password boxes). Click Next to proceed.
You can pick the type of locker by clicking the menu next to Choose Type and selecting Backup-able (FAT32) or Basic (NTFS). Also, you can allocate the maximum storage for the locker by clicking the menu next to Choose type and picking the range, from Up to 20Mb to Up to 14Tb. Otherwise, you can click Custom to specify any number of megabytes, gigabytes or terabytes.
To make sure you have enough free disk space available, take a look at the Required free space for the virtual drive as well as Available free space. After clicking Next, the application creates the locker by taking into account your settings.
Click Finish to complete the process and open its location in Windows Explorer. It's loaded as a new partition (the drive letter and label are assigned automatically). However, unlike regular drives, any files or folders you copy or move to this area are automatically encrypted after closing the locker from the main window of Folder Lock. To access them, you'll have to open the locker each time.
Returning to the Encrypt Files tab, it's possible to create as many lockers as you want with distinct settings, provided that you have enough disk space. From the toolbar, you can Open Locker, Edit Locker (Change Password, Rename, Copy, Move or Delete Locker, Remove From List), Close Locker, as well as Backup Locker (requires Secure Backup Account).
Protect USB tab
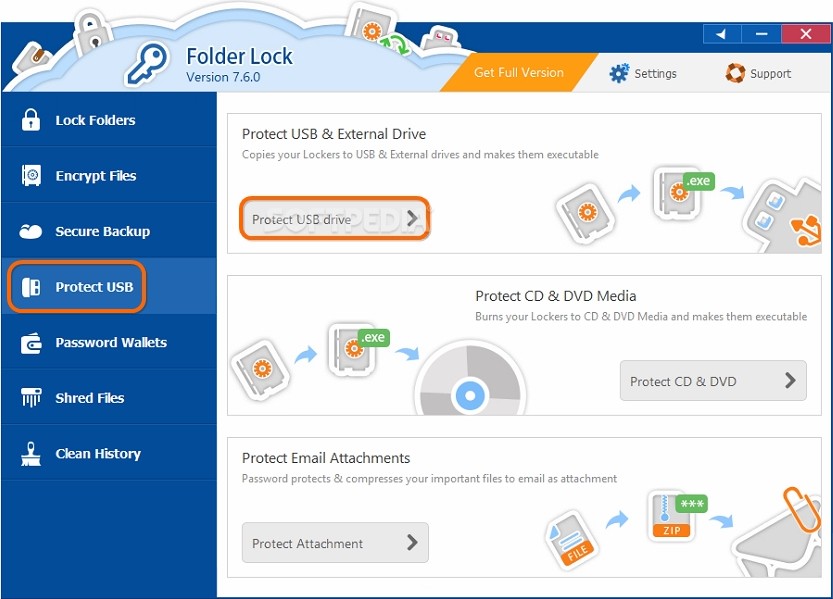
To password-protect your USB drives and keep data safe by creating self-executable lockers, go to the Protect USB tab and click Protect USB drive. In the popup wizard, select Create a new portable Locker in my USB Drive, click Next, then set the Locker Name, Select USB drive (click Browse, choose the USB partition, click Ok), Set and Confirm Password, then click Next to proceed.
In the following step, you can select the amount of data to protect. If the drive has less than 4Gb, then the locker will be converted to an .exe file. Otherwise, if it surpasses 4Gb, then the locker and a separate .exe will be copied. Click Next to create the locker and
Finish.
If you want to copy an existing locker from your computer to the USB drive, thus turning it into a self-extracting .exe file that doesn't need Folder Locker to open it, go to the Protect USB tab, click Protect USB Drive, select the Make my existing Locker portable option in the popup wizard, click Next, Choose Locker to Convert and Choose USB drive destination, then click Next and Finish.
How it works: the locker file on the USB drive is separate from the regular drive, so existing files and folders aren't encrypted by the application. Instead, you can double-click the locker file, enter its password and select a drive letter to assign for the virtual drive. It gets opened like a regular partition where you can copy files and folders, knowing that they will be kept encrypted and invisible on the USB drive once you close the locker.
Similarly, you can burn lockers to CD and DVD media files to make them executable (Protect USB tab -> Protect CD & DVD) as well as secure and compress email attachments (Protect USB tab -> Protect Attachment).
Password Wallets tab
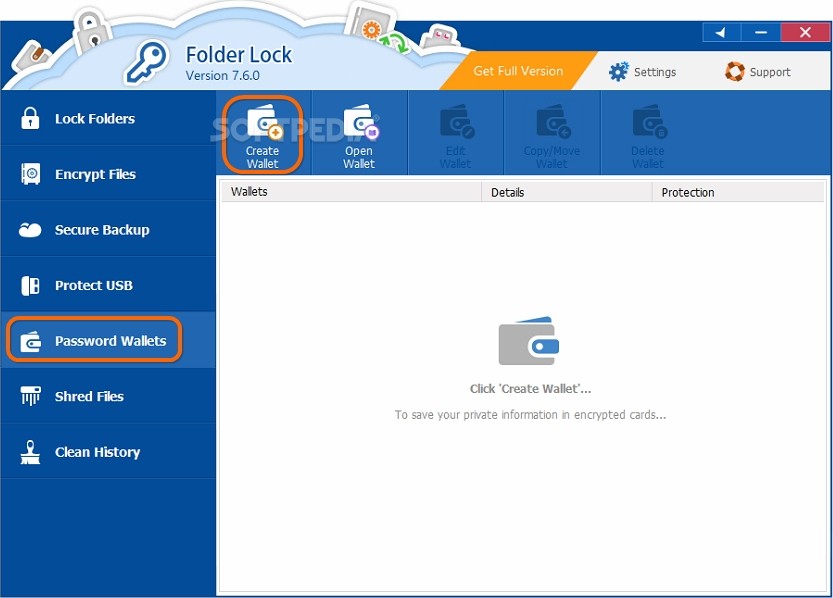
To store credit card numbers, banking information, and other types of sensitive data in a safe environment, go to the Password Wallets tab to create encrypted cards.
To do this, click Create Wallet on the toolbar, enter the Wallet Name and folder to Create In (click Browse, select directory, click Ok), click Next, then Set the Wallet Password, Confirm Password, and click Ok to open the new wallet.
Next, click Create card on the toolbar, enter the Card Name and Card type (Bank Account, Business Card, Business Info, Credit Card, General Purpose, Health and Hygiene, ID Card, License, Passport), click Ok, then fill out the necessary information. You can create multiple password wallets with distinct cards.
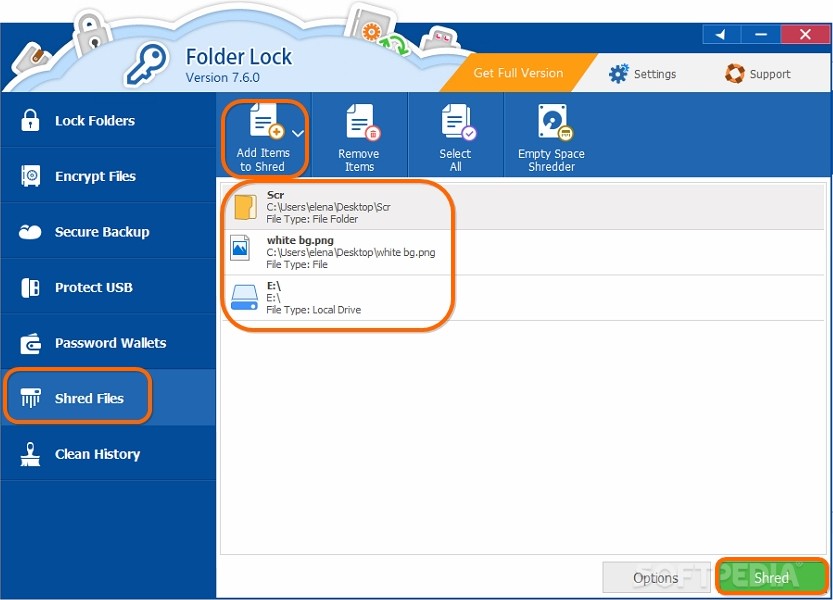
Shred Files tab and Clean History Tab
To securely wipe files, folders, and drives to make sure they cannot be recovered by other people using specialized tools, go to the Shred Files tab, click Add Items to Shred from the toolbar, and select the types of objects you want to securely erase from Add File(s), Add Folder(s), and Add Drive(s). Point out the targets and click Shred to eliminate all of them at once.
Wiping options can be configured from Settings -> Shred Settings, including the security algorithm used (Zeroes, Random Numbers, DoD 5220.22-M Standard, Peter Gutmann Standard).
To protect your privacy, you can delete details about your past activity and footsteps left behind in Windows, Windows programs and Start Menu. To do this, go to the Clean history tab and click the Clean button.
By default, all listed objects are taken into account for cleanup, but you can exclude any of them by clearing their box: Windows temporary files, Open/Save directory, and Clipboard data (in Windows), Media Player, Microsoft Paint and WordPad history (in Windows Programs) as well as Run, Find Computer, Find files and folders, and Recent Documents history (in Start Menu).
Play our video guide below to see how this program works. You can also download Folder Lock from Softpedia.
Folder Lock Explained: Usage, Video and Download
Create lockers as virtual drives to protect sensitive files, folders and even entire drives using passwords. More info: http://www.softpedia.com/blog/folder-lock-explained-usage-video-and-download-505957.shtml