14 DAY TRIAL //
 Ripping DVD movies to more compressed formats is quite an old practice. It was more popular in the past, when everyone had small hard disks and, at that time, it was more practical to store a 700MB avi file rather than a 4GB DVD image iso file. Even today, when the latest hard disks allow us to store a far more greater number of DVD images, the number of programs dedicated to ripping DVDs keep on growing exponentially. But that's not necessarily a bad thing since I guess everyone would rather have as many available options as possible.
Winki the Ripper is one of the DVD rip programs available for Linux. Basically, it's just a graphical front-end for Gnome written in Python to command line tools like mencoder, mplayer, mkvtoolnix and oggenc.
Winki can be installed in a number of ways, depending on which distribution you're using. Moreover, you can find instructions for most popular distributions on the Winki's homepage. When I first tried Winki, I was running the latest version of Kubuntu (7.04) so I followed the instructions for Ubuntu Festy Fawn. I had to add a few lines to apt's sources.list file, validate the author's signature, and run the apt-get install winki command. Everything was looking good until I was presented with the huge list of dependencies (about 90 - 40MB needed to be downloaded). Besides the programs for which Winki is a front-end, the list also contains many of Gnome's packages. So basically, KDE users won't be able to use Winki unless they download most, if not all packages that build the Gnome desktop.
When the installation was over, I started looking for Winki's shortcut through the KDE main menu and I was surprised not to find one. That forced me to open the run application dialog (Alt+F2), type winki, press Enter and hope for the best. A couple of seconds later, Winki fired-up.
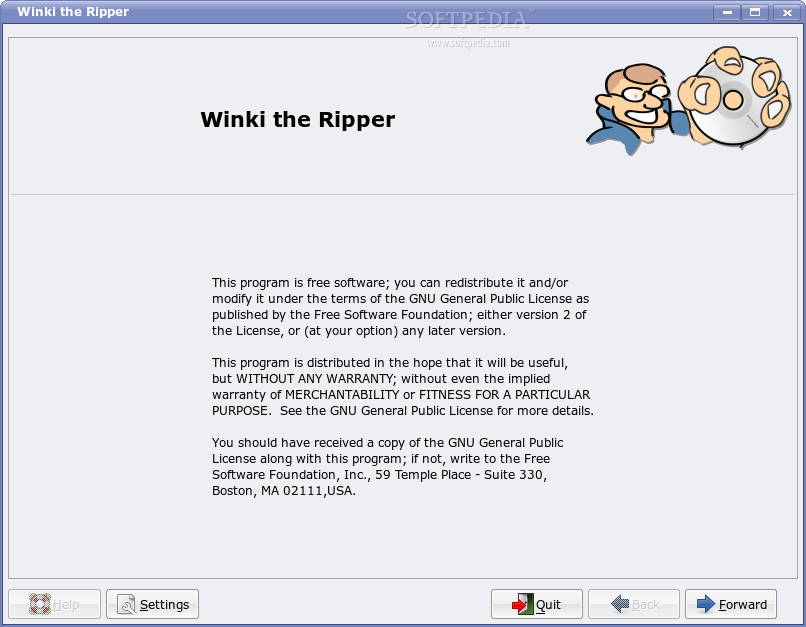
The first thing you'll notice about Winki is probably the wizard-like interface. This is good thing as this type of interfaces are easier to use. The first screen will display the GNU General Public License, a logo at the top and several buttons at the bottom, which will be available through all screens. These buttons are Help (it's not available for some reason), Settings, Quit, Back and Forward.
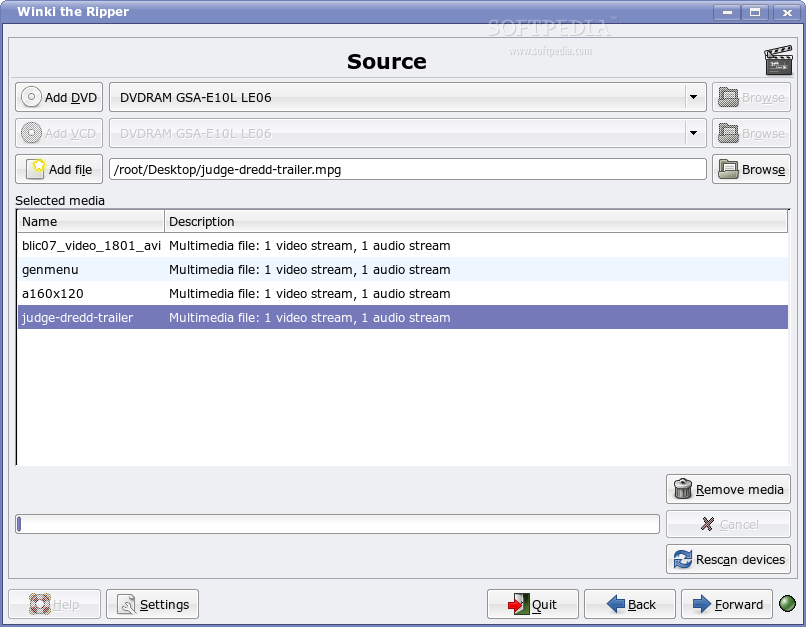
Clicking the Forward button will lead to the next screen, where you'll add the source media. Here, you can choose the CD or DVD device containing the media you want to encode. You can also select a DVD image file or a DVD folder, as well as a multimedia file stored on the disk (avi, mpeg etc). You may add as many sources as you want.
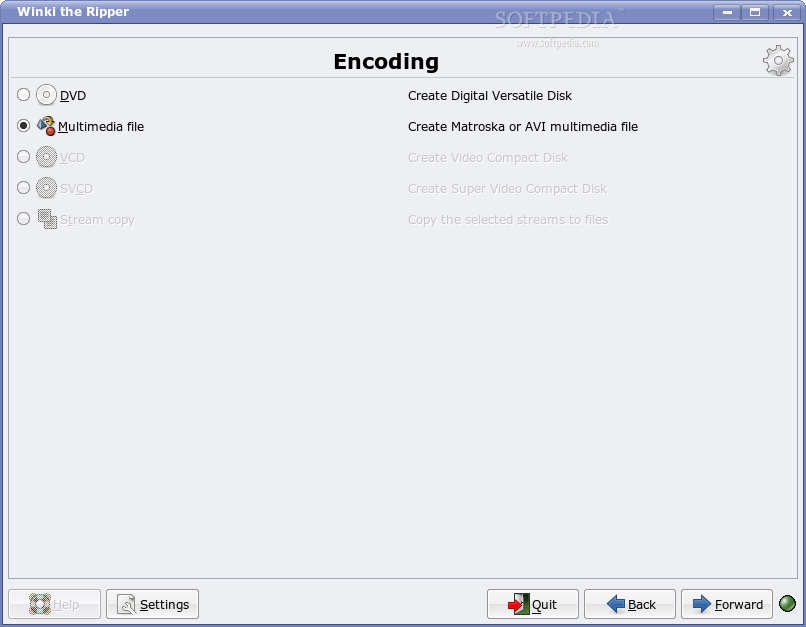
Another click on the Forward button will reveal the third screen, where you'll choose the encoding. The available options are: DVD (create dvd), Multimedia file (create Matroska or AVI multimedia file), VCD, SVCD (create vcd, svcd) and Stream copy (copy the selected streams to files). Based on your selection in the source screen, only one or a few options will be available.
In the next screen, you'll be able to enter the movie information. If all Winki's dependencies have been met (required as well as optional), the application will be able to fetch the info from IMDb. Otherwise, you may enter it manually. In this screen, you can also select the output folder.
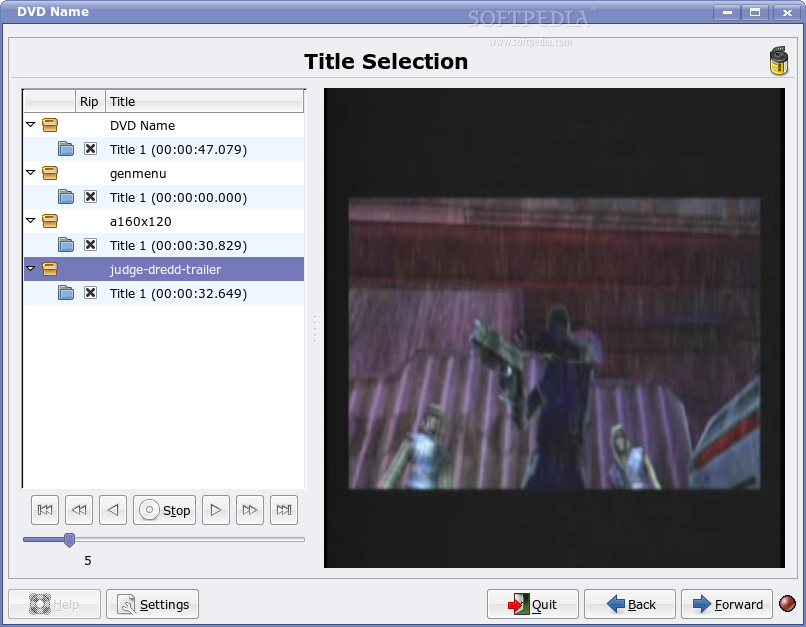
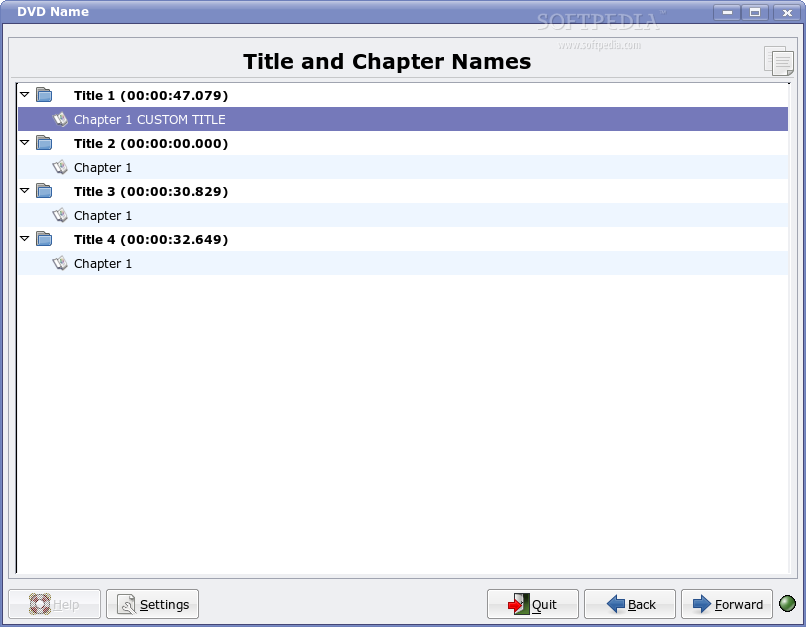
Off to the next screen: title selection. In this fifth screen, you will be able to preview the move and enter a title for it. Moreover, right-clicking on the movie title will pop-up the proprieties dialog, where you can modify various options such as video and audio format, aspect, frame rate, bitrate and so on. After that, another click on the Forward button will display the Title and Chapter Names screen, where you may enter names for the movie's titles and chapters.
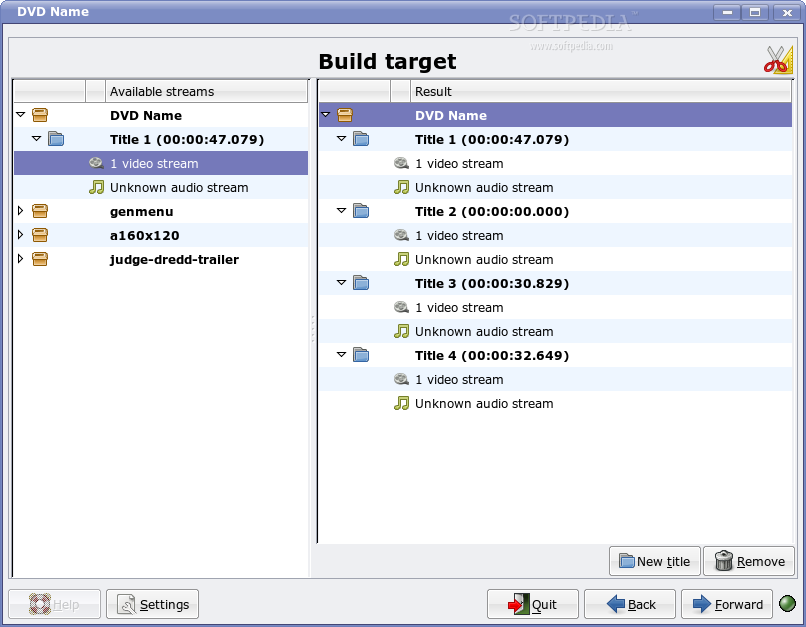
The succeeding screen allows you to select one of the audio languages available. This enables you to choose the audio language you understand best as the audio stream for the encoded video file. Clicking Forward will open the Target screen, where you will see the target structure preview in the left part. In the right part, you can choose the number of targets, the media sizes (CD or DVD) and optionally, the video bitrate.
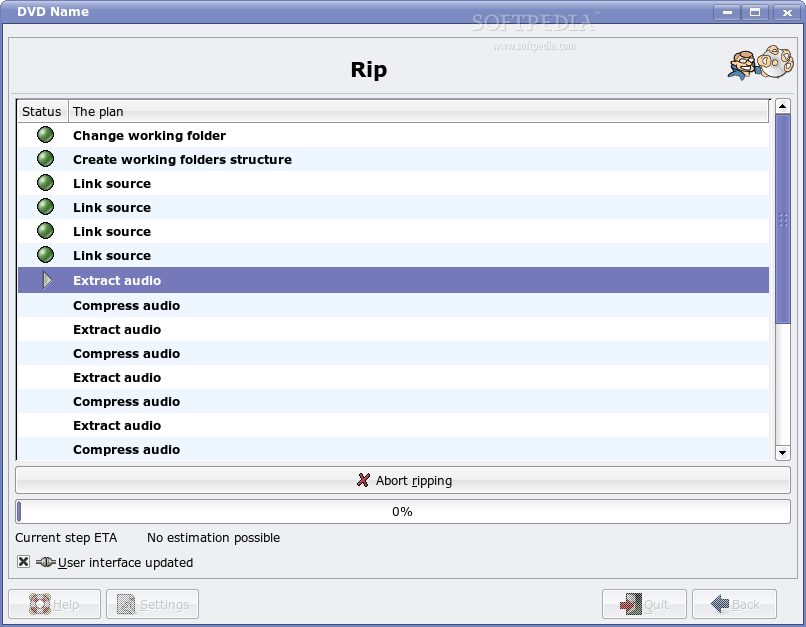
Next is the Crop Detection screen. On the left, you'll see all the titles listed, as well as the control buttons. Pressing the Crop Detection button will start the preview of the selected title, while the Get Value button will save the location of the crop. As for the last screen, Rip, you'll see here the steps required by the rip process, as well as the current step. At the bottom of this screen, there's a check box that allows you to enable or disable updating the user interface during the rip process. Moreover, a tooltip announces you that ripping will be faster if the UI is disabled.
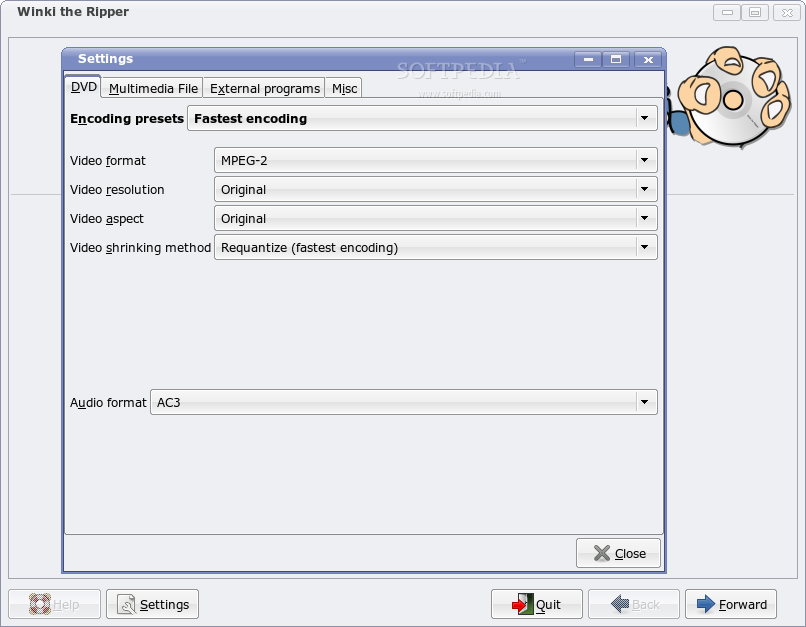
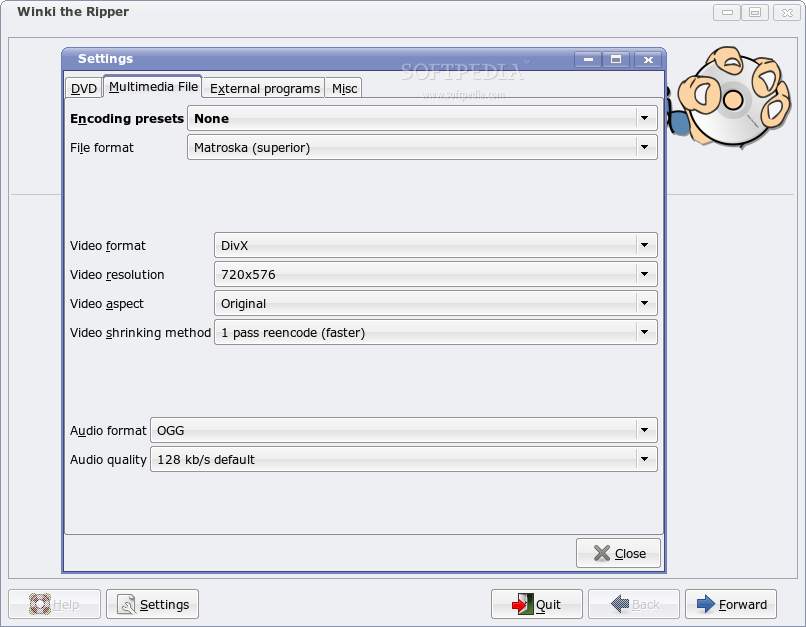
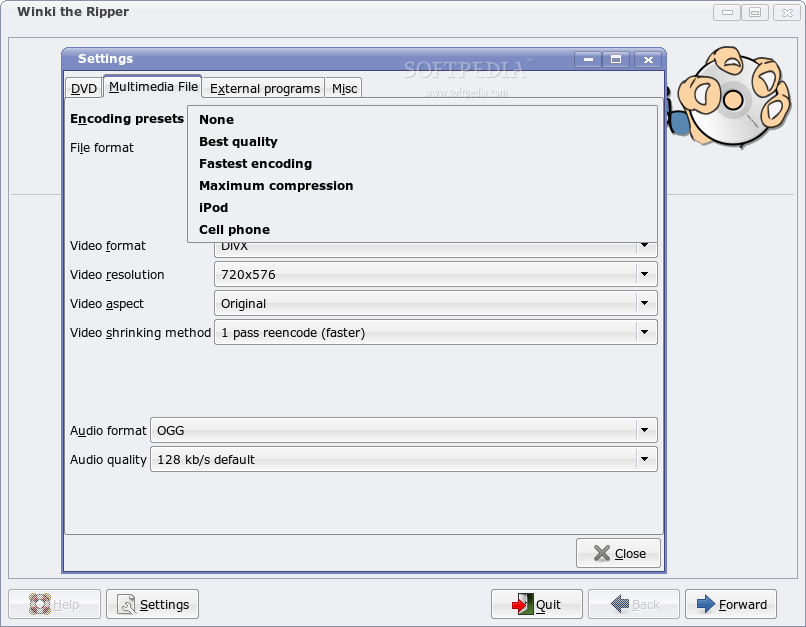
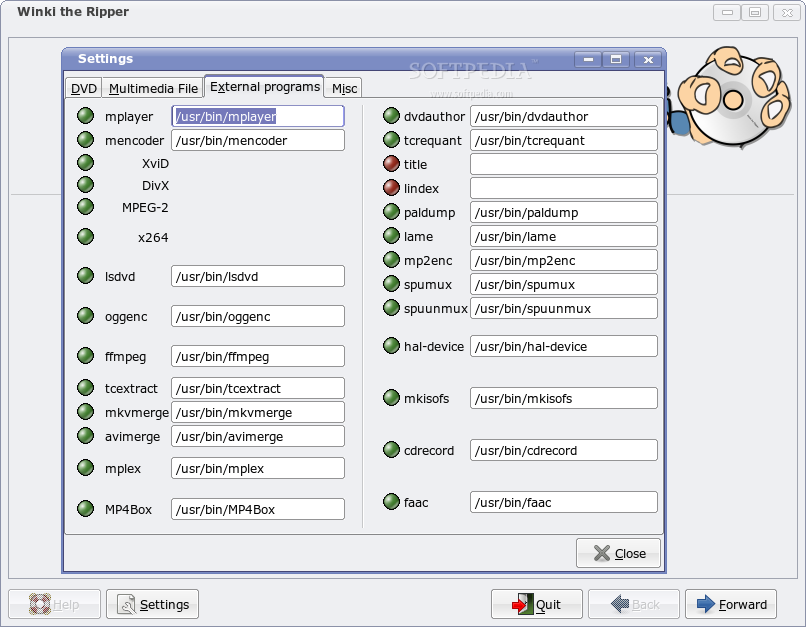
While at any screen (except for the last), you can click the Settings button which pops-up the preferences dialog, which is divided in four tabs. The first tab, DVD, allows you to choose an encoding preset which will change the options underneath: video format, resolution, aspect and shrinking method, as well as the audio format. The available encoding presets are: None, Best quality and Fastest encoding. The multimedia file tab allows you to choose from one of these encoding presets: None, Best quality and Fastest encoding, Maximum compression, Ipod or Cell phone. Optionally, you can select one of the file format (matroska which is superior, MP4 or AVI which is inferior). In the third tab, you'll need to enter the full path to the executables required by Winki. Most of them are already there and have a green spot next to them. That means they are good to go. For the rest, with the red spot, you'll need to make sure they exist and if they don't, to install them. The final tab, Misc, provides three checkbox options: whether to process one DVD chapter at a time, whether to exist winki when done and whether to show pop-up windows or not.
The Good
Winki The Ripper aims to be the easiest program for video encoding. I have to admit, that's not far from the truth. It provides a wizard-like interface that's pretty easy to use and it supports several input and output formats.
The Bad
Many of the basic features are missing, such as the help system and the support for more multimedia files; fortunately, Winki is an actively developed project and I'm sure there won't be anything wrong with it once it's complete.
The Truth
Winki The Ripper is a graphical front-end to several command line tools related to multimedia playback and rip. It has a clean and easy to use interface, as well as several useful features. Unfortunately, there are several drawbacks as well, such as the possibility that some programs for which Winki is a front-end may not be legal in all countries.
Check out some screenshots below: