14 DAY TRIAL //
 Choosing a disc burning utility these days should not be too difficult considering the amount of options available on the market. Depending on your needs, there is quite a number of freebies you can use to write data to disc, and even Windows 7 offers an alternative in this regard (especially with the progress made through native support for ISO image type).
Among the list of freebies you can rely on if you want to burn CD, DVD or even Blu-ray media there is also BurnAware. The application is available in three editions: Free, Home and Professional. For the paid versions you get a 10-day testing period during which no limitations are enforced except for a nag screen. The free edition is somewhat limited in options as it brings only the basic functionality with it, but this should be sufficient for the great majority of users.
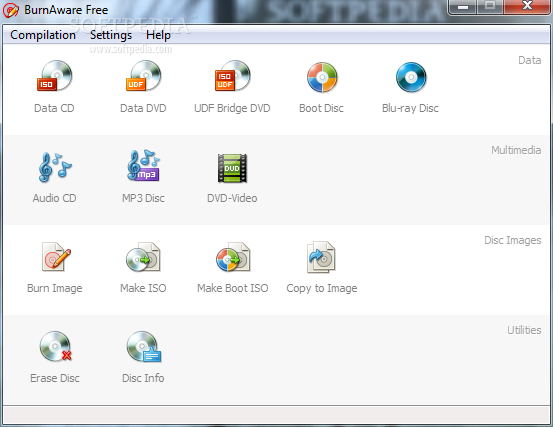
The free edition installs with no effort, but you have to pay attention during the procedure unless you want it to push Ask toolbar on the system. Once you get past this bump, it’s smooth sailing till the end. At the end of the procedure a simple interface awaits, displaying all the tasks that BurnAware Free can accomplish. The four categories available cover jobs like burning data discs (CD/DVD/Blu-ray), creating multimedia discs (Audio CD, MP3 disc, DVD-Video), disc images (burn ISO/CUE, create ISO) and erasing rewriteable media.
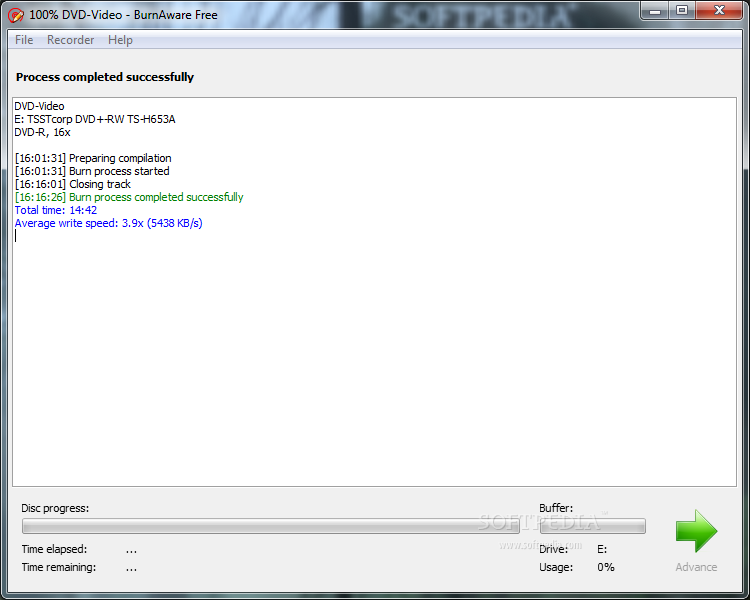
BurnAware Free has modular architecture, which means that each task opens with its own process and in a new interface. The benefits of this are drawn the moment you want multiple different tasks to be executed at once. Of course, for this to happen you need multiple recorders and a system that can support the entire load, which should be no problem (in our case a simple DVD-Video job cost the system an average of about 11% CPU usage and about 24MB of RAM).
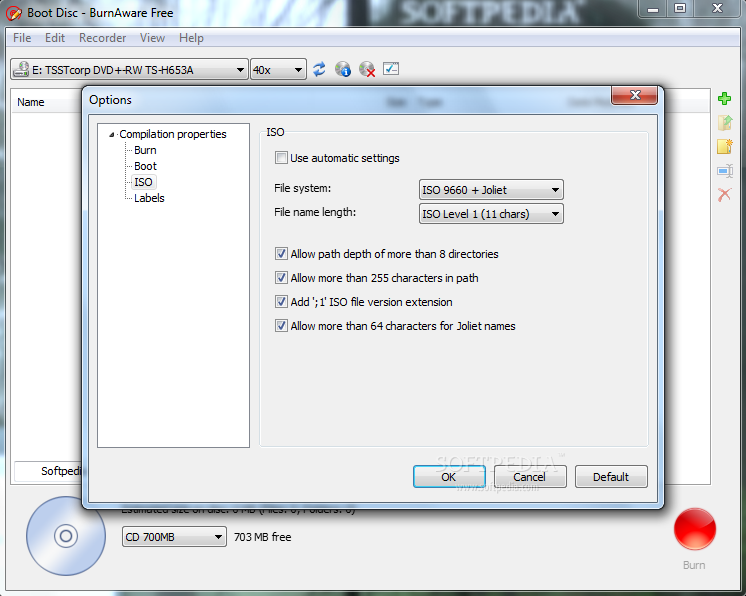
Regardless of the type of job you choose, they have a common set of settings you can tinker with; and it’s no tough nut, even if you are a beginner user. Matters like setting disc burning speed, labeling the disc or choosing disc type are basic options for such an application. More complicated choices are available in the Options menu of each of the tasks. This menu is adapted to the type of task you choose and, as such, you’ll have different options when creating a DVD-Video than when you prepare to bake an Audio CD or a Blu-ray disc.
The common ground, however, is enable/disable buffer underrun protection, ejecting disc after burn process completes, run a test write before the actual procedure initiates or verify the data on the disc after burning finishes. In the case of Audio CDs, BurnAware Free offers the possibility to write CD-Text as well as pick the write method (track-at-once or disc-at-once) and the pause duration between tracks.
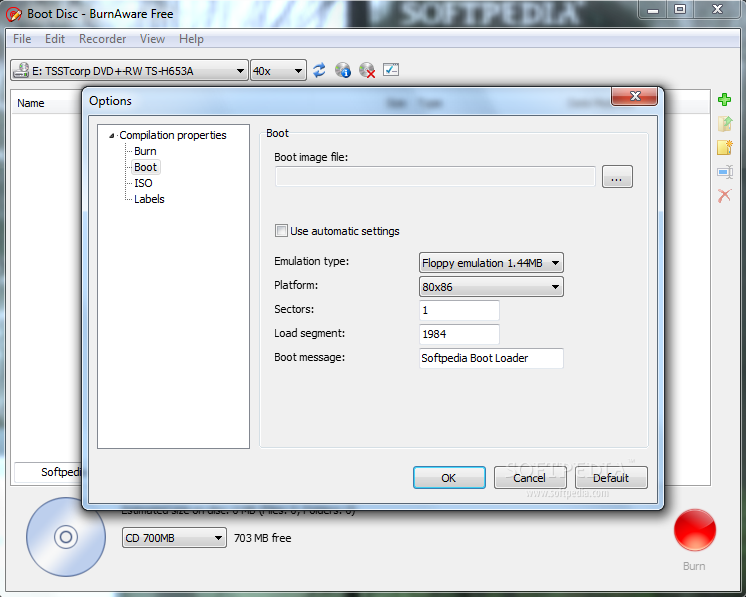
One feature rarely used by the average user, but fairly important for advanced users is creating boot discs. The application does not complicate things in this case, either, offering a neat stack of easy to understand options. All you need to do is point the application to the right boot image file and adjust the settings to your needs: select emulation type (floppy or hard drive), choose the platform, define the total number of sectors and load segment as well as customize the boot message.
Building up an Audio CD with BurnAware requires minimum effort as the program provides drag and drop support to easily add the audio files and supports a wide range of sound formats. We tried to create a mixtape using OGG, FLAC, WAV, WMA and MP3 and our attempt was a total success as none of the audio formats we added was rejected. Furthermore, before starting the burning process you can arrange the tracks in whatever order you want as well as add CD-Text for each of the items or listen for them with the help of the built-in audio player.
BurnAware has no progress bar to show you how much data can fit the media, but you are still provided such information as the application estimates this in numbers. It will display the total time of the elements already added if we’re looking at an Audio CD or the total size of the items if we’re talking about data burning operation. It will also automatically calculate the amount of space left on the media.
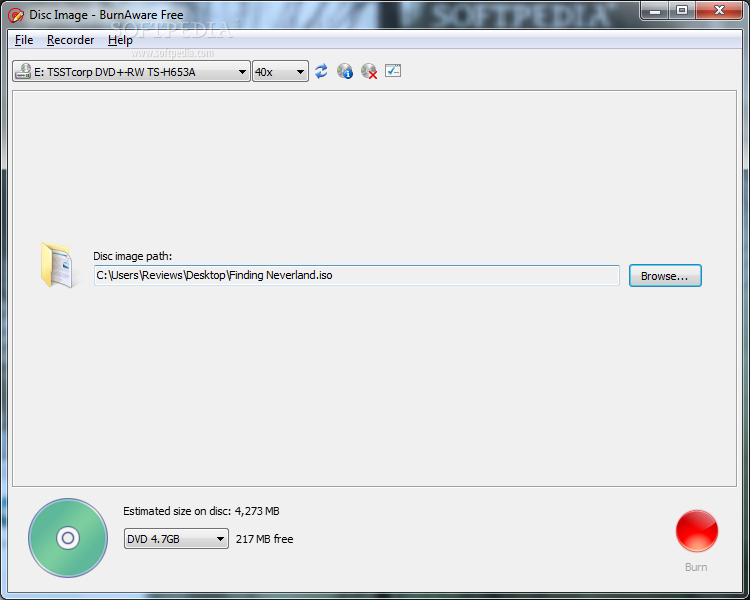
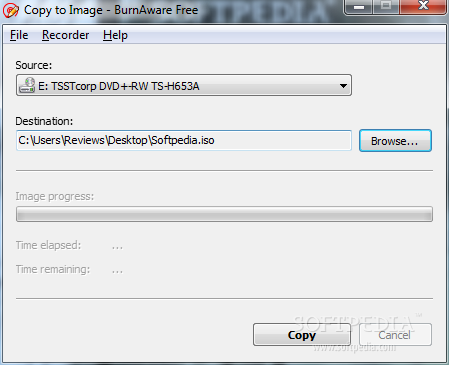
As far as the image formats go, BurnAware Free allows you to burn ISO and BIN/CUE types, create ISO from any file or folder on stored on your computer, build a boot ISO or copy disc contents directly to ISO archive. Support for a wider pool of image archive would be a big plus and maybe this will be added in the next versions.
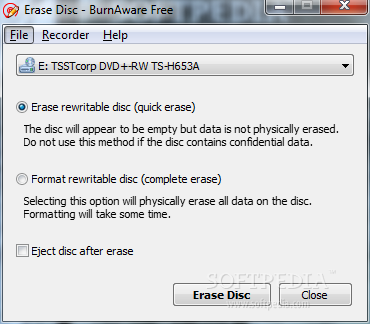
Under “Utilities” menu there is the disc erasing option. It does not matter the type of rewriteable disc you insert in the optical unit because the application will instantly recognize it. All you have to do is pick between a fast superficial job, which does not erase contents physically or a thorough one that formats the media completely and will take longer to complete.
Information about the inserted disc and drive details are also within BurnAware’s reach. If you need to see the amount of free and used space on the inserted disc or number of sessions written, check out Disc Info section under “Utilities”; it will also offer details about the optical drive you’re using.
This article is also available in Spanish: Aplicación gratuita para la grabación de datos Follow me on Twitter @Ionut_Ilascu
The Good
The Bad
The Truth