14 DAY TRIAL //
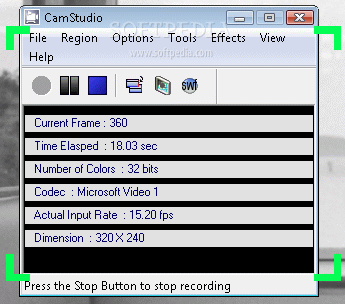
 You have probably encountered different video help files and asked yourself how they had been made. Or maybe you want to see if someone has gone through your computer files while you had a break. A simple way to do this is checking the CamStudio open source application. Mainly designed for building tutorials, CamStudio records all audio and video activity from your screen. But the area of use does not stop only there, as you can record just a certain area of your desktop.
The screen and video annotations can bring a nice touch for your movie, improving the quality of expression. The application is saving the video in standard AVI files, but using its built-in SWF Producer you have a choice of converting them to bandwidth-friendly Streaming Flash videos (SWF file format).
With this program there is not a lot expected from your input. You just need to define the desired region of your screen and press the record button. Save it to an AVI file and that's it. Easy, right? But if we go under the hood of the software, we will see that things are a little bit more complicated. If you are a power user with a lot of applications running on your computer, the CamStudio can stay quietly minimized in your system tray even when it is recording and it is still usable, via a few shortcuts you can define.
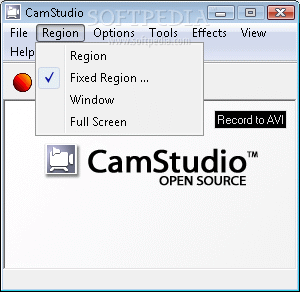
A lot of options and mouse clicks allow us to customize the application. Let's take for example the region of the screen from which the video will be recorded. First of all, the choices for screen capturing are fixed region, e.g. a window (it can capture even translucent or layered ones), the whole screen or just any screen area we define with the mouse. The fixed region is a tab where you can type in the coordinates of the captured window, if not, you can simply select any area from your desktop by dragging a rectangle (the flashing effect can be hidden). The coordinates' fields will fill in automatically with the correct values.
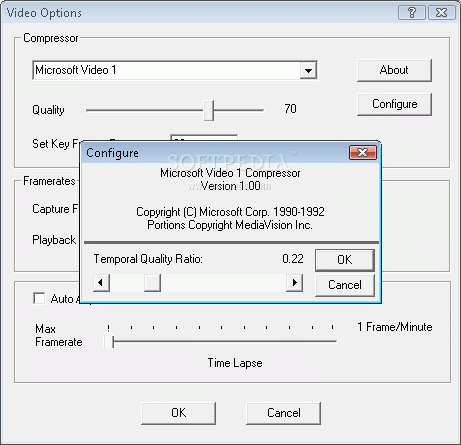
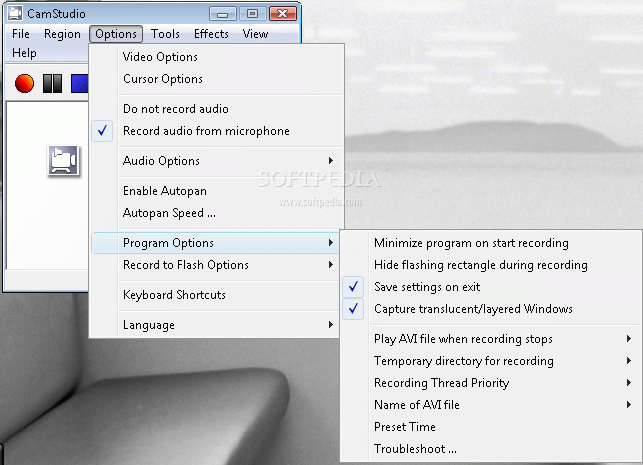
Having a look in the Options menu you will realize that the program is far more complex than you may think. In the video options tab you can choose the compressor you are going to use for your video from quite a wide range of alternatives. Available for download is CamStudio Lossless Codec v1.0, which can be found on the producer's website.
You can adjust different settings like Playback rate or define the milliseconds in which the frames should be captured. As for the compression algorithms, LZO and GZIP come as natural choices. Nine levels of compression are left for the user to choose from, starting with the fastest one and finishing with the best.
The mouse cursor is important especially when we are creating tutorials or presentations, because we want others to see what buttons we are pressing or what functions we are calling. If necessary, the mouse cursor can be hidden within the recorded area, or else you can choose it to be a custom one from a file or from CamStudio. To be more obvious for your viewers you can highlight it, change its color and/or its shape.
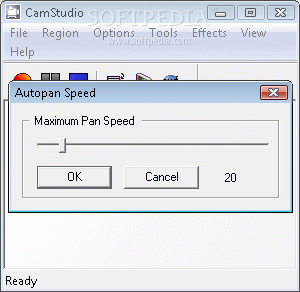
If you think a sound will suit better to your movie file, adding it from your microphone is not a complicated job. But when playing with the sound option you might get the feeling the program is asking too much from you. It is indeed easy to use, but not easy to understand as a novice user may find it hard to comprehend the set of options in Recording Format drop down menu, or what Audio Compression Format is best for him. On the other hand, as a professional, you can even interleave video and audio at a preset interval, use MCI (Media Control Interface) method for audio recording or enable the autopan effect and decide on its speed interval.
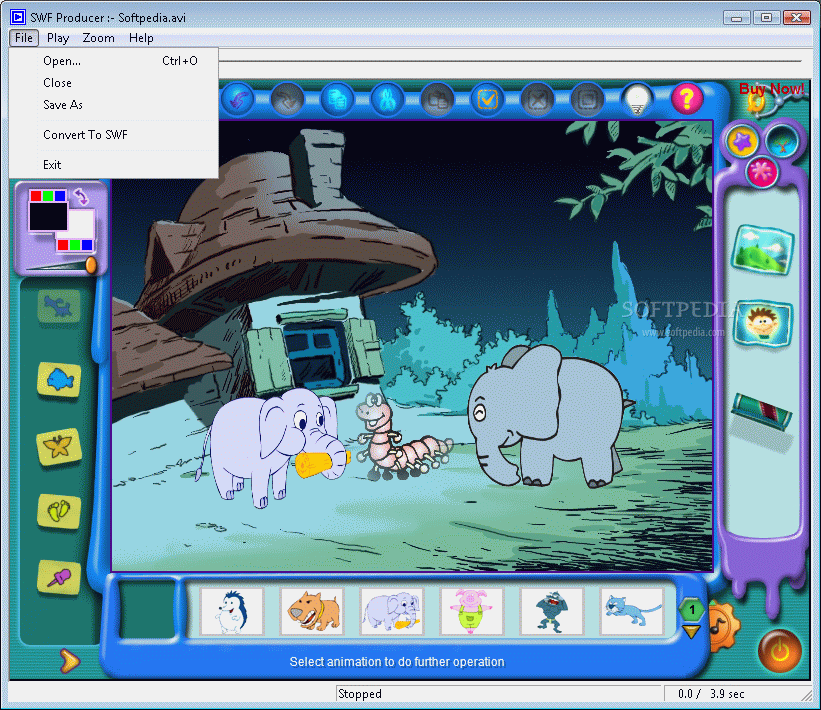
If you decide to upload your file on the Internet, you'd better convert it into a bandwidth-friendly file format. CamStudio comes with its own SWF Producer to do the job for you. It is a standalone program which can be used to convert AVI files into SWF (Flash) file format. You can set your converting options to be displayed for a final check, or save the hard drive space by deleting the AVI file immediately after the process completes.
Defining the temporary folder for recording can be done from the Options tab. The name of the captured file can be asked for or can be preset with the current date and time. You have four levels of recording thread priority to decide upon and the length in seconds of your movie file can be up to 7,200.
Troubleshooting is restricted only to the functionality of other sound recording applications or video and audio codecs generating CamStudio crashes. And if you are unfamiliar with the English language, you might be lucky, as the other choice is German, but the restart of the application is required for the change to be applied.
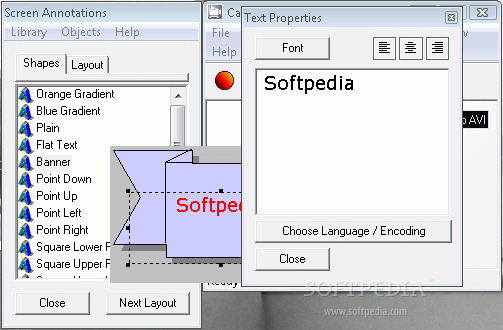
In Tools menu, you can try the screen and video annotations. There are lots to play with in here as well. For video you can edit the transparency of the window, the resolution, the pixel depth and the compression of the digital image format. You have a choice to create cutouts using predefined shapes and add a border to them. These cutouts can also have a user-defined size and color. If necessary, the refresh rate of your video device (webcam) can be adjusted accordingly, from 1 to 60 FPS (frames per second), for a better quality of your capture. On editing text you can select the font, its positioning and even the Language/Encoding (e.g Western, East Europe, Greek, Russian, Arabic, Thai, etc).
Using Video Source settings you can select the video device and configure its options (brightness, contrast, sharpness,etc). If you want to play with the image, you can mirror it vertically or horizontally. See how you can improve your image, controlling exposure, color and low light boost or flickering.
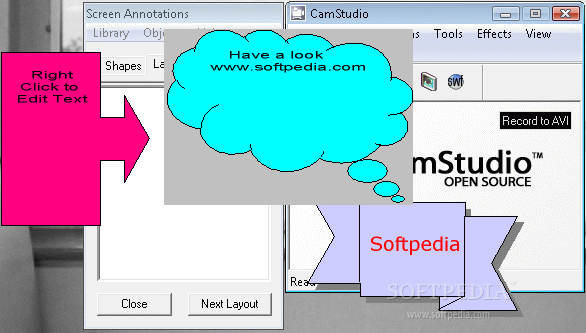
For the screen annotation, there is a lot to talk about. Mainly because here it is all about you and your artistic vision. You can take advantage of a multitude of already designed shapes or you can create new ones. Resizing, cloning, editing text, image and transparency are options left at your disposal. Once you have created a nice layer, you can save it for further use in a new library or in the current one. If you have your own shapes you can insert the library which contains them. Creating new shapes may be easy when they are loaded from BMP, JPG or GIF files, but if you have artistic flair you can start from scratch.
As effects for your video you can select the font, text and background color of your timestamp, name the caption or attach a watermark which you can load from your own files. In toolbar you can find the most used buttons as Record, Pause and Stop, but also for screen annotation. Changing the recording format can be done from here and is a mouse click away.
CamStudio is designed as an intuitive software for all users, once they don't expect to make complicated compression choices. The difference is visible with the quality of sound and video for an experienced user. Assistance menu is far from being the most appropriate one.
The Good
With CamStudio you can record all of your screen or just a certain region defined by a window. The video you make can have a timestamp, caption and a watermark. Recording can be preset for a certain amount of time. Movies recorded in AVI format can be converted into Streaming Flash -SWF - file format. The application can highlight left or right mouse clicks.
The Bad
Help menu is unavailable and there are no hints in the program as well as explaining the options you have to choose from. The interface can be redesigned to make the software more appealing. As is a very easy to use program for all types of users, this is only to a certain extent because not all of us know how to choose the best video and audio settings for our needs and no hints are given at all.
The Truth
CamStudio is a useful application for home-making films, especially tutorials. It has lots of options the user can customize. It is Open Source so there is no need for money to be paid. There is a lot of customizing available and choices to make, like preset the recording time of user-defined screen region or watermark your video. It helps you greatly in creating tutorials highlighting the mouse clicks with customizable colors, and that is indeed an important feature.
Here are some snapshots of the application in action: