14 DAY TRIAL //
 Creating stunning quality videos may be a difficult task, as freeware solutions on the market do not cover all the needed whatnot. You will have to use multiple softwares in order to record your video (either directly from the desktop screen or from a webcam) and publish them on the web. And if you want to add a little editing, titles and menus, then the number of applications involved increases exponentially.
However, shelling out a great deal of money will always bring you a software that integrates all needed functions to record, edit and produce your video for different types of transporters. TechSmith comes with its latest version of Camtasia Studio, number 5.
I have to admit that testing this application was the first time I touched the software. The reason is easy to understand: the $299 price tag is sufficient to keep me away from it. But I always new I had to give it a try one of these days especially when the 30 days trial period comes with no limitation at all.
Camtasia Studio is software tailored specially for screen recording and providing a full motion approach over all sorts of presentations. Over time, it has enriched its list of features garnering options for webcam recording, video editing and enhancing audio. All of them are wrapped up in a nice looking interface filled with tips and help in order to make working with the application a snap for everybody.
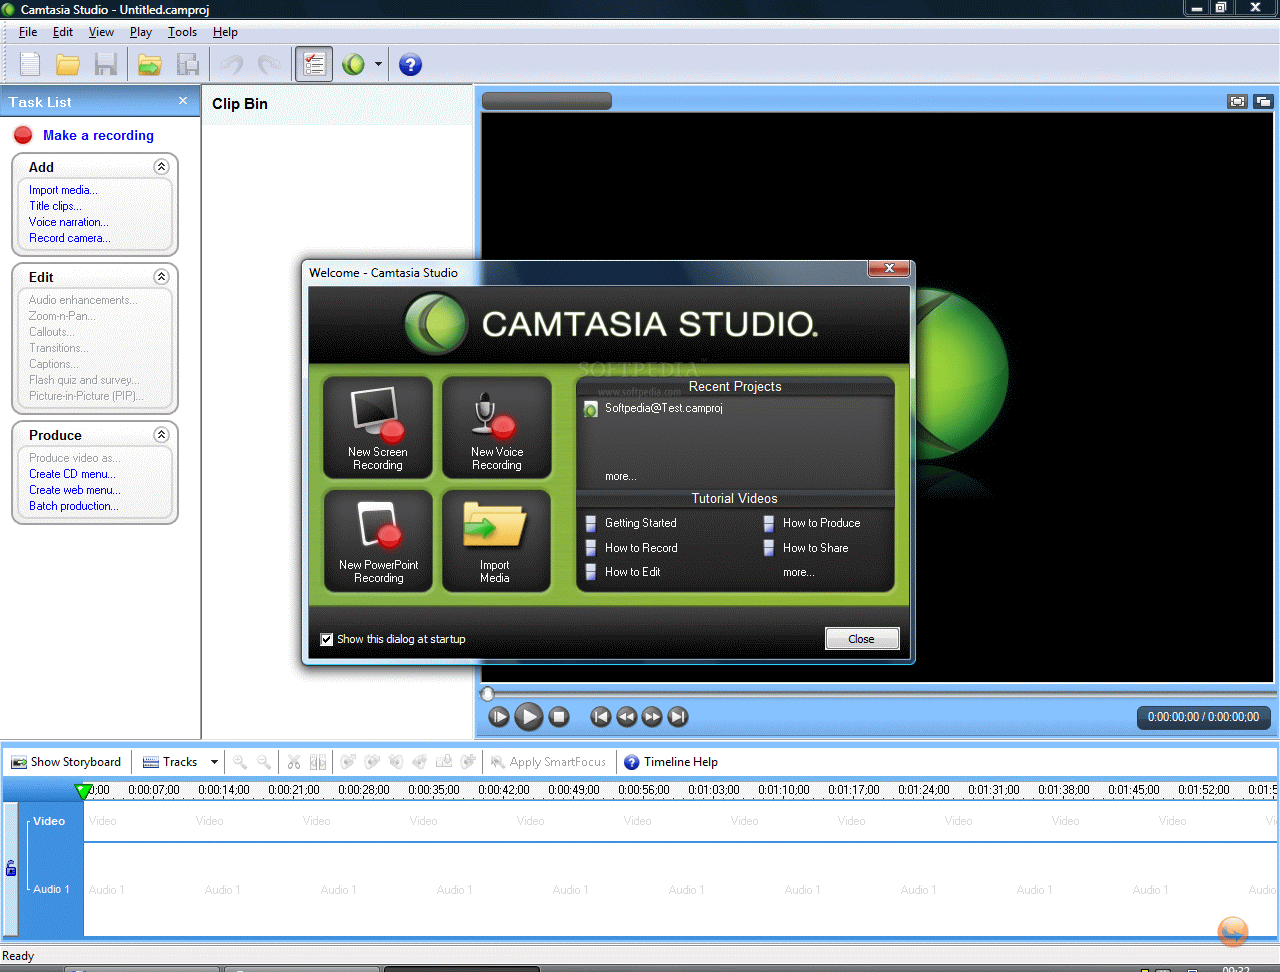
Immediately after launching the app, a wizard will pop up on the screen displaying all project options available in the software: screen recording, voice recording, PowerPoint recording and media importing. Also, a list of video tutorials are available teaching you the basics in working with Camtasia, the steps that have to be made for recording, editing your clip, producing and sharing it with others.
Camtasia Recorder's settings allow users to enable sound and webcam recording options and configuring them for the best result. Audio can be saved in more than one format, but if you are going for a small file and good quality, I recommend using MPEG Layer-3 encoded with LAME and set the convenient attributes (frequency, channels, and bitrate). To make things easier, there are three audio quality presets available (CD quality, Radio quality and Telephone quality) but you can create your own to use them in other projects.
Selecting the area to be recorded is the easiest task. The moment you press "Select Area to Record" button, a crosshair appears, allowing you to choose the area to be captured. All you have to do is drag the selection or simply place it on the title bar of the application to be captured, as the Camtasia can detect it automatically. The options for the selection appear in the lower right hand part of the selection.
These allow modifying the size of the selection as well as locking it to application, a very handy option if you wish to resize the window without making a new selection. ?Locking to application? allows moving the application screen all around your desktop without losing Camtasia selection of the area.
The great thing is that you can choose one of the preset sizes available for the selection and the screen to be recorded is automatically resized. The next step is pressing the red "Record" button and do your thing. Recorded area is guarded by a blinking frame alerting you that Camtasia is recording. In the lower right corner, you have the recorded time, while in the opposite side there are the controls for pausing the process, stopping it, deleting it or hiding all of them in order to resort to hotkeys for manipulating the process.
Once the recording process is stopped, the application proceeds to processing audio tracks and launches the movie. Now it is time to save it or dump it if it is not to your taste or if it has not captured the necessary. Saving the video leads to creating a .camrec file (native Camtasia format) anywhere on the disk.
Post-Save Options dialog let you proceed to editing your video or get directly to producing it into a shareable format. I suggest you polish the video a little and personalize it. Speaking of which, if you want to place a watermark on the video while recording, Camtasia Recorder's Options menu has a Watermark tab providing all the settings you need to make it happen.
Options menu also comes with alternatives for annotations (time and date stamps, computer name, user name, elapsed time), cursor setup, and zoom options (auto zoom speed, autopan speed, zoom level, enable smooth scaling, centering etc.). Be sure to make all these settings in order to get the most out of Camtasia Studio.
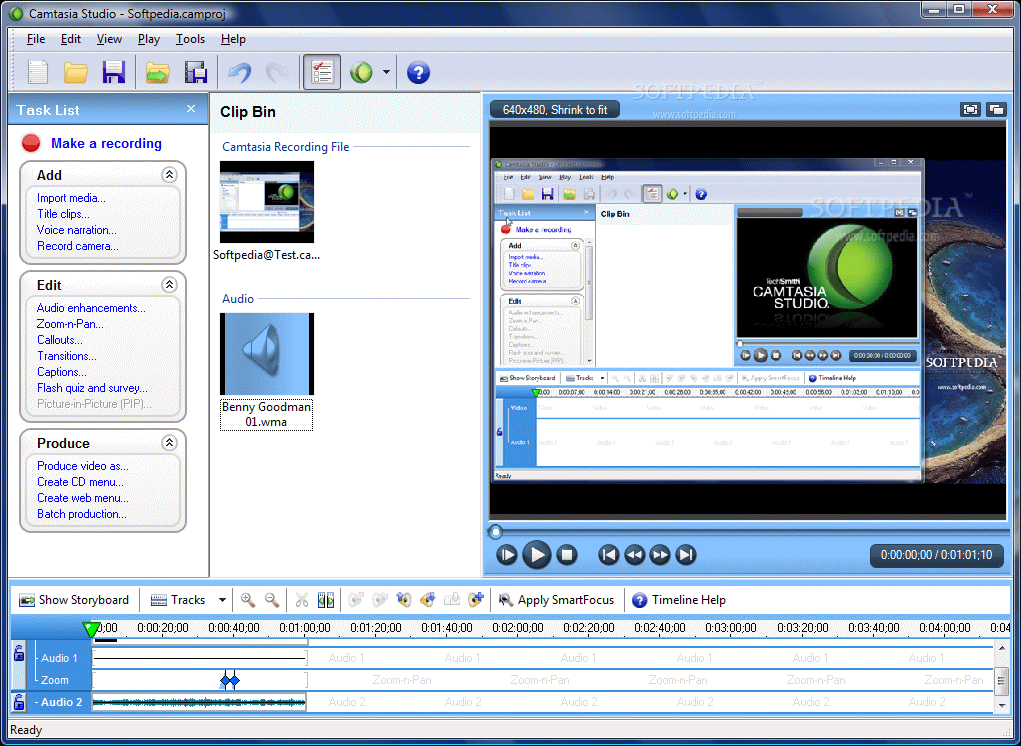
Editing component of Camtasia Studio 5 is displayed in a big screen containing a Task List, the Clip Bin, recorded video, and a Timeline. All these elements are essential in bringing the video to the desired outcome. For editing your video, you have to load the saved .camrec file and save it as a Camtasia project (.camproj format). Now Timeline is unlocked and ready to use.
Task List on the left contains all the elements you can add to your video. It is composed of three different menus, all containing options for importing media files, edit the video and the audio track, add transitions or produce the video according to distribution method.
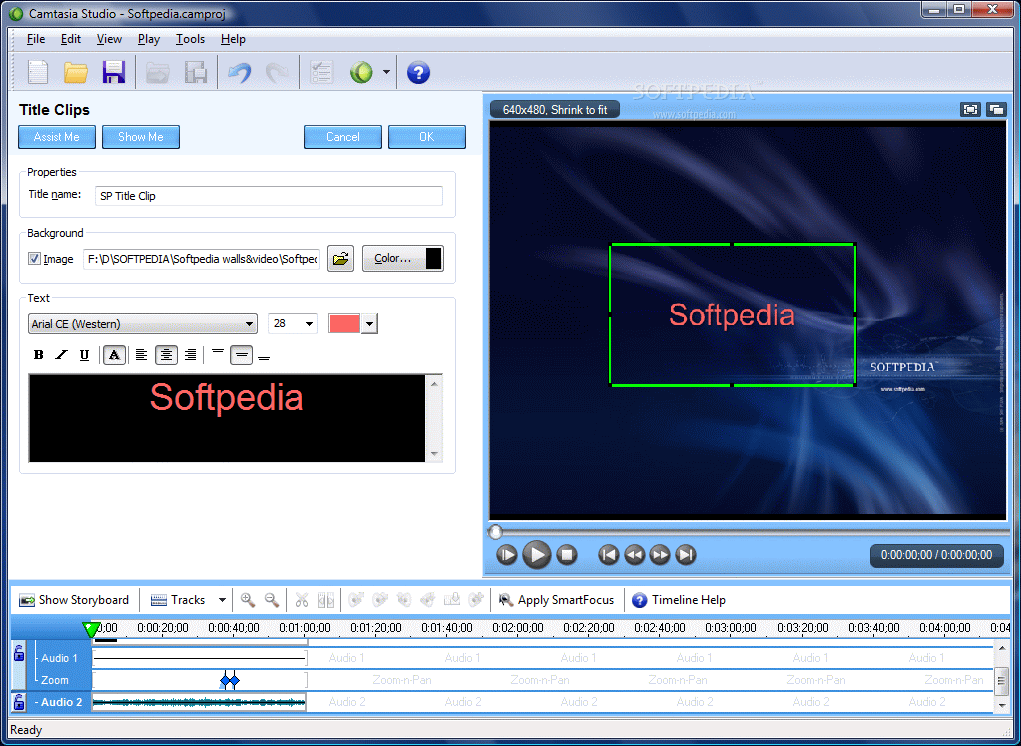
Add menu allows the user to insert different media elements in the video, like additional movies, title clips for separating the different sections of the movie, voice narration and webcam recordings. All these elements can be edited and are present in Clip Bin section of the application?s window.
Title clips support adding a background image as well as text input. There isn't too much effort to it especially if you consider that a single click of your mouse can take you to Title Clip section of Help menu. Text can be modified in terms of font type, size and color as well as style and alignment in the page.
Media files that can be imported from your computer include images, video and audio. However, Camtasia Studio 5 proves modest in what concerns the formats supported: AVI, MPG, MPEG, WMV, BMP, GIF, JPG, PNG, WAV, MP3 and WMA. But these are the most popular among computer users and I have to say that the application handles them very well.
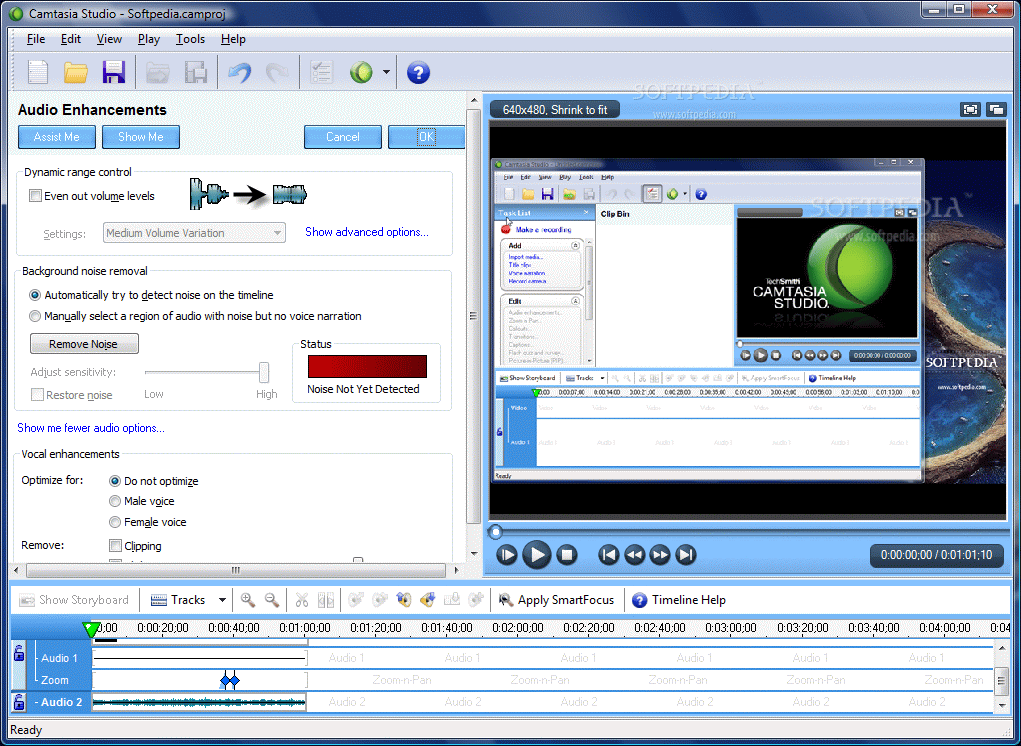
Edit panel in Task List permits enhancing the appended audio track, by evening volume level; you can also remove background noise and optimize it for male/female voice, make zoom and pan adjustments, add callouts, transitions, captions and Flash Quizes. Though it may seem a bit difficult at the beginning, all these elements can be easily handled by a 6 grader.
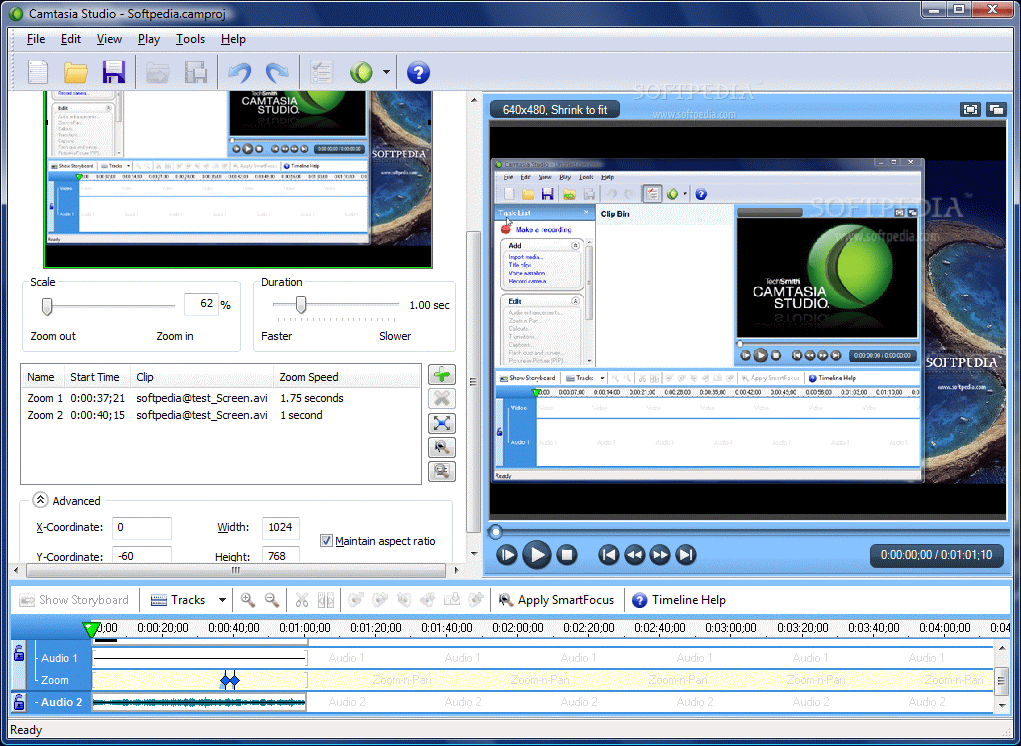
One big advantage of Camtasia Studio is that it comes with smart zoom options that allow zooming on user defined sections of the video for certain periods of time. You can set the duration of the zoom and make it faster or slower, depending on the object of interest. Zoomed parts of the video and their duration are marked in the Timeline (the blue diamond shaped elements). Double clicking them will open Zoom-n-Pan Properties window that permits making all necessary adjustments (from defining zoomed area to the duration of the effect).
Callouts are marking elements designed to highlight or blur a certain part of the video. These include four types of arrows, transparent hotspots, notepad sections, bubbles or rectangles. If provided presets are not enough for you, then proceed to the customization area that allows adding images from your computer and place them inside the video. All you have to take care of is the part of the video you want to draw attention upon (use Timeline or video preview window to find the spot).
The great thing about callouts is that you can make them active and add actions like jumping to an URL or at a user defined frame in the video or simply let the user express his/her wish to continue watching the video by pressing it.
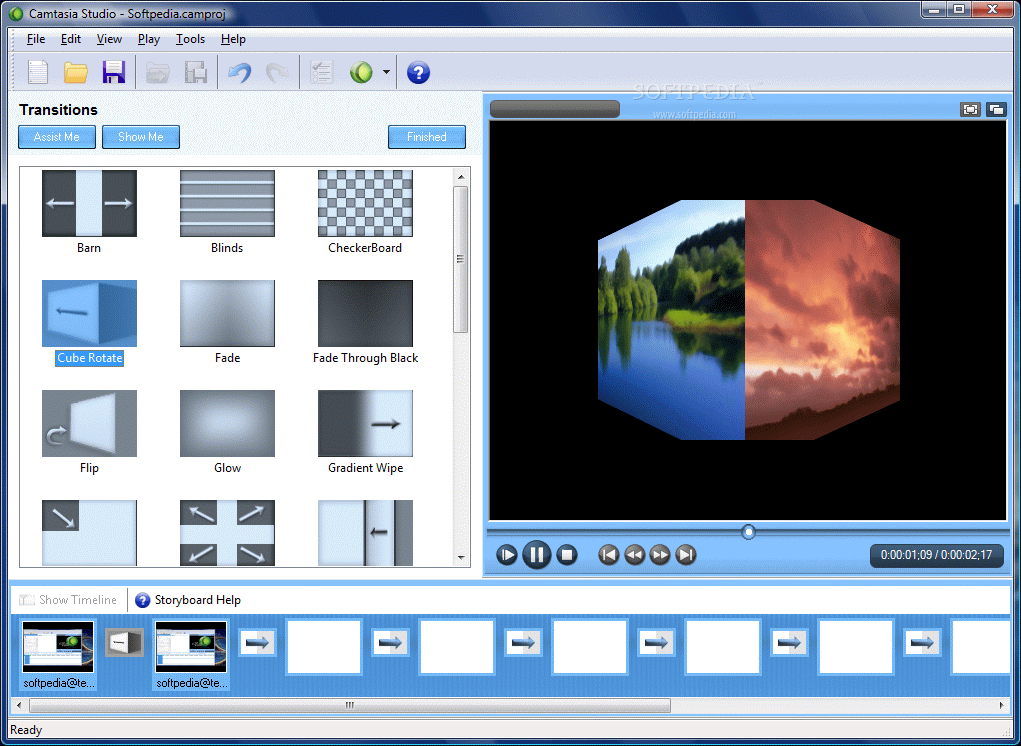
Transitions are elements that link one part of the video to another. Suppose you present different matters that are related in the video tutorial. Just add a transition at a certain point in the Timeline to make the transition to the next subject. There are 25 alternatives, all looking great. Just to give a few examples, Camtasia brings transition effects like peel, pixelate, radial wipe, roll, sliding to the right or to the left, zig-zagging, checker board like, fading, glowing, image flipping, gradient wipe, cube rotation etc. And all of them apply directly to your video.
Preview is available and a simple drag and drop at the bottom of the screen where all splits (we'll get to that in a moment) of the video are displayed is all the ?work? that you?ll have to do. If you already made the correct video splits, you no longer have to hunt the correct frame to insert the transition.
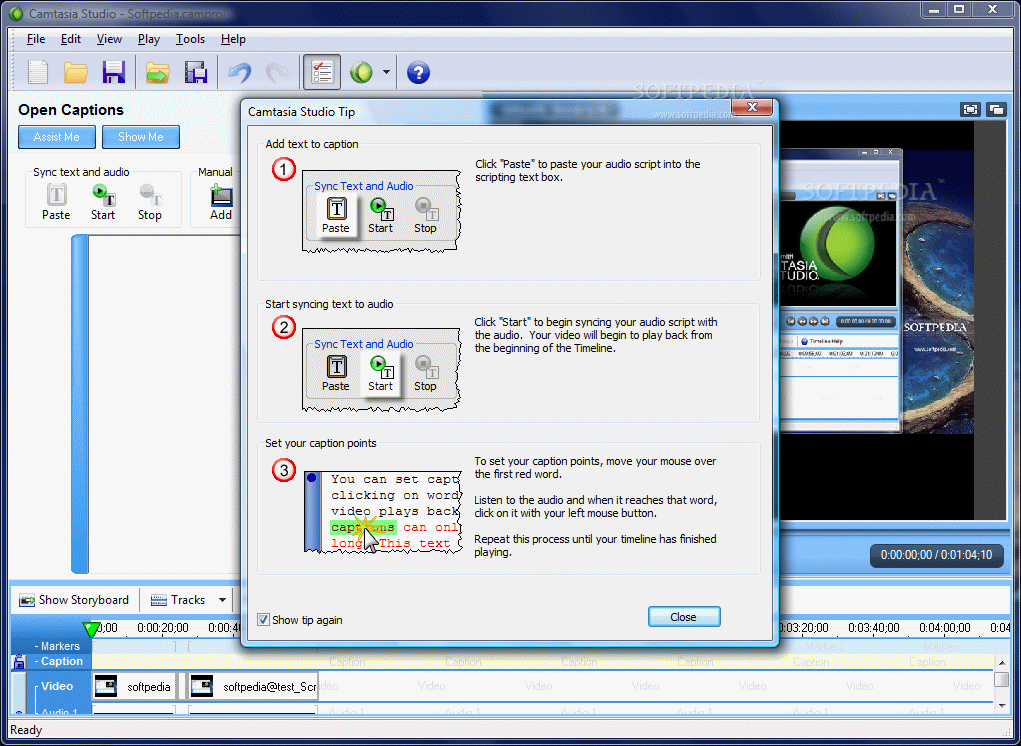
Text captions can also be added and displayed in the lower part of the video. Unfortunately, only three lines of text fit in. But you can synchronize text with audio and add as many as you want. Also, going through the text line using Ctrl+Arrows is not going to happen.
Suppose your training video is ready and all the elements are in place. How about giving viewing party a quick quiz or survey? Camtasia makes this possible as long as the format of the video is Flash. You can make it interactive by adding the right answers to the test and giving users the results on the spot. Quizes and Surveys are added at the end of the tutorial and you can preview them just to check on things. On the downside, you will not be able to go back and forth the text line using Ctrl+Arrows.
Timeline. I used to hate this element in every software, until I realized that it is the easiest way to build something. In Camtasia Studio 5, it contains the right amount of options which are easy to use and extremely handy. First of all, you can customize the tracks to be displayed (if it is very rich in elements it may hinder your work): markers, captions, audio tracks, zoom-n-pan, callouts, PIP and PIP Audio.
Other options include zooming in and out for a better view of the elements available, trimming the video by selecting and removing unwanted parts (just click and drag by the green marker and look in preview window for guidance), fade the volume in/out on selected area or crank it up and down or just replace it with silence.
An extremely important option is splitting the video for inserting additional elements. This can be achieved by simply going to the desired frame and clicking "Split" button (next to "Cut"). Be careful as all the elements in the timeline will be split as well, not only the video. So if you want the audio to run smoothly all along the video play, I suggest you add the track after all splits have been made and all visual elements added.
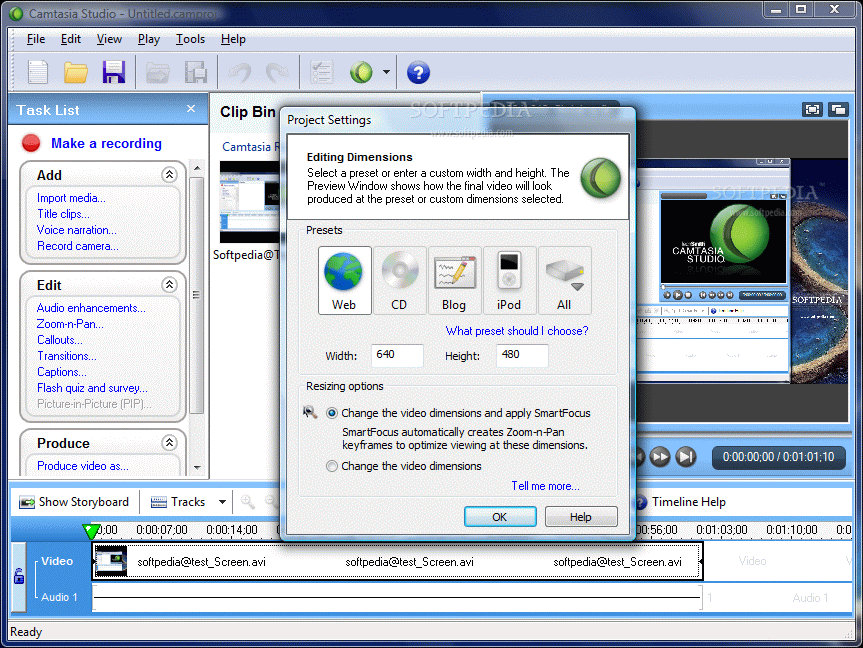
SmartFocus feature available in Camtasia Studio 5 is especially useful when you decide to capture a large screen area and produce the resulting video at smaller dimensions. SmartFocus? purpose is to quickly change video dimensions for different parts of the video. It automatically generates zoom-n-pan keyframes to optimize viewing at any dimension. It is just like Zoom-n-Pan option in Edit area, but automatic. Give it a try and preview the video. If you are not satisfied, simply undo the action, you have nothing to lose.
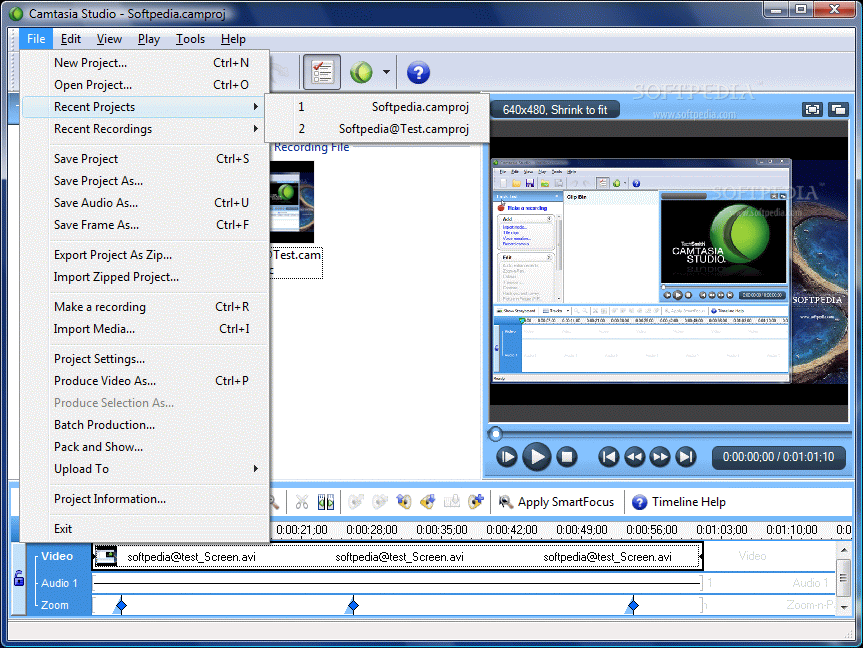
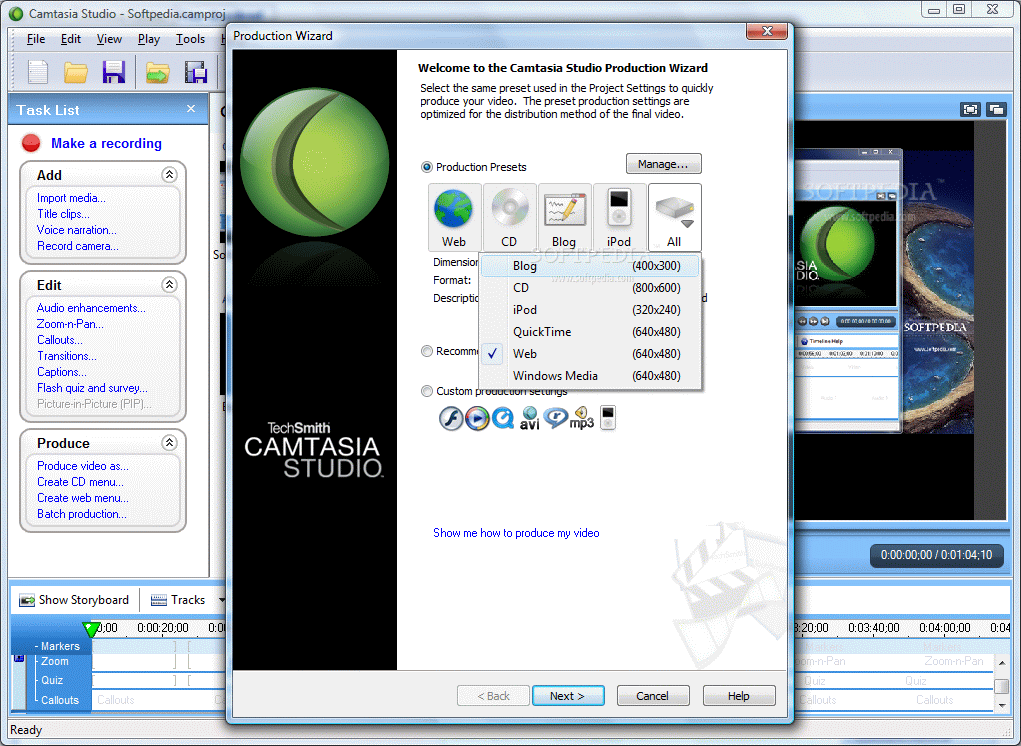
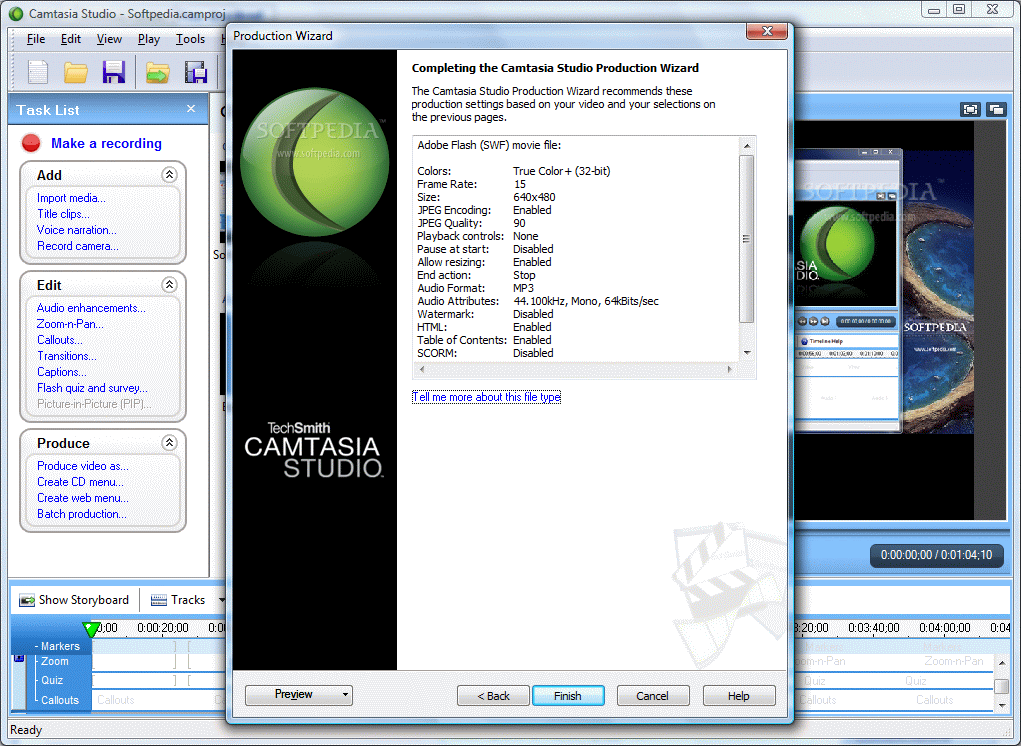
Producing the video is the last step to be taken in Camtasia Studio. The options here are generous, providing presets, recommended production settings and custom ones. Presets include optimum settings for web distribution (creates cross browser compatible presentations), CD (the file is saved in AVI format), Blog (creates and ExpressShow single-file SWF), iPod (M4V format).
Recommended settings help you determine the format of the output result. This also depends entirely on how you intend to distribute the video (Web, E-mail attachment, save it to disc, create a DVD from it, store it on your hard drive or load it to your iPod).
Custom settings bring more options and you have the possibility of saving the file as an animated GIF, RM video, MP3, MOV, Flash format (FLV or SWF) or WMV.
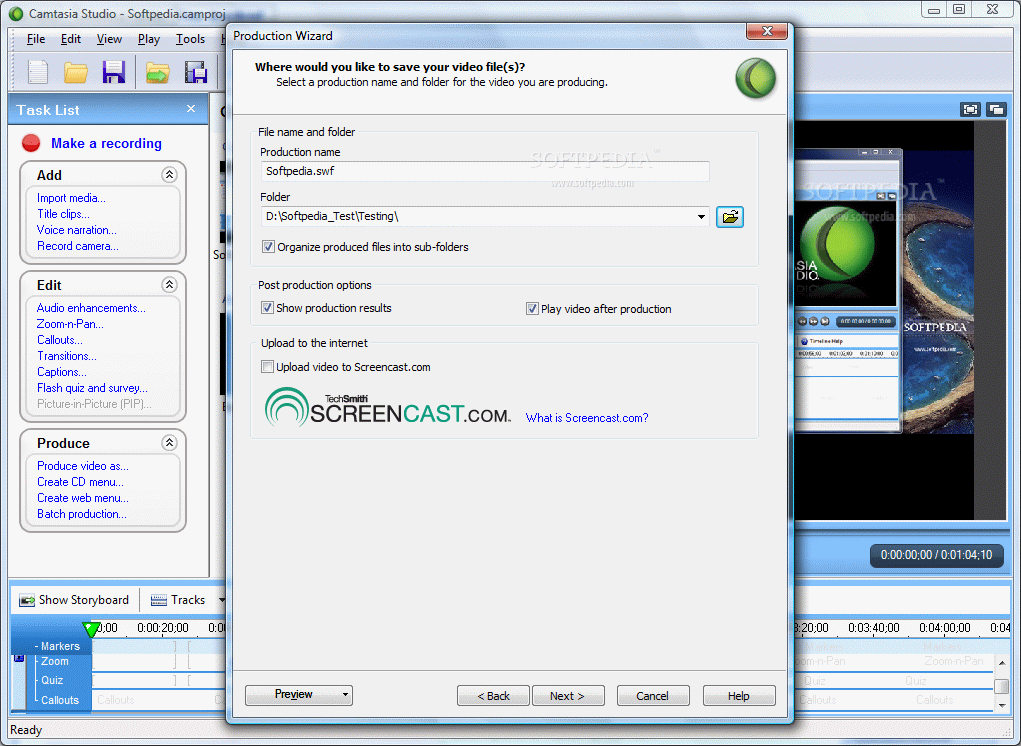
If you decide to distribute it via Web, the application will place all necessary files in a single folder making your work easier. Also, for those with Screencast account, Camtasia can upload the video to your account for everybody to see it. After video processing operation completes, the video will be played automatically (if the "Play video after production" option is enabled).
I recommend not to dump the project file right after production is complete, as there may be cases when you want to change a thing or two and ?project file? allows just that.
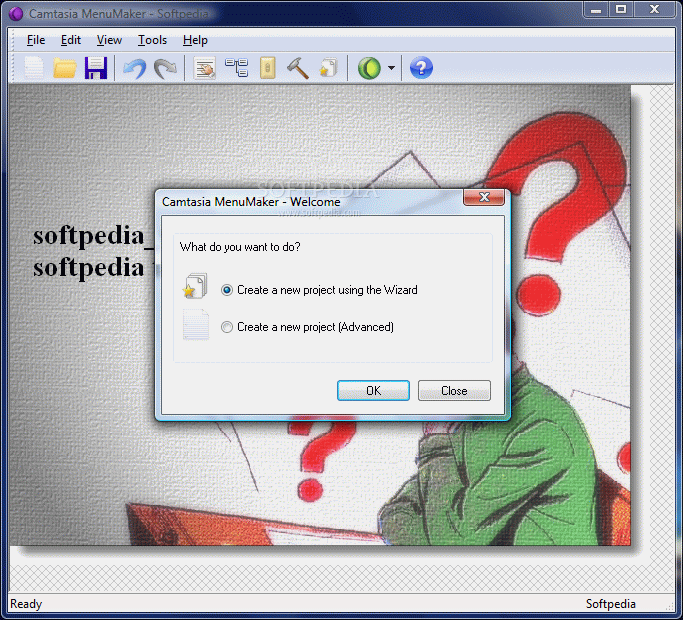
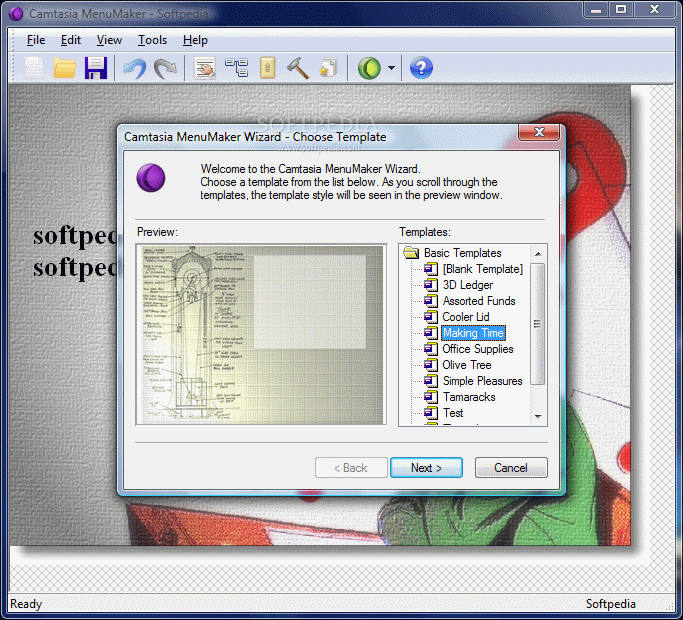
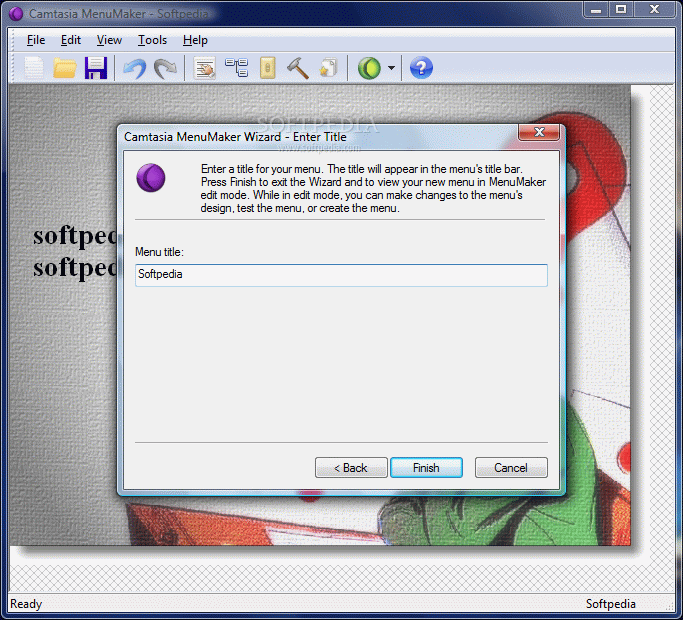
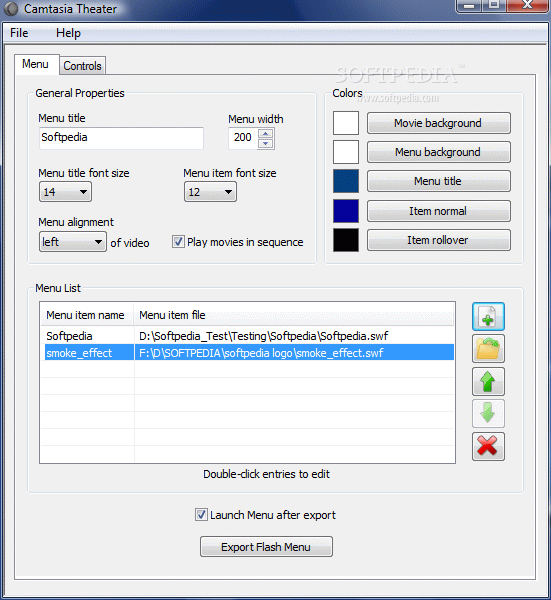
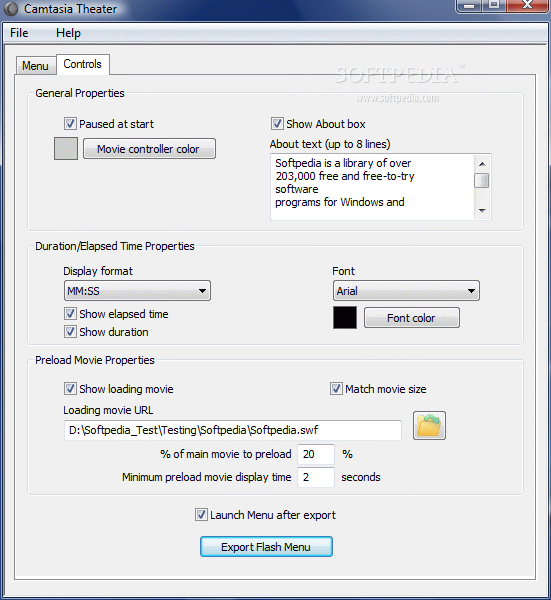
However, Produce menu in Task List brings additional options tailored to make your video as professional as possible. Thus you should try creating menus for the video, for both CD and Web. In both cases, the procedure is painless and simple as a wizard will guide you step by step through the process. Creating menus for your presentations will make launching the elements in the package (documents, images, multimedia files, videos, executables, etc.) a snap. It is a perfect way to distribute your videos to customers, students, employees, workgroups etc.
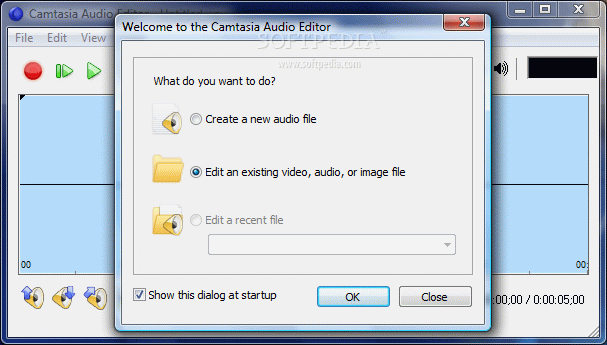
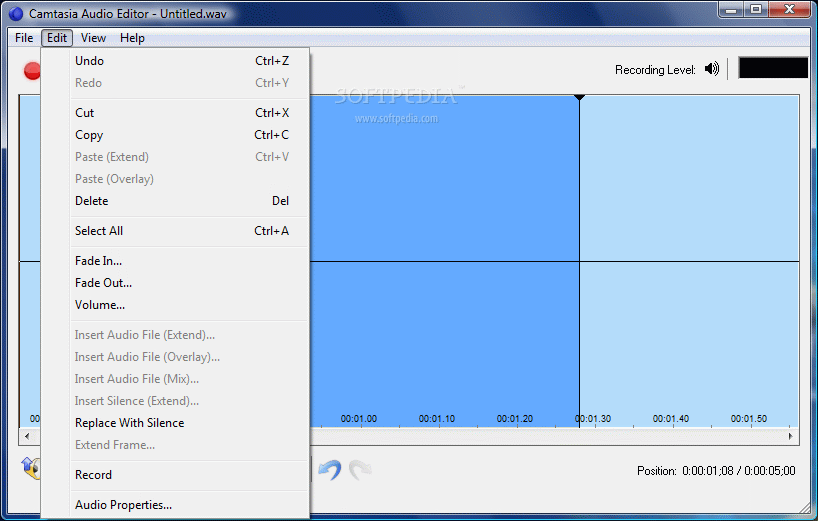
Besides all aforementioned settings, Camtasia Studio brings a set of additional applications designed to improve the Camtasia experience. Thus you benefit from an Audio Editor (provides a minimum of options). Menu Maker, Recorder, Camptasia Theater and Camtasia Player. Some of them have correspondents inside the main application (Camtasia Recorder, MenuMaker and Audio Editor) while others can be used separately (Theater and Player).
So, for $299, you will get an easy way to create video tutorials for Web or CD, iPod or just for saving on the disk. The ease of use is really something (complete Help file, tips at each step you take, plus online tutorials showing you exactly how a certain job is done) and the options for optimizing video view and their customization is amazing. However, there are minor details that need to be taken care of like extending the support for multimedia formats.
The Good
The interface is nice and clear, all the options are neatly arranged on visible sections. You benefit from assistance every step of the way.
Camtasia Studio provides the necessary means for creating professionally edited video tutorials that can be customized and modified with the least effort from the user.
You have maximum flexibility in adding media to your video and my favorites are callouts that support all sorts of editing and can be transformed into flash hotspots.
The video can be easily split into chapters and add transitions between them in order to make delimitations in the presentation.
SmartFocus and Zoom-n-Pan options are truly amazing as they allow shifting the focus to a certain part of the video and then return to previous view.
The Bad
I hate to say this, but there are minor problems to be reported. Ctr+Keyboard Arrows do not help you navigate back and forth through text strings in both Quiz and Captions options.
It is true that the application supports the most popular multimedia formats, but I wish there was a wider palette in what concerns media importing.
During our testing, embedding a watermarked WMV Video into HTML caused the resulting file to have a double watermark applied.
The Truth
Great app at a spicy price. But, if you are looking for quality in your presentations you've hit jackpot. Camtasia Studio is all about making you look good through your presentations as they have that professional look we're all going for.
If you skip the minor baddies in the software, and I am sure you will, you've got yourself a helluva software to distribute your videos with. Quality is at home in Camtasia and the output results are marvelous.
Here are some snapshots of the application in action: