 14 DAY TRIAL //
 "What's the best RAW application?" This question alone is the starting point for aggressive topics on photography forums where supporters of certain software throw smut at each other over the issue. In fact, the answer is quite simple: "All and none". It all depends on what you're shooting, how much post-processing you're doing and how much time you are willing to spend waiting for the app to get the job done. This is exactly what I'll try to achieve in this review, so don't be expecting any "Oh my God, what a spectacular and outstanding software this is, I can't believe I haven?t tried it earlier, I was such an ignorant for not doing so"-type of conclusions.
Some facts about the software
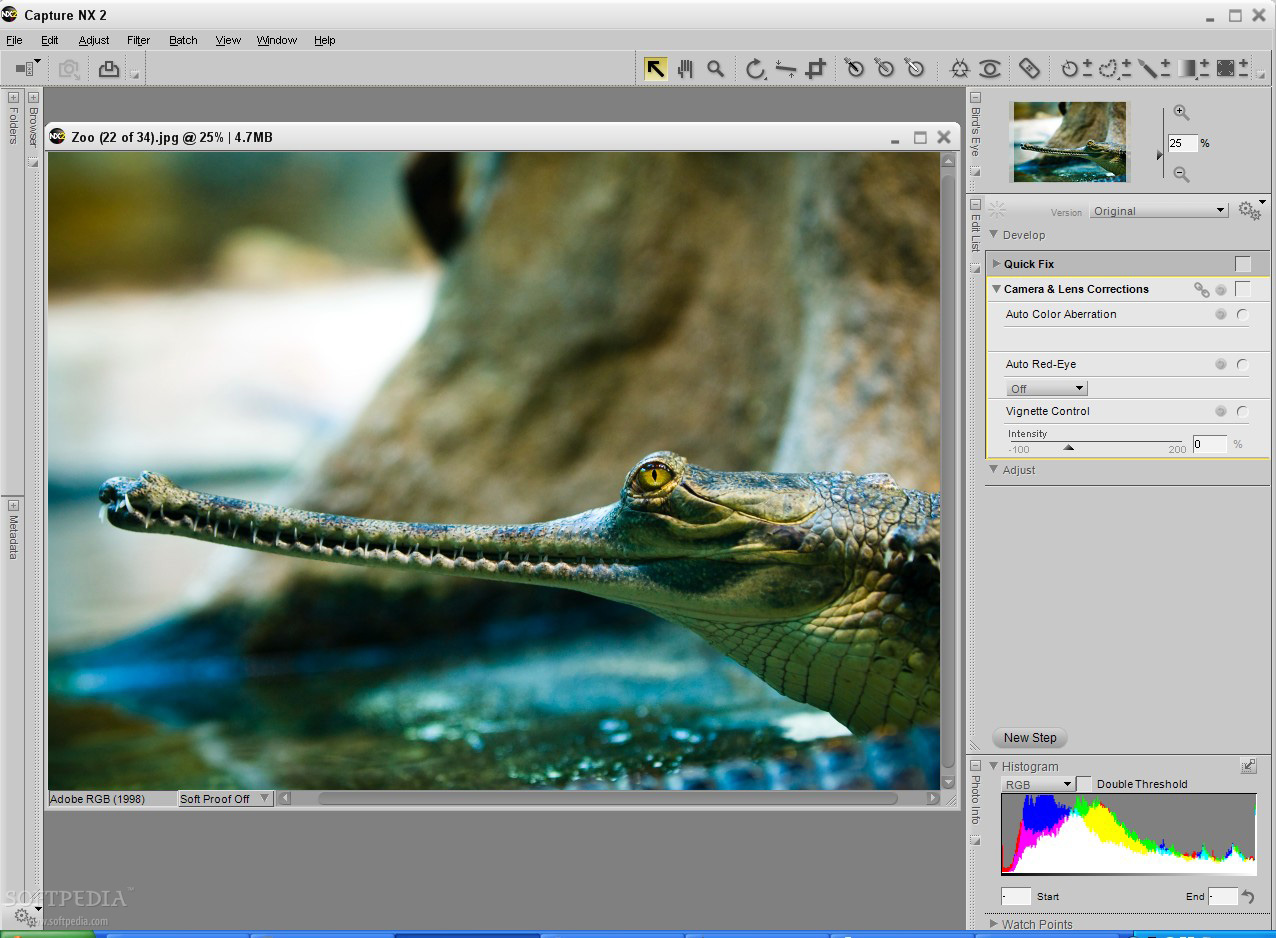
Announced on June 3, 2008, Capture NX 2 improves on the existing NX solution, and aims at convincing Nikon photographers that it's the best application for their files, both RAW and JPEG. Some of the advertised new features include selection control points that can be used to manually outline or mask an area, an auto-retouch brush to remove blemishes, dust bunnies or other "impurities," and a Shadow/Highlight adjustment that can open up shadows or recover blown-out highlights.
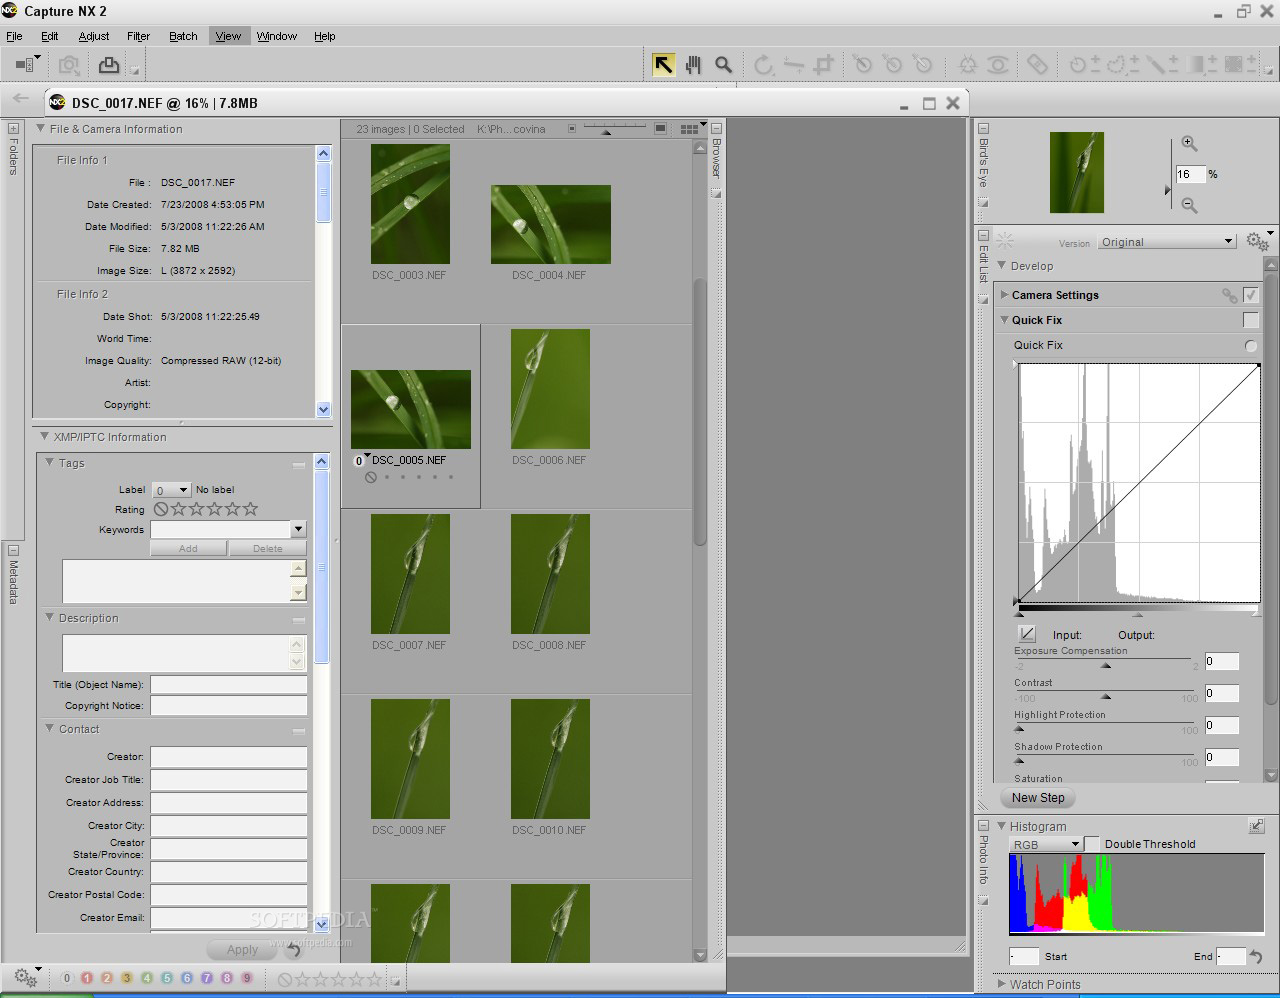
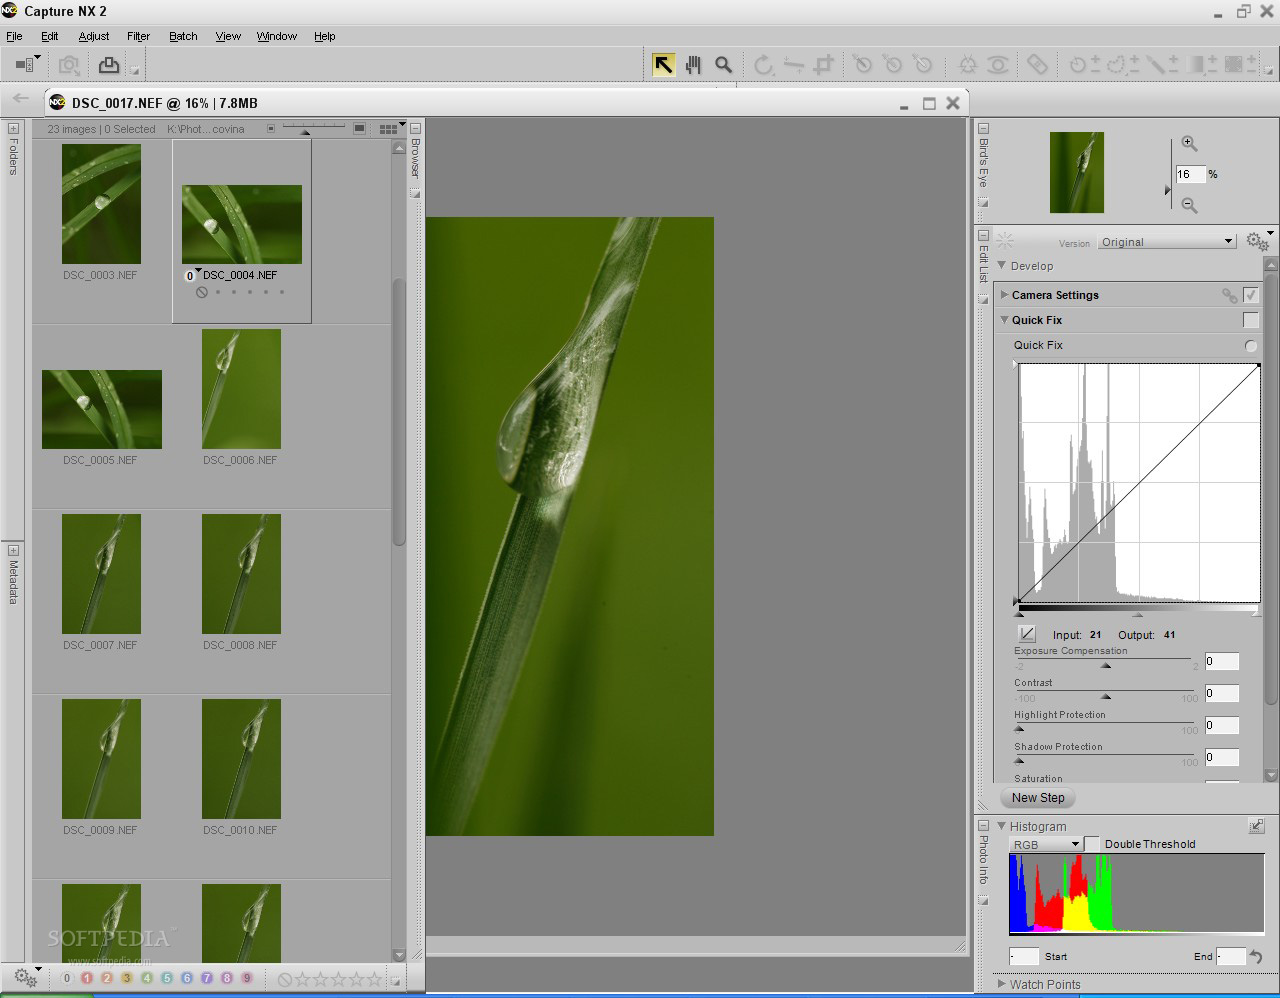
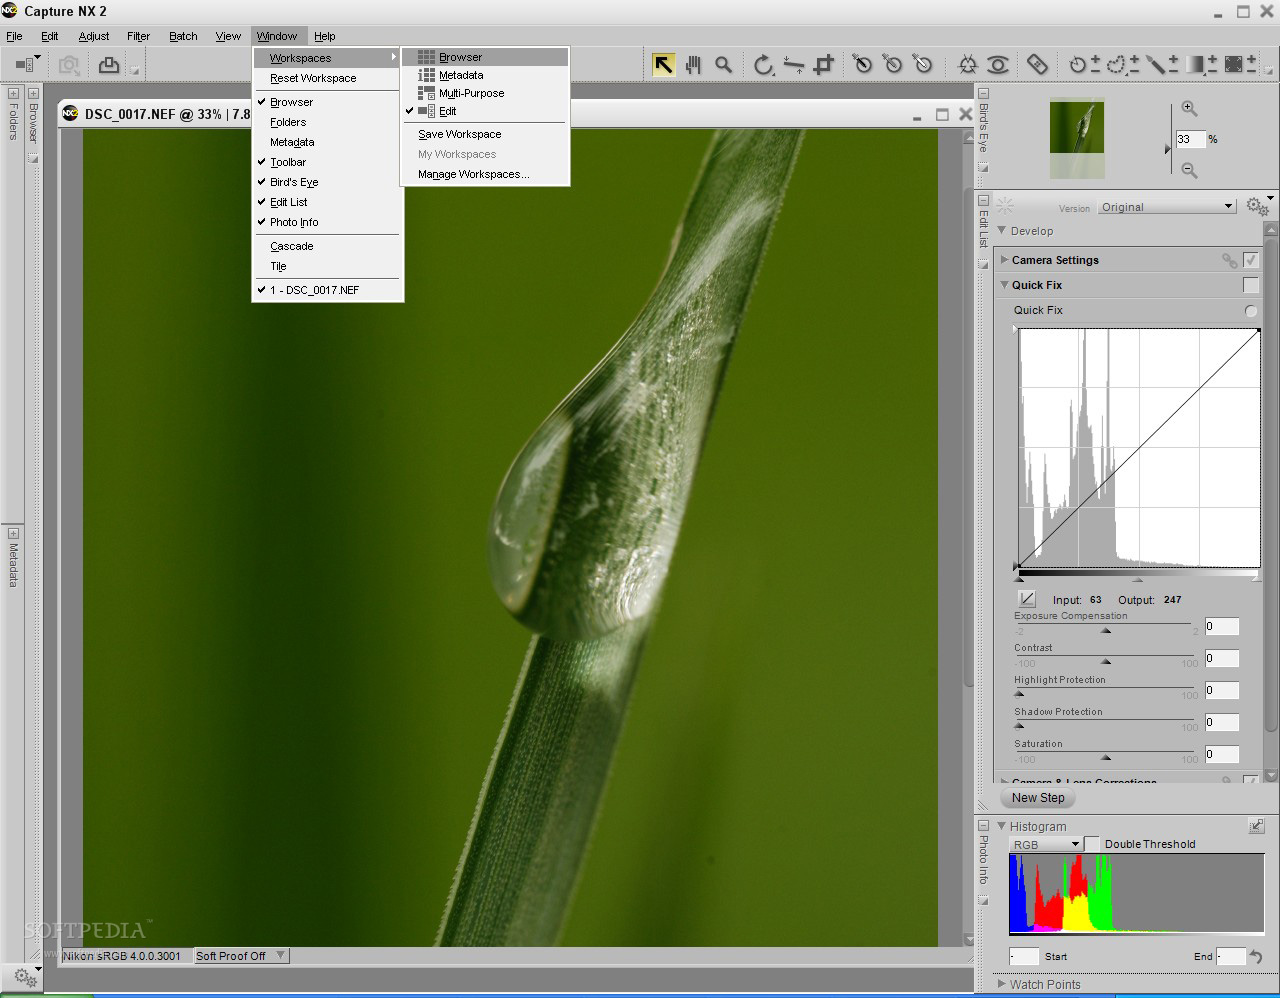
Apart from the new features, Capture NX 2 also boasts an improved interface with a higher degree of customization compared with the previous version of the application. You can now choose between four different workspaces or you can save one of your own, custom window arrangements.
If you are new to the whole digital imaging industry, you might not know that Capture NX can only work with the proprietary NEF files produced by Nikon cameras, albeit it can process JPGs rendered by all camera models, regardless of manufacturer. The app is famous for its color points that allow for selective alteration of an image without having to perform complex gradient selections or other Photoshop tricks.
Ok, formalities out of the way, let's take a closer and objective look at what Capture NX 2 has to offer.
The Interface and Tools
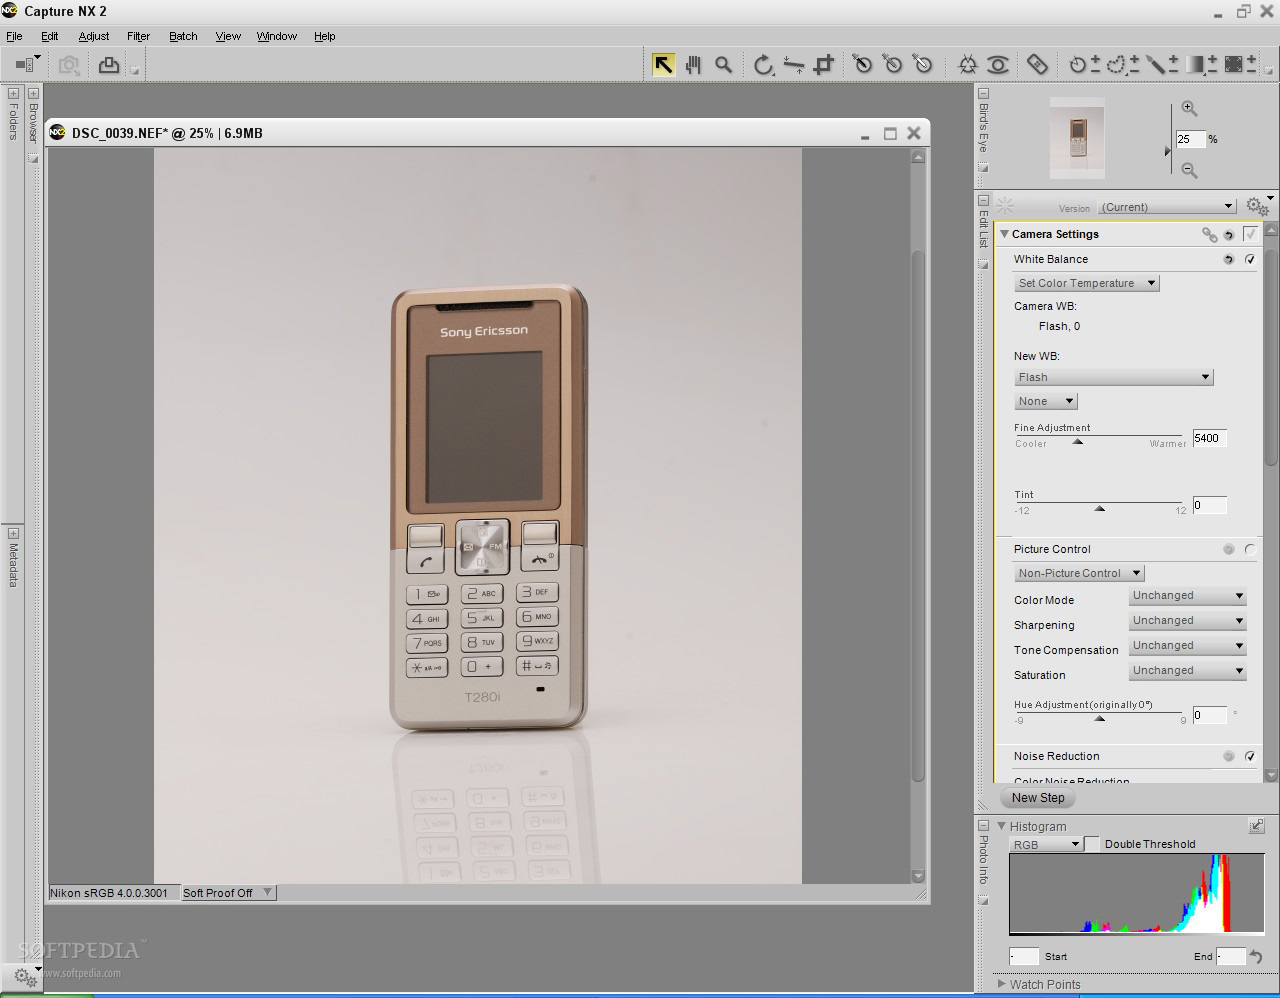
While there's a clear resemblance to the first Capture NX, the new version has been improved to the point it actually feels more professional. The ability to create custom workspaces is godsend and an important feature if Capture NX 2 wants to make Nikon users switch from applications like Lightroom, Aperture, Silkypix Developer Studio, Capture One and the likes. However, there's room for improvement. As with the Capture NX, while I was able to undock the windows from their default location and move them around as I saw fit, I found it impossible to dock them to their new location. All the palettes (toolbar, edit list and so on) have a docking/undocking button, albeit by pressing it they will only be docked to their default location. Workspace customization would have been quite stellar if this tiny detail had been taken care of.


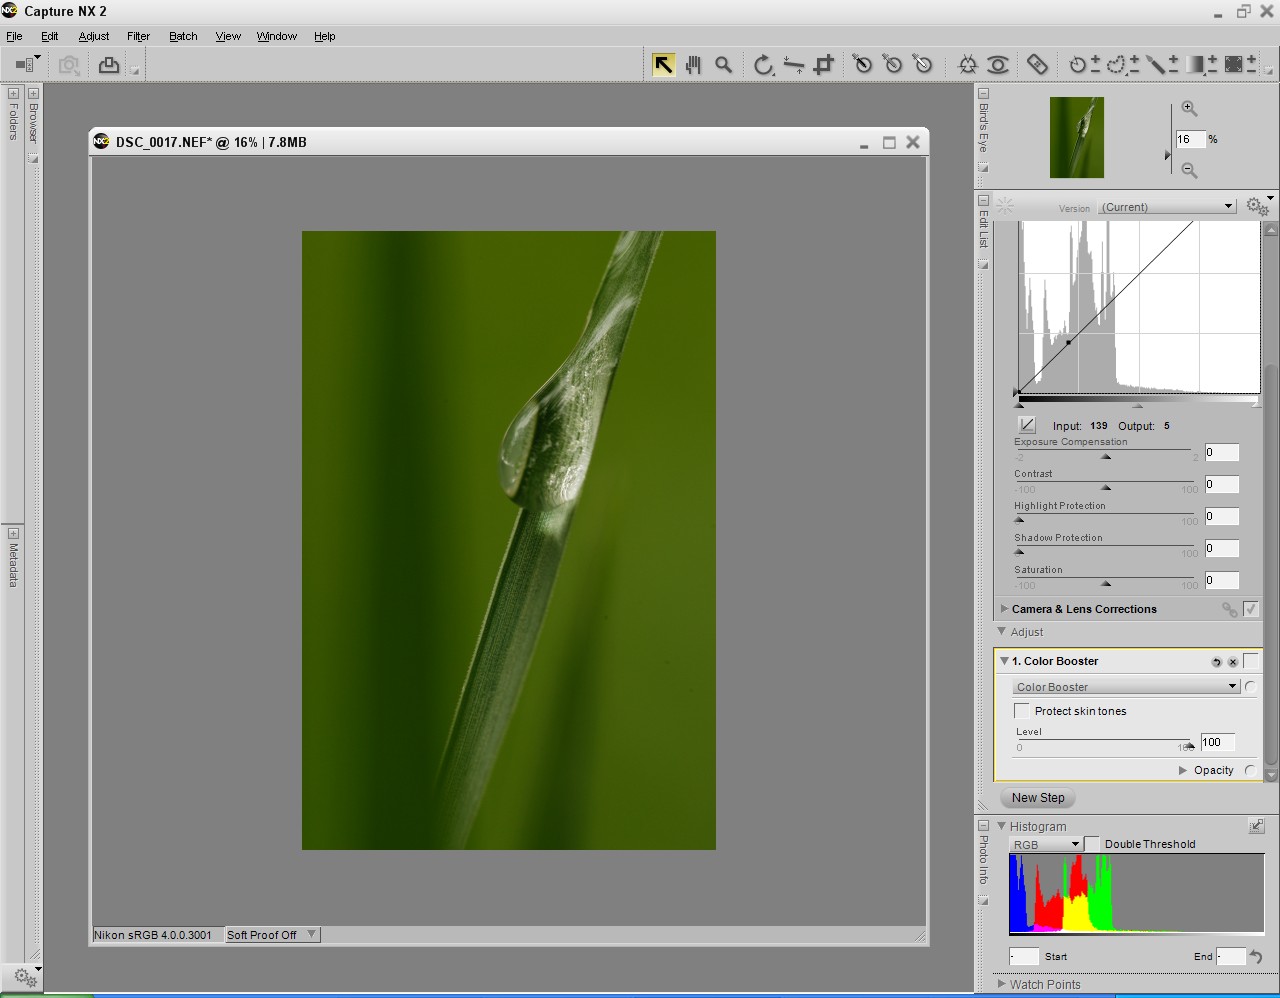
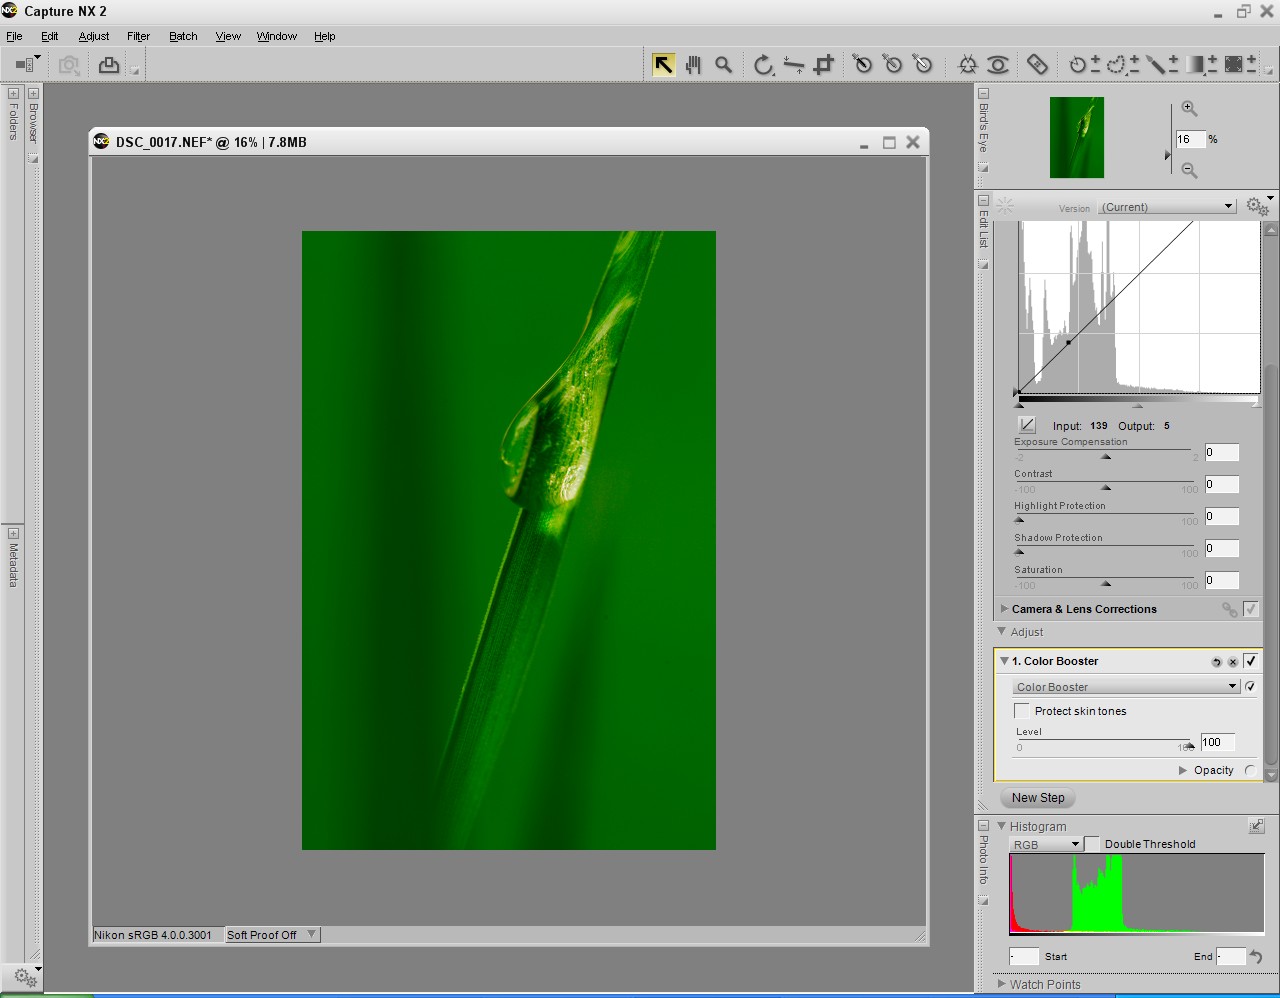
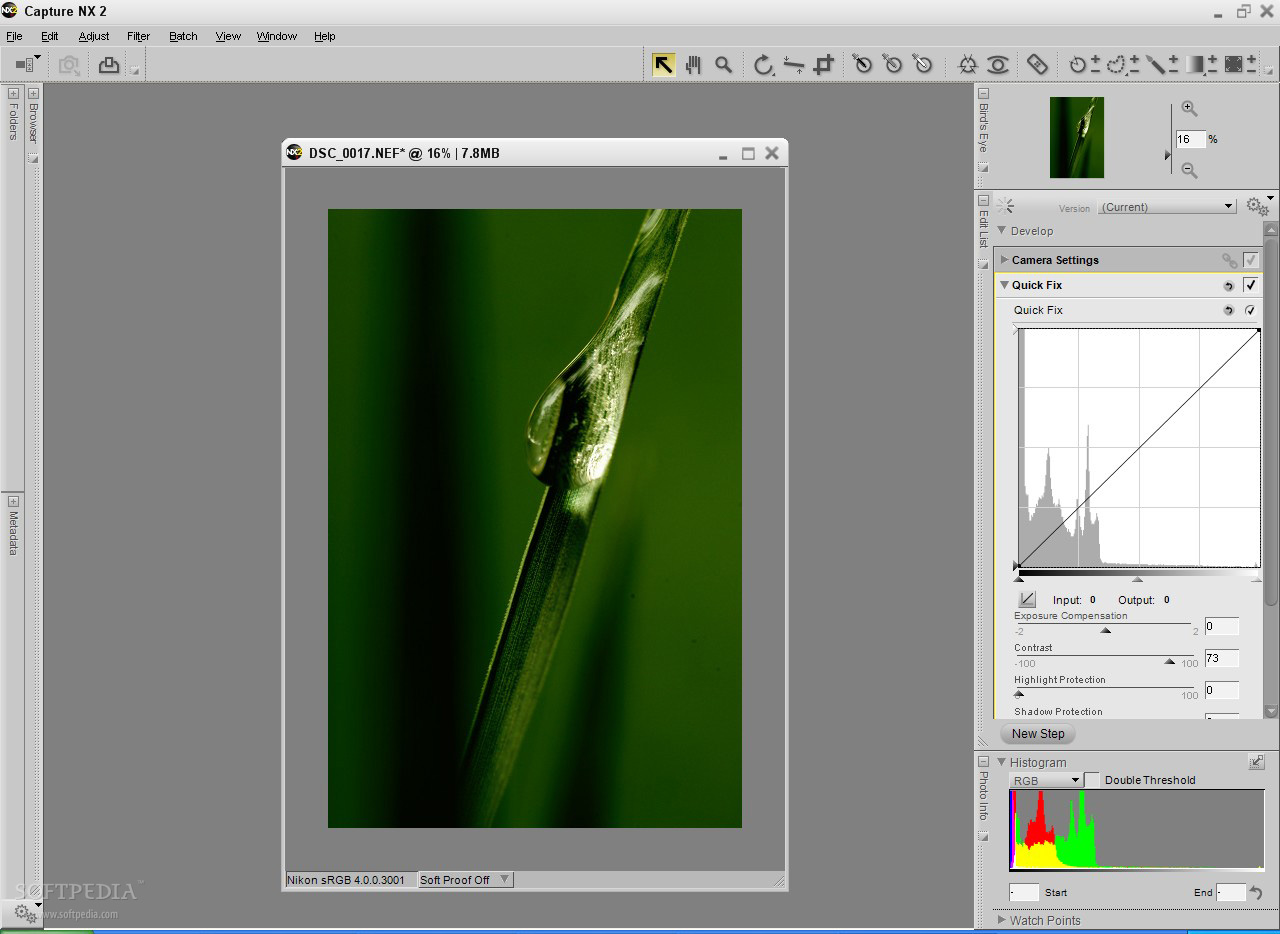
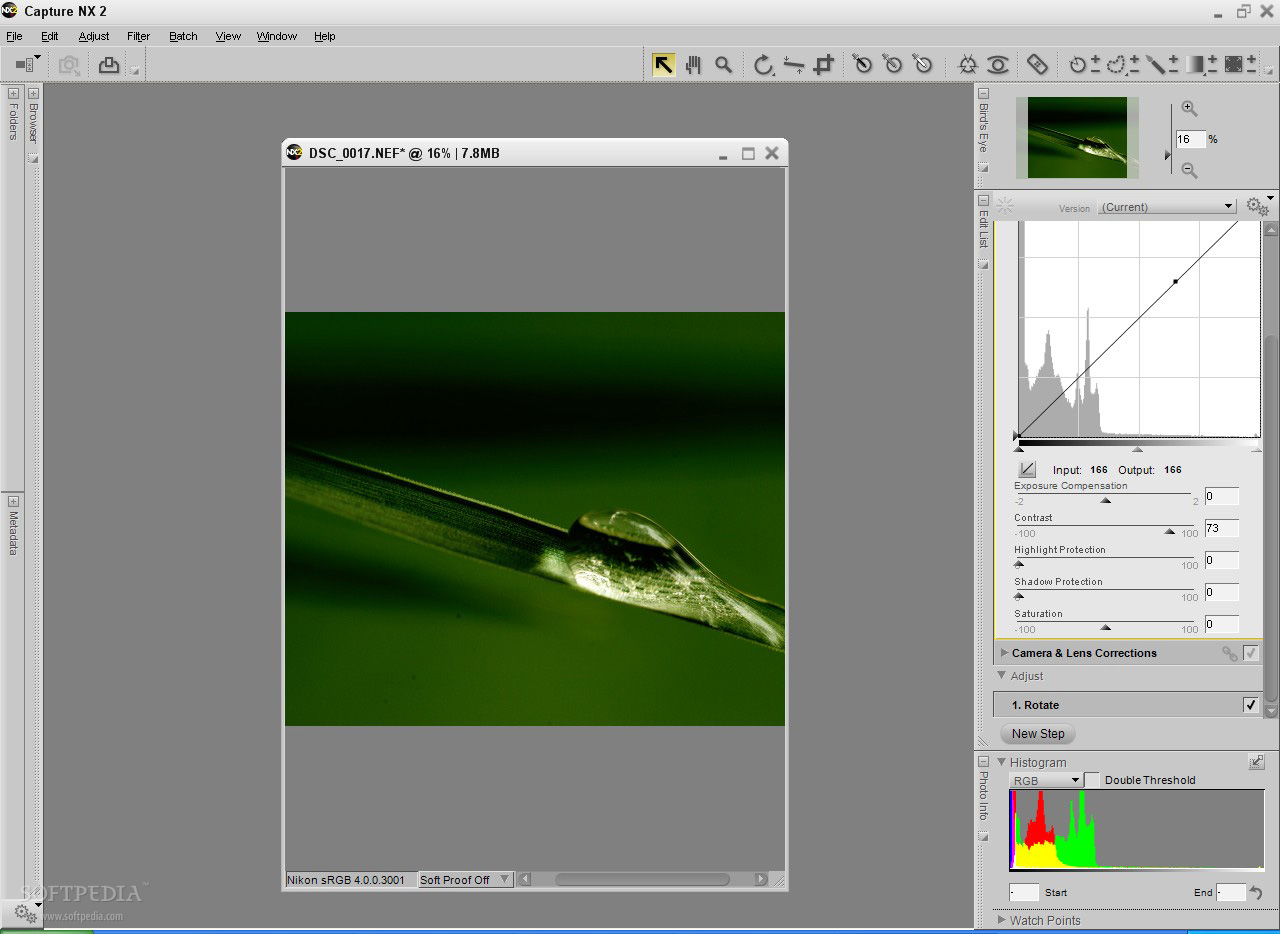
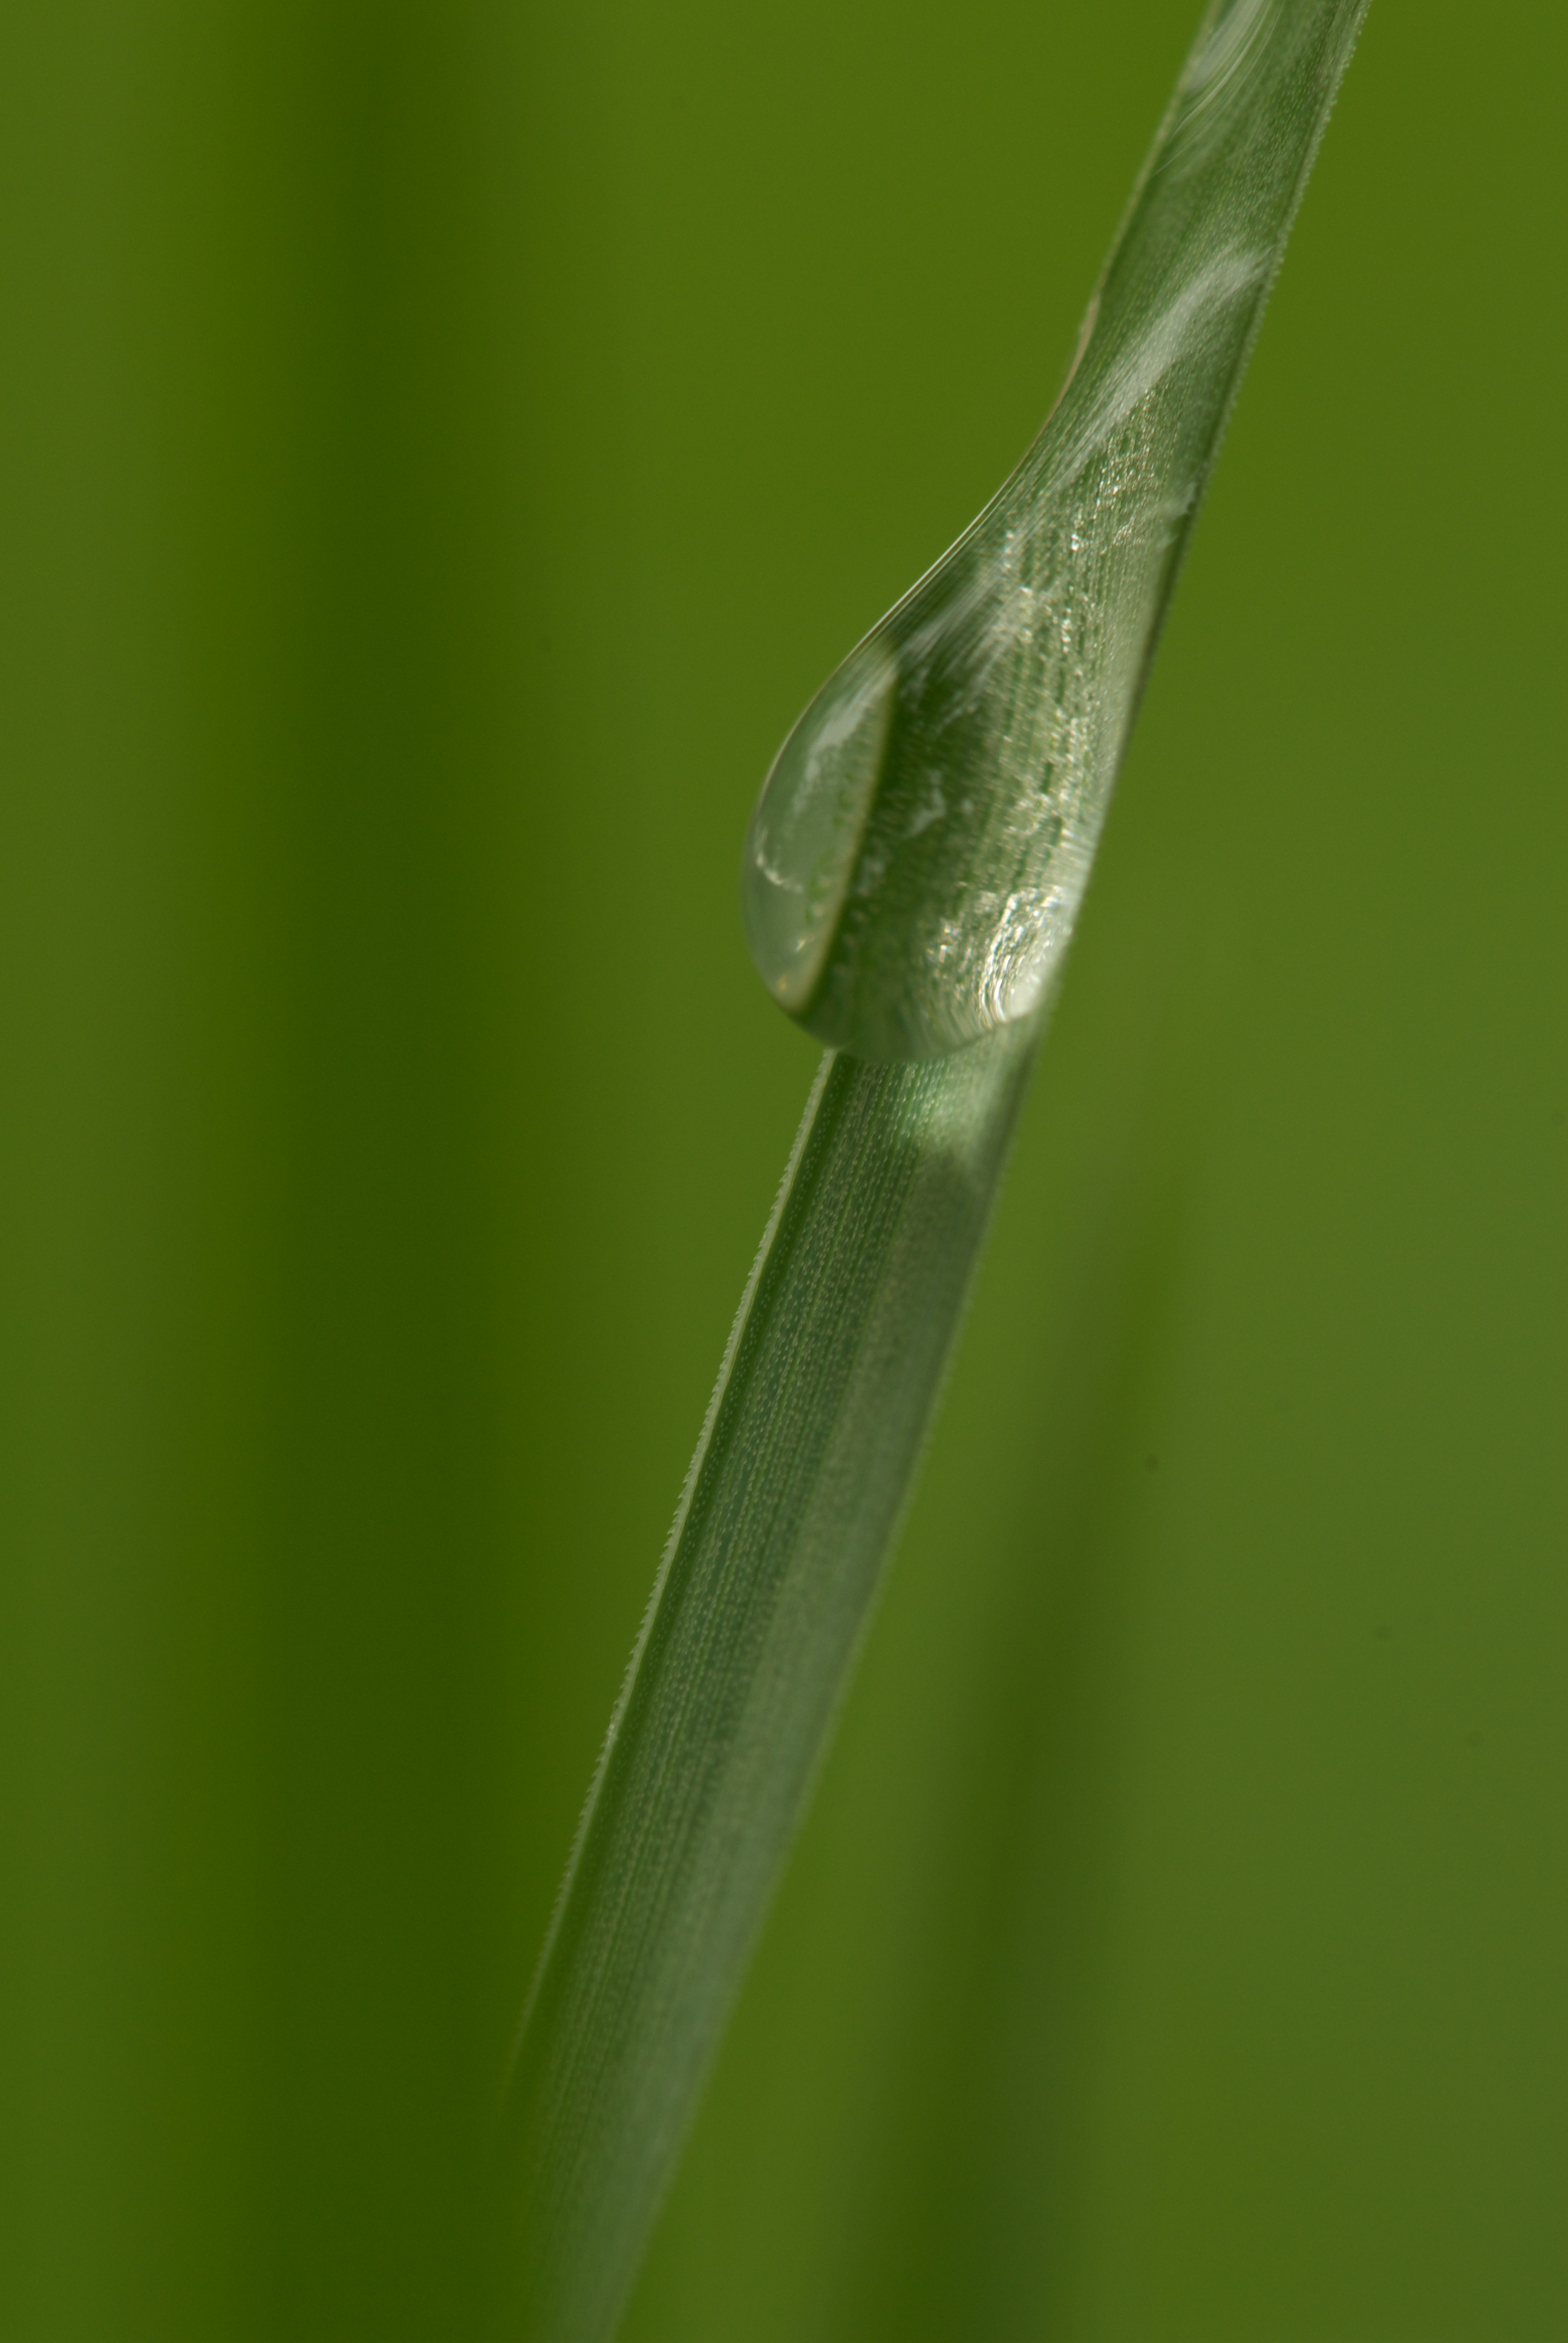
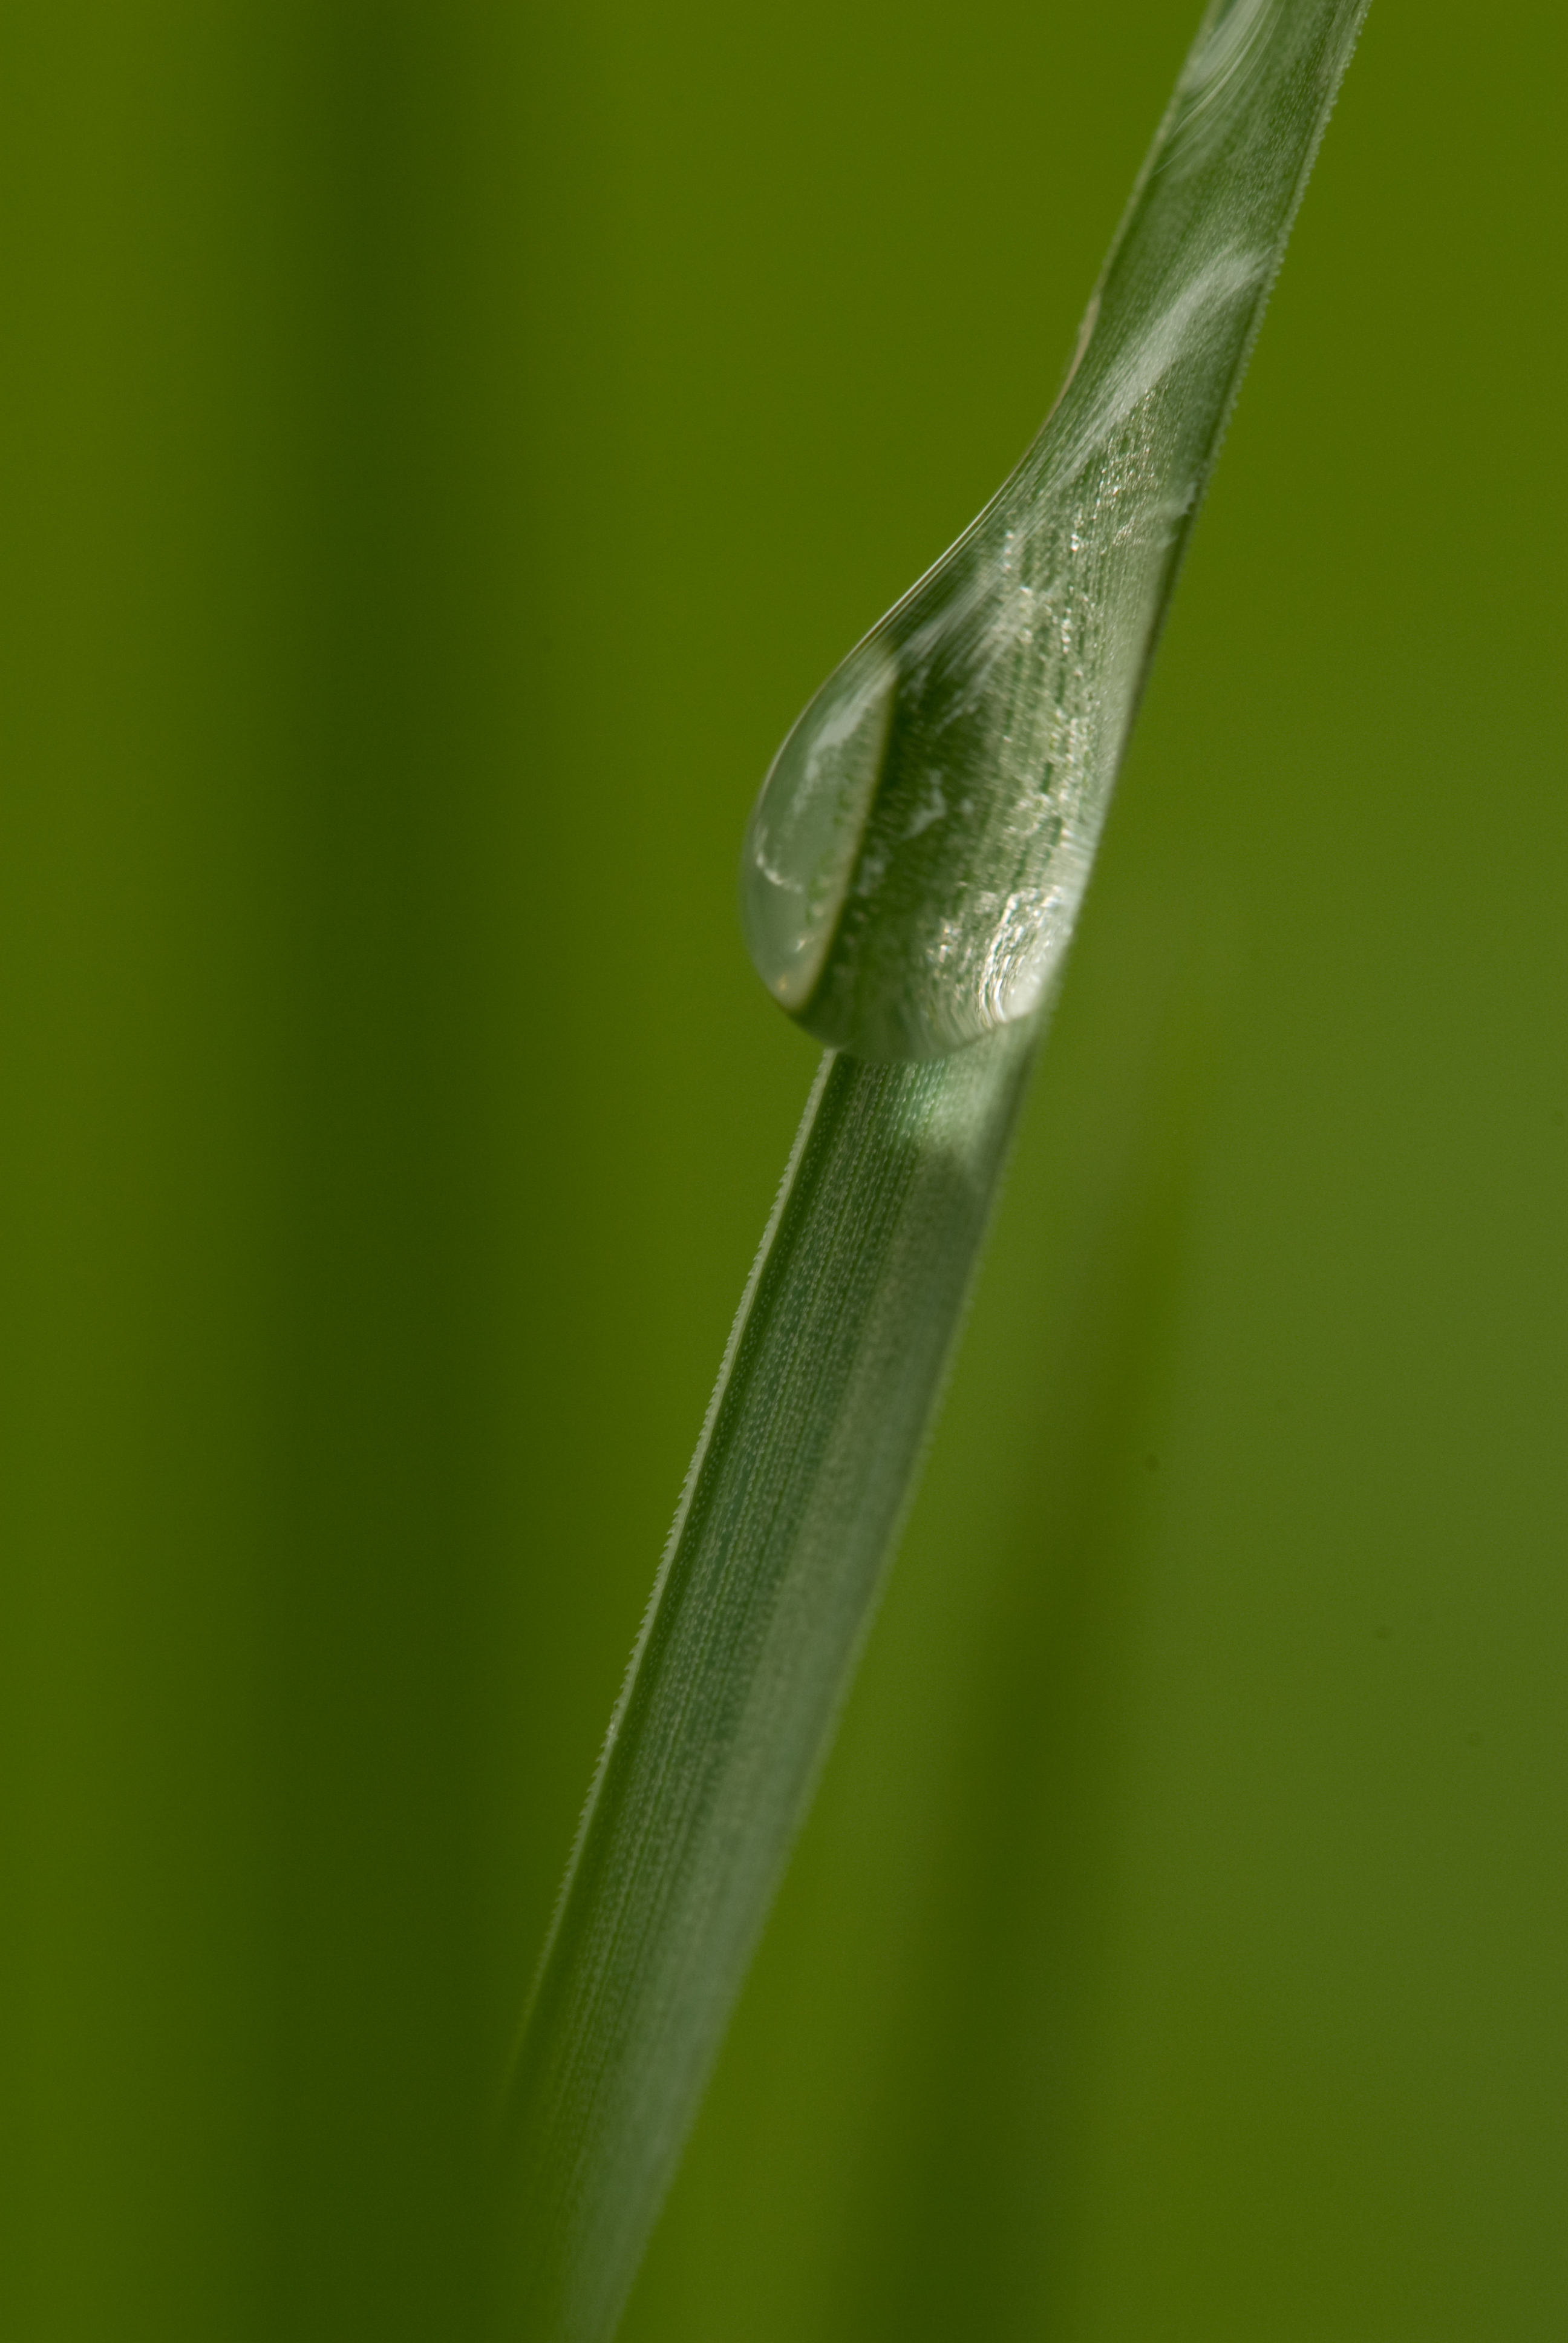
One of the biggest novelties in Capture NX 2 is the selection control point, which works similarly to a color control point, but serves a different purpose. Simply put, with a selection control point you tell the application the areas in an image you want to be affected by a certain adjustment. I've taken some screenshots to show you how this works. For the sake of demonstration, you can see I've applied a color booster adjustment that has saturated (although it looks a bit different than when using the actual saturation adjustment) the image a lot. Now, in the third screenshot, I've placed a "-" control point. The result is that the drop where I've placed the point and a bit of the surrounding area now has a mask protecting it from the adjustment. The "+" selection control point does exactly the opposite; it creates a inverted mask that protects the rest of the image so that only the area covered by the point is affected. Obviously, you can control just how much to feather the selection.
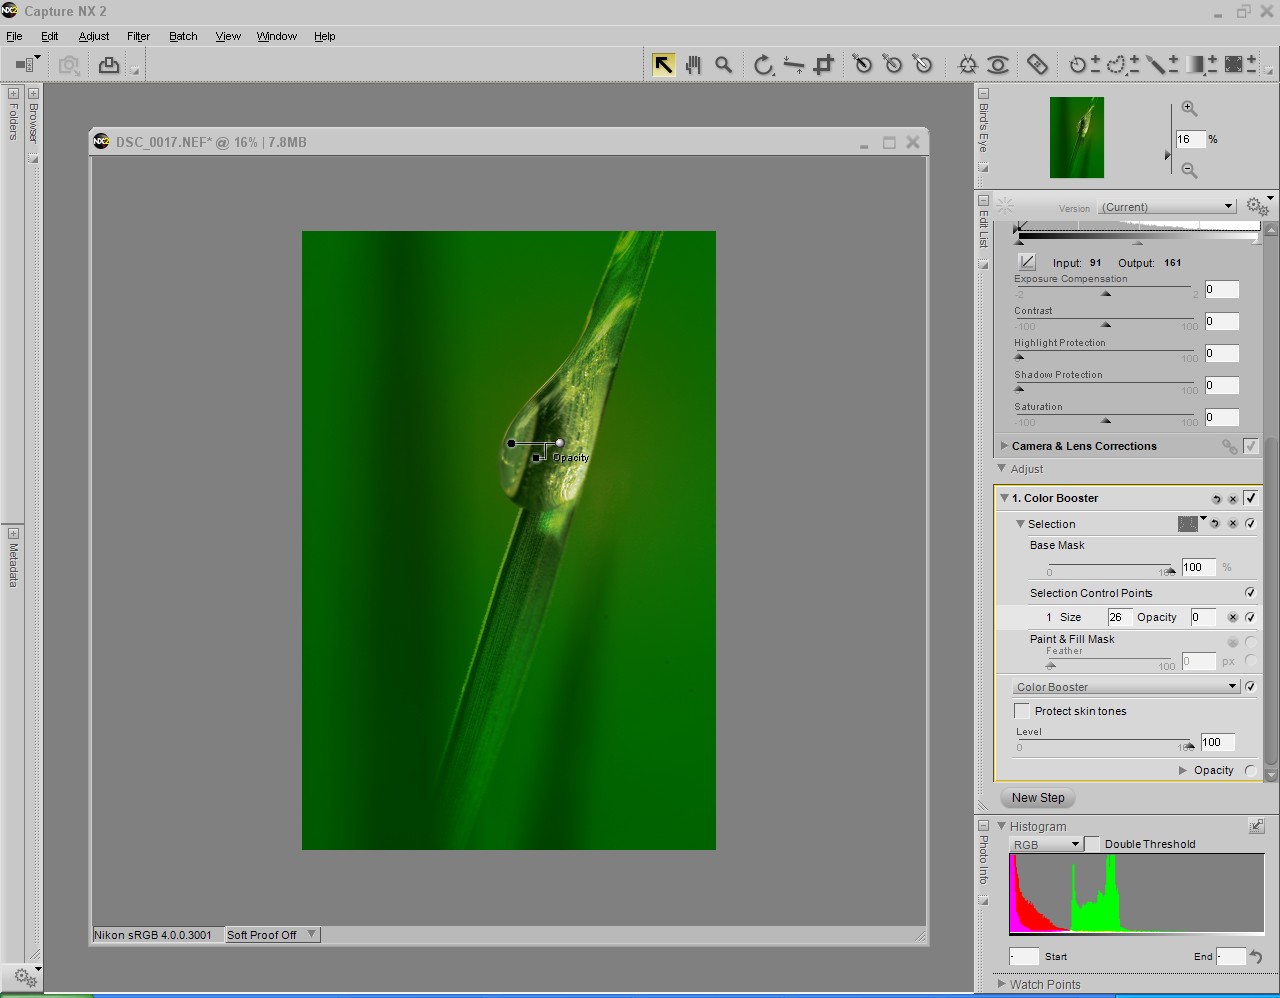
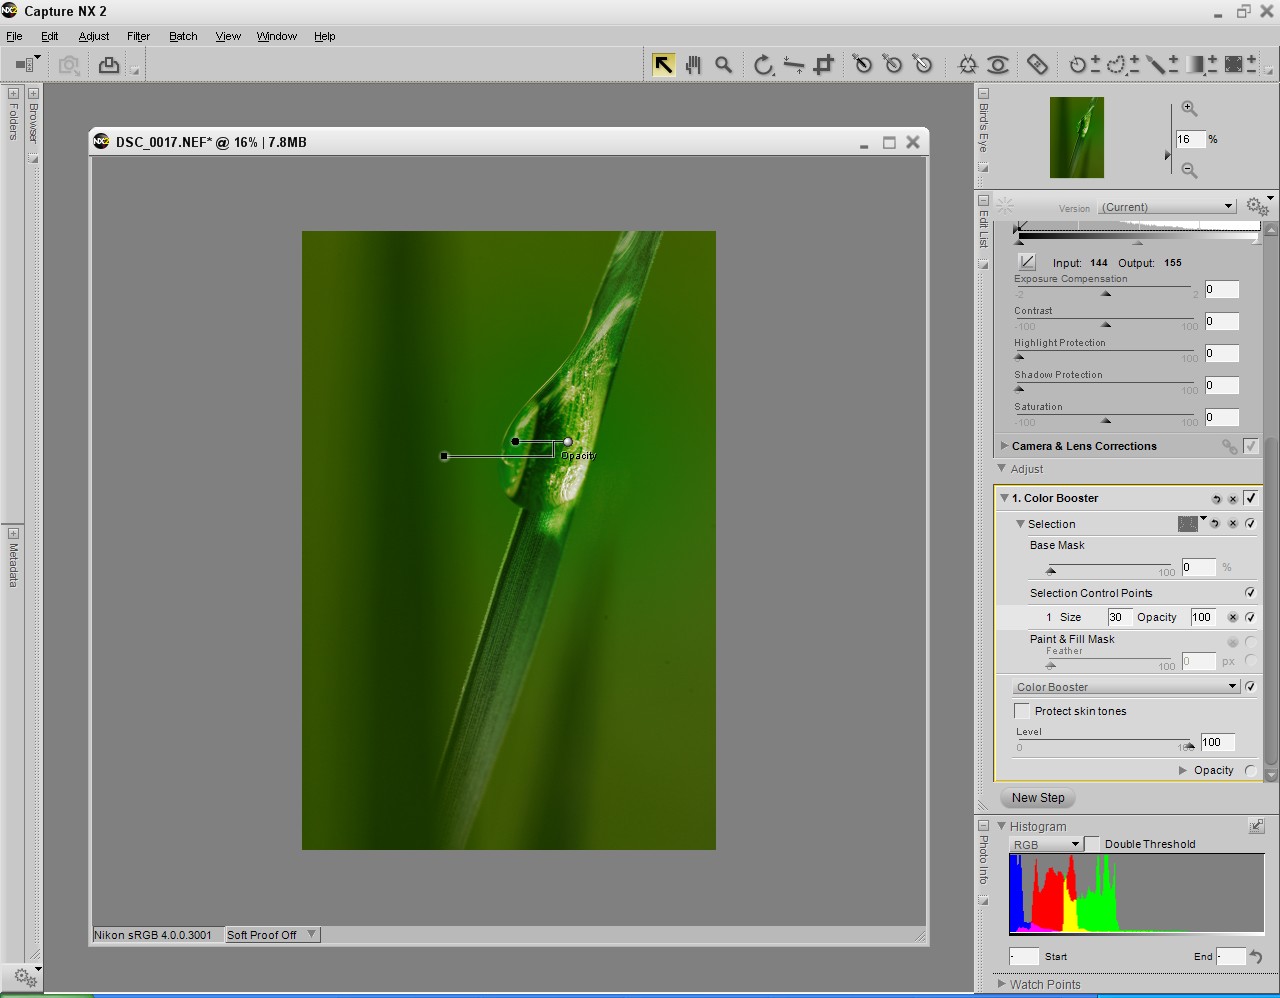
However, if you don?t feel comfortable with the new method of masking, you can always use the classic lasso, selection brush and selection gradient, also found in the previous version.
All in all, you have a huge amount of control over selections and, if you are not too hooked up on Photoshop, you might actually be able to do almost all the post-processing (including portrait retouching) in Capture NX 2. By the way, although I was a bit skeptical of the healing brush, which works like the Photoshop healing brush, it turned out to do a pretty decent job at removing dust bunnies or face imperfections.
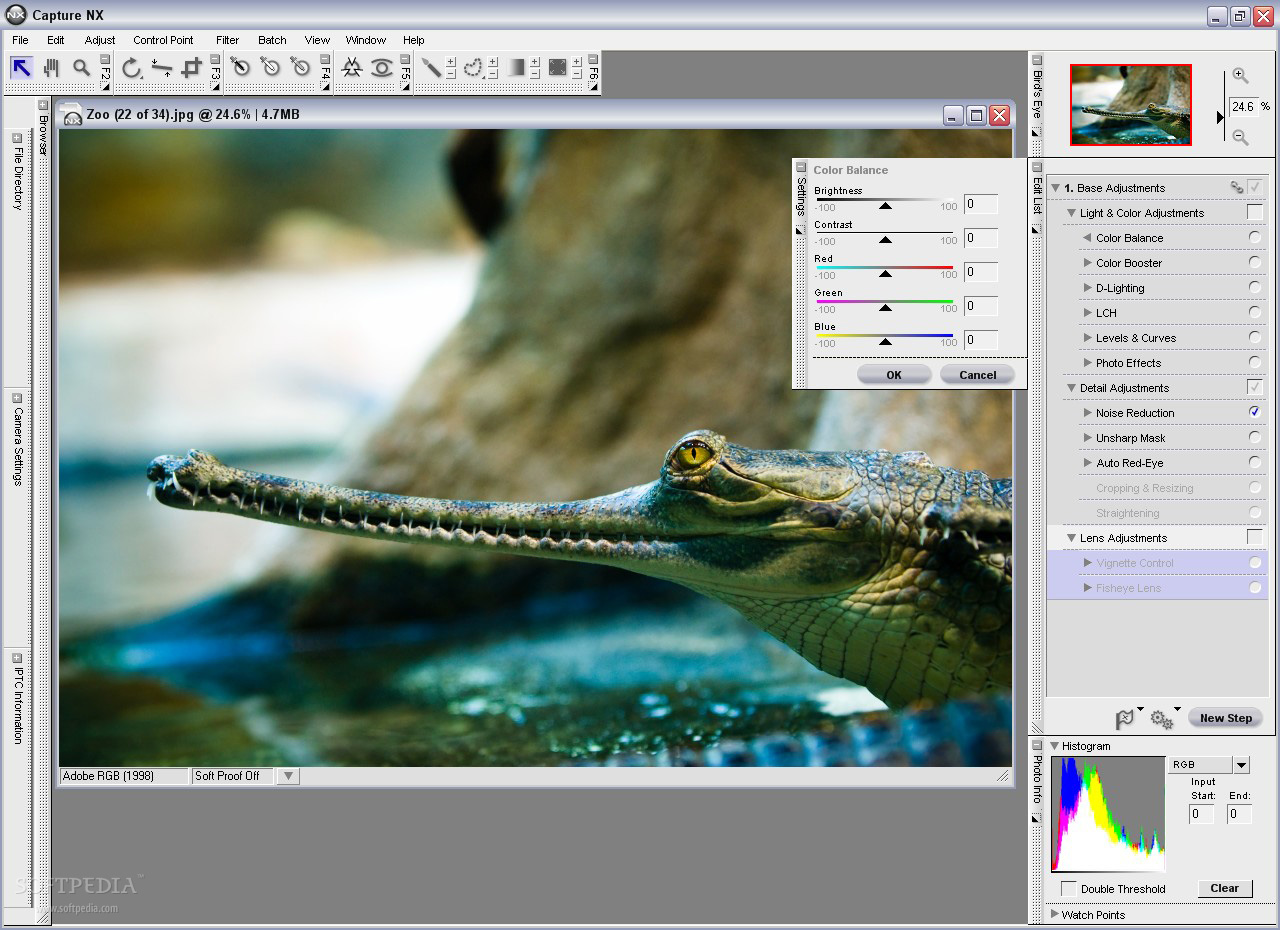
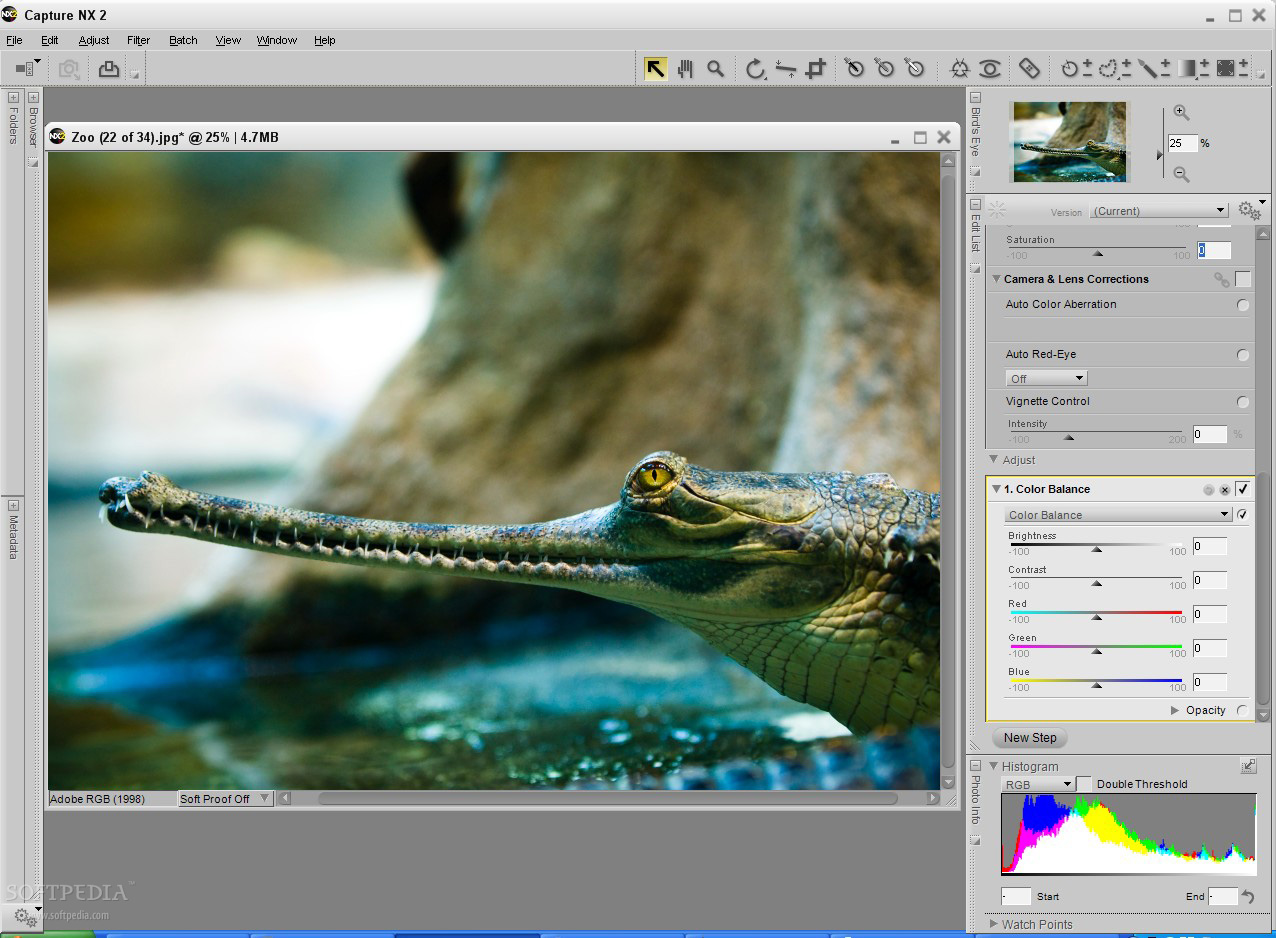
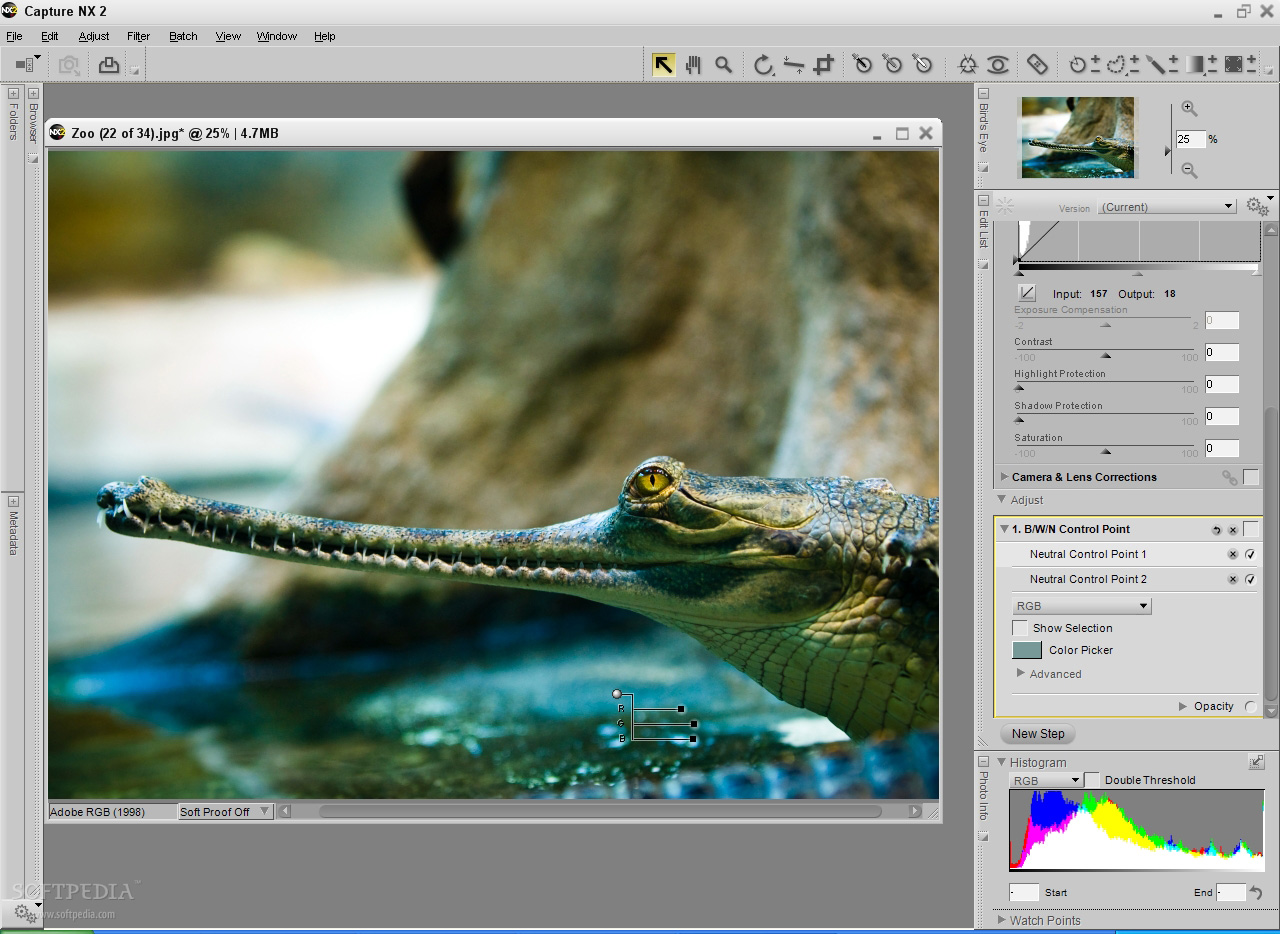
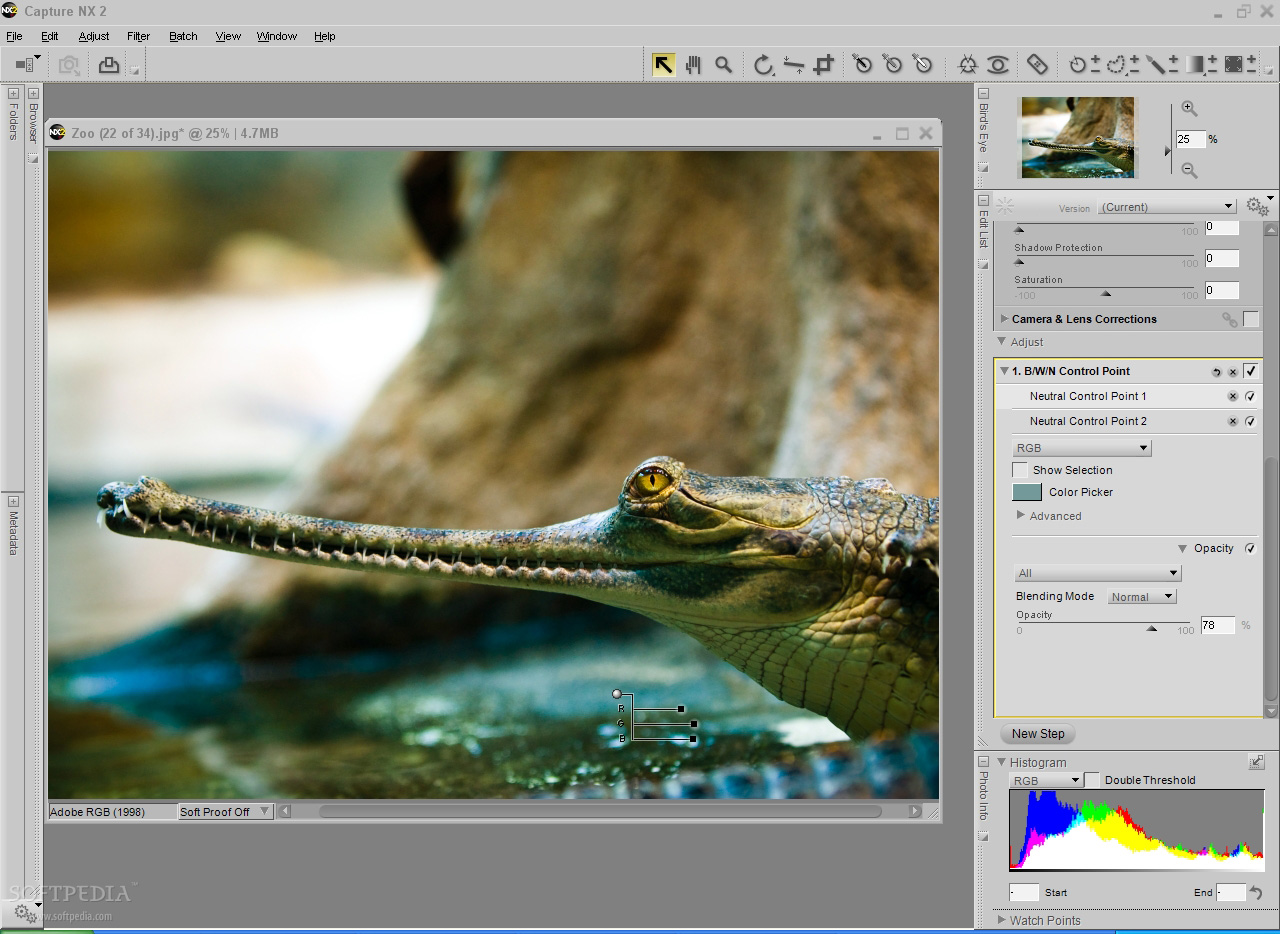
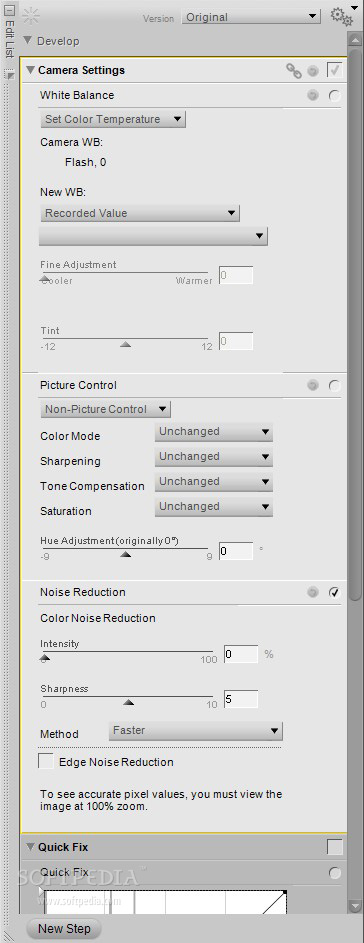
Present in both Capture NX versions, but a pleasure to use, are the black, neutral and white control points. The black and white ones will help you to define the ends of your dynamic range and make some color corrections for the printing process. The neutral one will make things a lot easier when you?re dealing with color casts and troublesome white balance. I?ve taken some screenshots, which you can check out below, to see the effect of two neutral points in action.
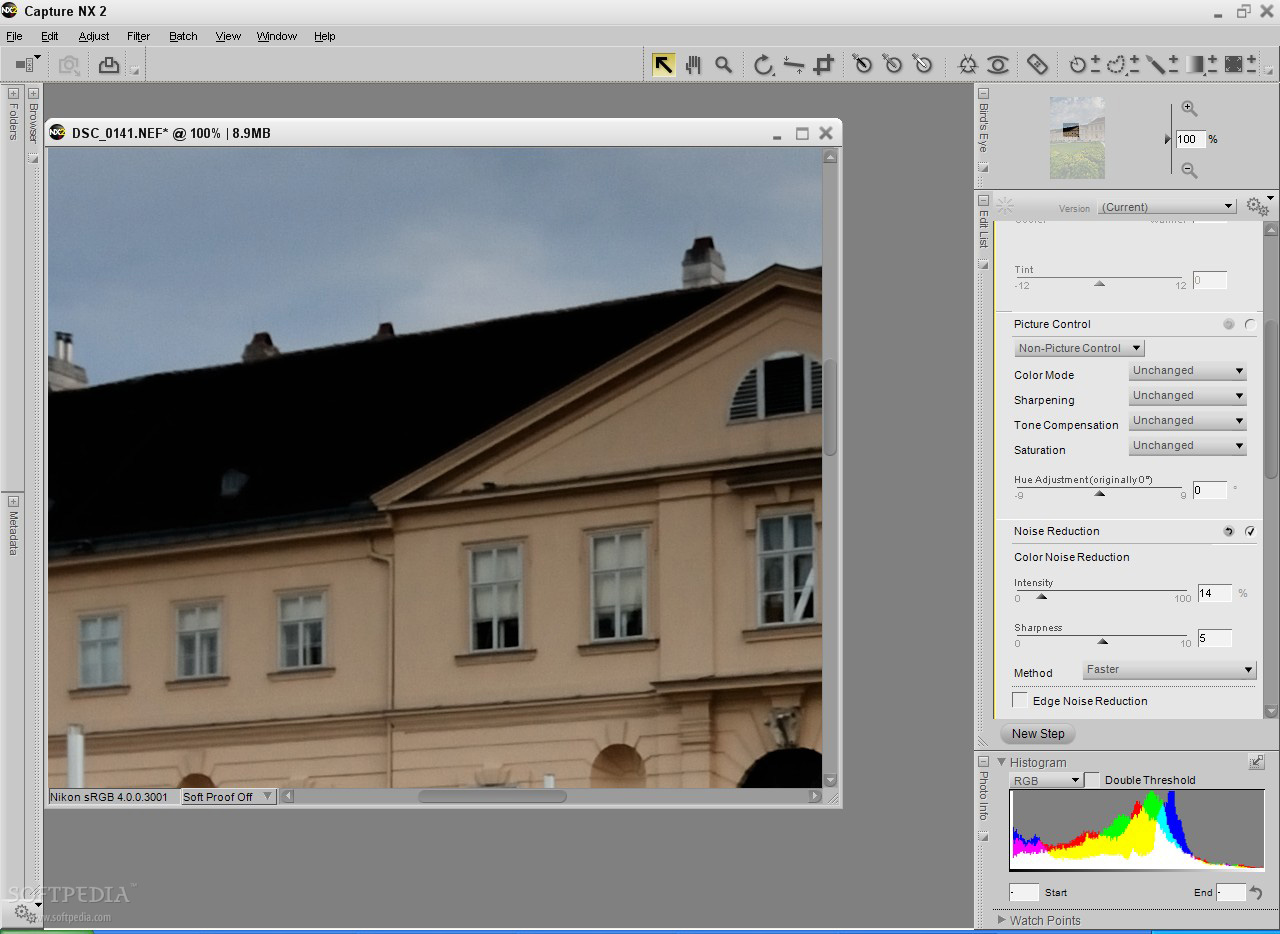
But enough with the praises, as not all is that jolly. First of all, there?s the noise reduction adjustment which is, in my opinion, the application?s worst component. While most converters have complex settings that allow for delicate noise reduction operations, Capture NX 2 has only one slider, called "Intensity." Yes, you have some sort of threshold in the form of the sharpness slider and an edge noise reduction option, but it?s not enough to fine tune the dreaded noise reduction. I find this quite strange as Nikon DSLR models, not including here the D300, D3 and the recently released D700, have a poor performance when it comes to signal to noise ratios. Let?s just say my D200 is not particularly pleased in this department.
Back to Capture NX 2, another gripe of mine, perhaps even more bothersome than the noise reduction is the strange way in which the application deals with several layers of adjustments, especially the ones involving crop and rotate. Take a look at these screenshots.

The last of my gripes is the rotation tool, which just like the noise reduction adjustment, lacks in versatility. You can only rotate by 90 degrees clockwise and counterclockwise and this can be quite limiting in some cases.
That's about it with the interface and tools; let's move on to the....
Image Quality
If image quality is top-notch, some photographers forget about everything else. It might have the crappiest interface and speed performance because, if their images benefit from extra sharpness, low noise levels and unique colors, they'll use it fanatically. Of course, in most cases, the differences are minute and only an expert eye can actually see them.
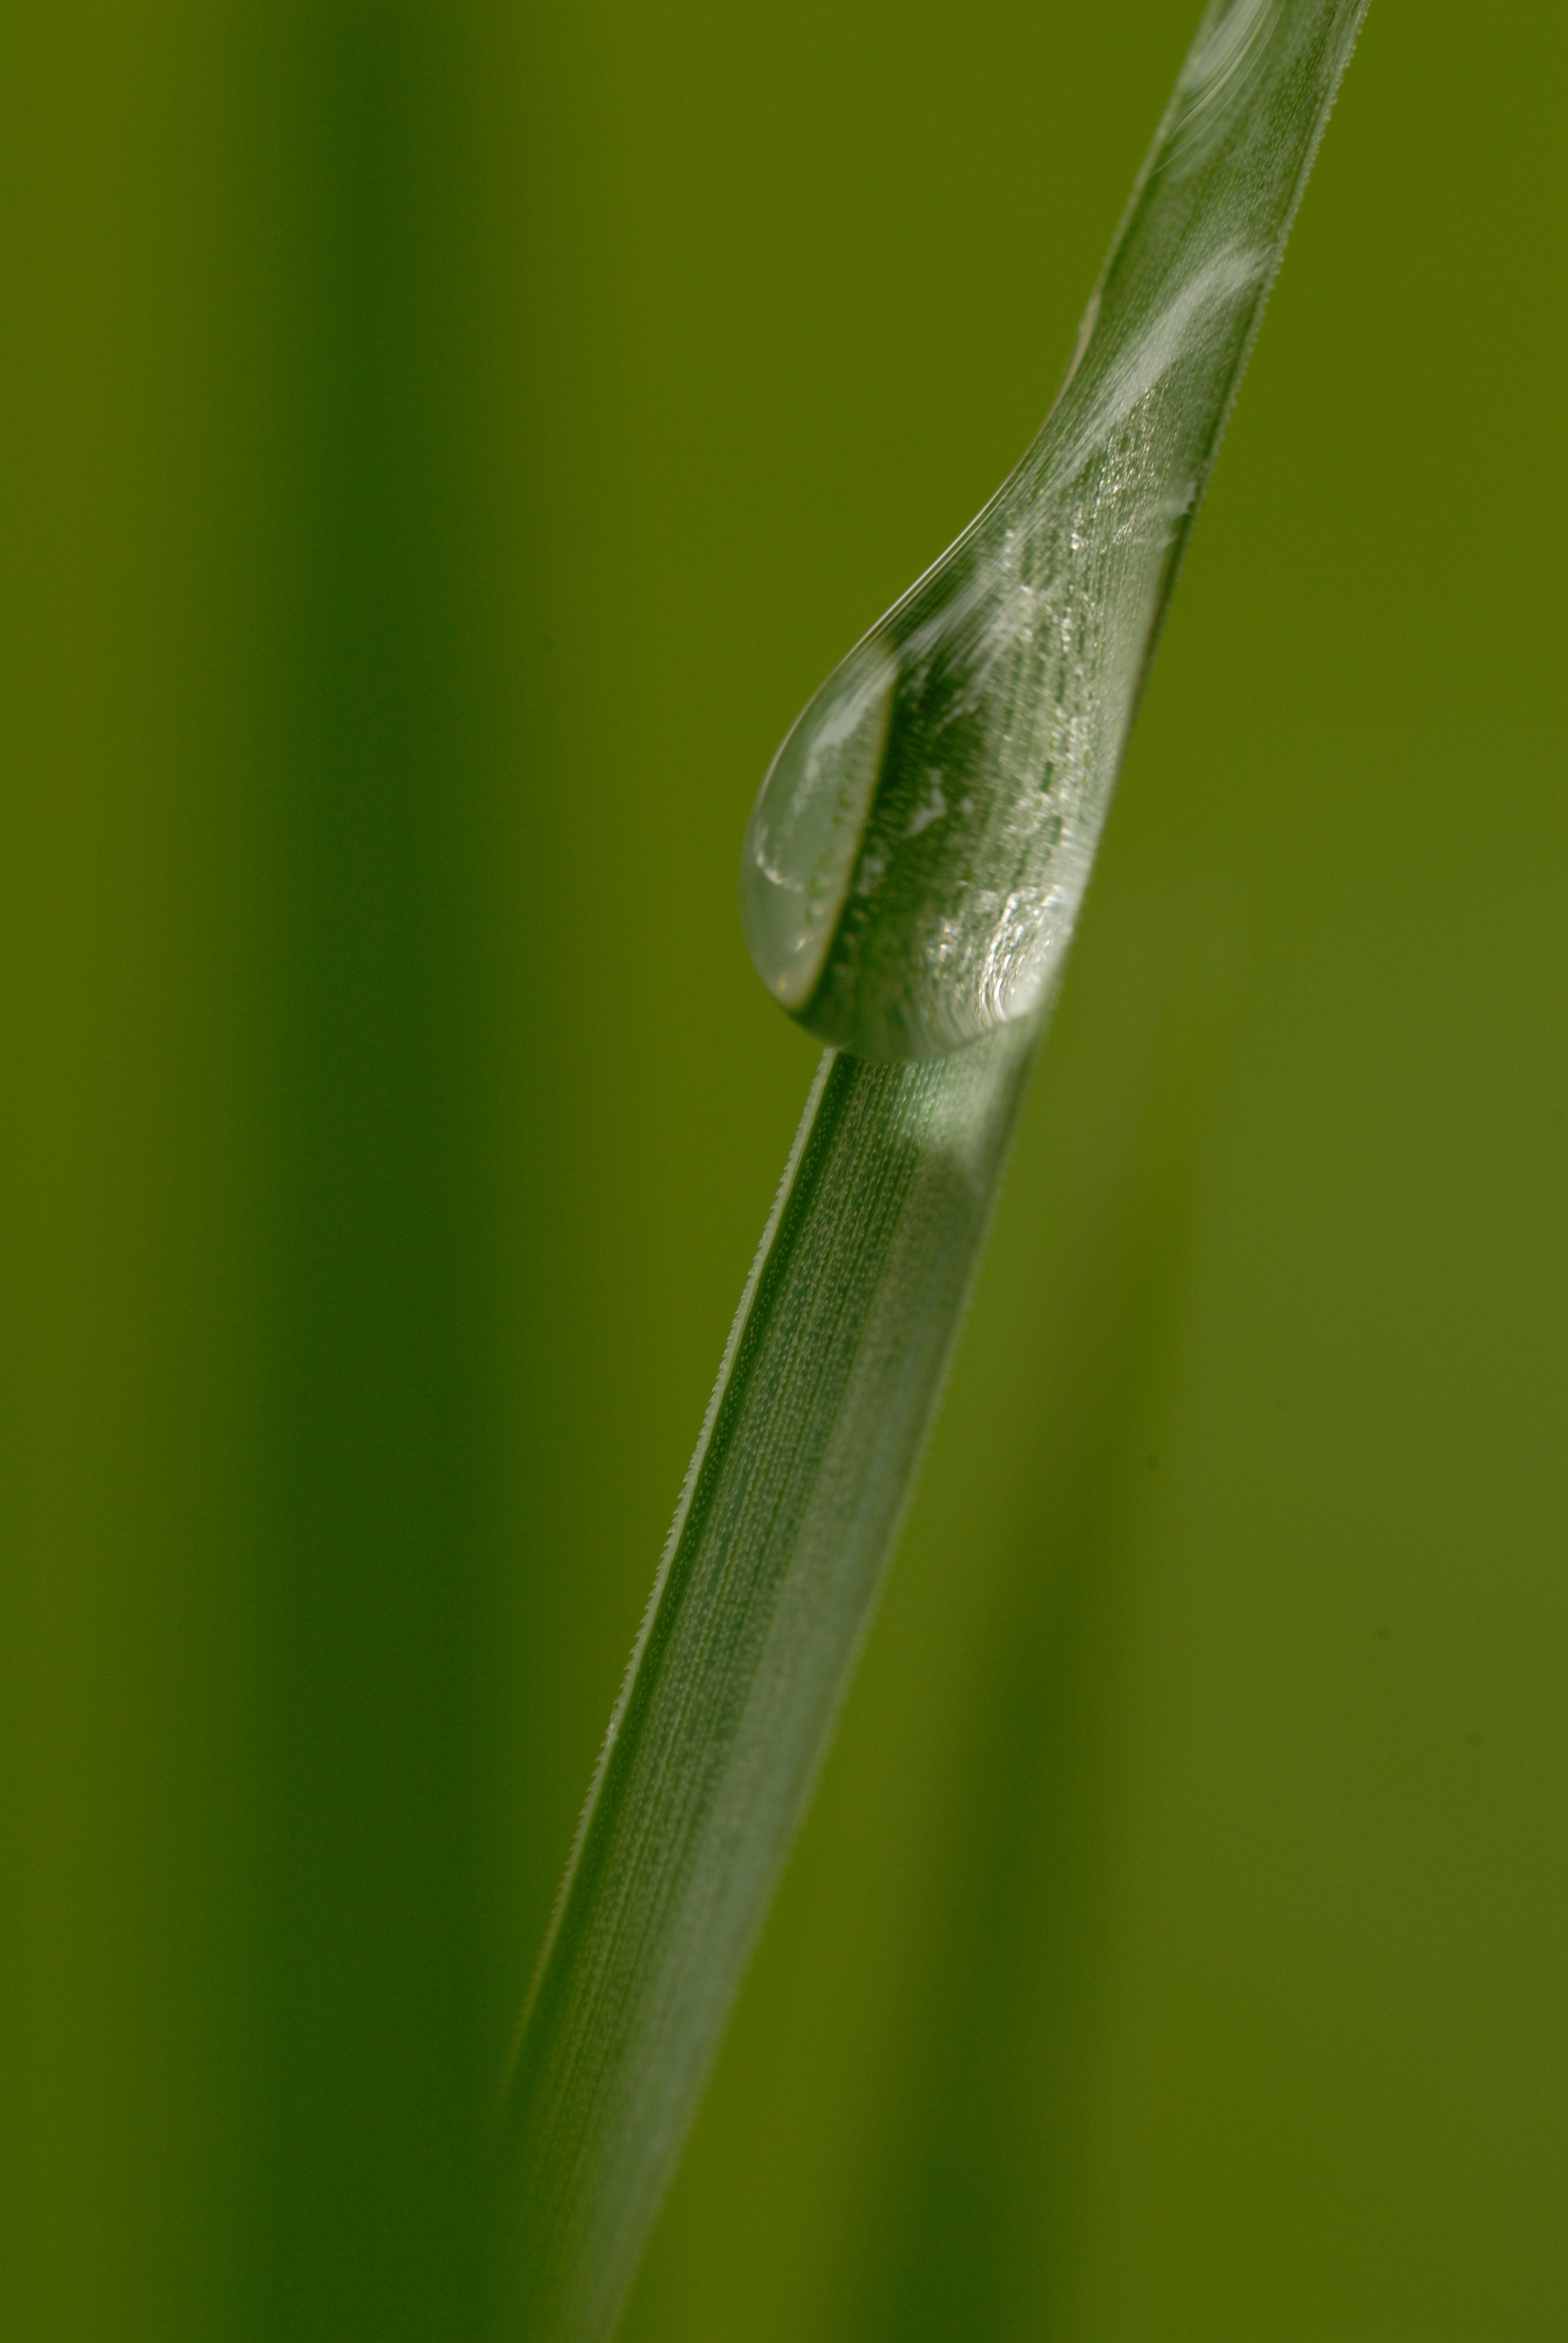
While Capture NX 2's interface and speed do not fall in the aforementioned category, the top-notch image quality does. As it would be expected from a proprietary RAW converter that shares the knowledge of the Nikon engineers involved in the development of the cameras themselves, Capture NX 2 really shines through. As I said before, it's about the details. You will notice a bit more kick in the contrast, some extra sharpness... but not by much, just enough to get your attention. Here are some examples for you with two separate shots. The first image is converted with Capture NX 2 with the camera settings set to normal, the second is processed with SilkyPix Developer Studio, and the last one has gone through Lightroom 1.4. My overall feeling is that Capture NX 2 has the best standard contrast and sharpness and the most pleasing colors, the only negative being the noise, which is in excess compared with the other two. To make matters worse, the other two apps have superior noise reduction capabilities.


With the image quality out of the way, let?s benchmark its...
Speed and Batching Capabilities
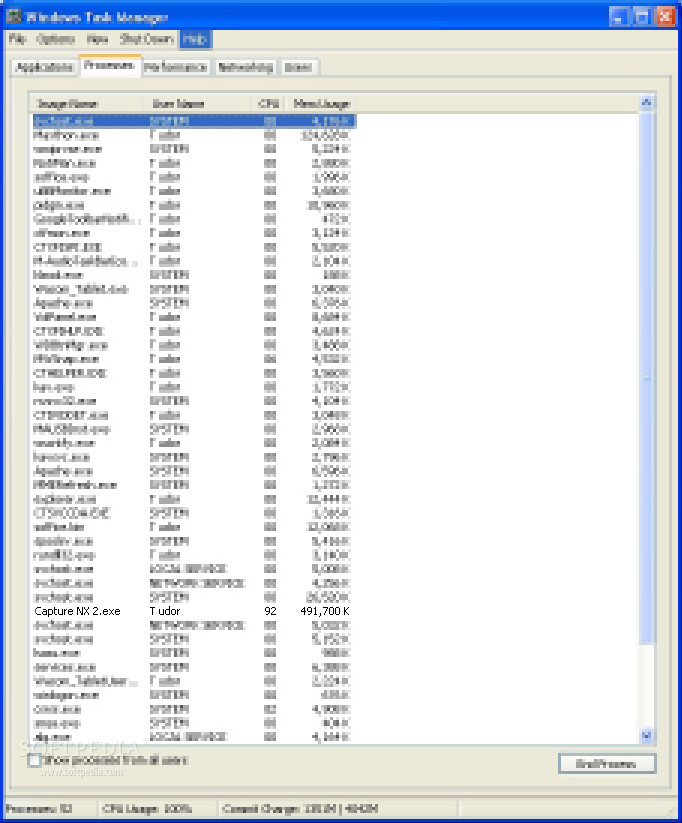
This part has always been Capture NX?s weak point. The application has a reputation for being a memory hog and not quite a speedy performer. The good news is that things have gotten better; the bad news is that there?s room for more, considerably more. To make matters worse, the application has a mixed behavior. There are times when everything runs smoothly, but you shouldn?t be surprised if Capture NX 2 suddenly becomes Plato, and starts thinking over and over and over again about... whatever it is that applications think about.
I?ve tested the performance on two configurations, one fitted with an Athlon 3000+ processor running at 1.8Ghz with one 1 GB of memory and regular 7200 RPM HDDs, and the other equipped with an AMD Athlon FX-55 processor at 2.6Ghz with 2 GB of memory and two 10,000 RPM HDDs. While the performance on the second configuration was considerably better, it wasn?t something to brag about. The app still had some inexplicable hang-ups, especially when zooming in or out, and changing sharpening and noise reduction settings. Moreover, many adjustments are associated with an unpleasant lag so that every time you drag the sliders around you have to wait a bit to see the effects. All these issues must have something to do with the fact that Capture NX 2 is quite the memory hog. Unlike SilkyPix Developer Studio, whose memory usage accidentally went through the roof at 700MB, Nikon?s app did this on a regular basis. The overall memory usage was of around 450 megabytes, which is still a lot, especially considering that Lightroom rarely goes over 200 megabytes.

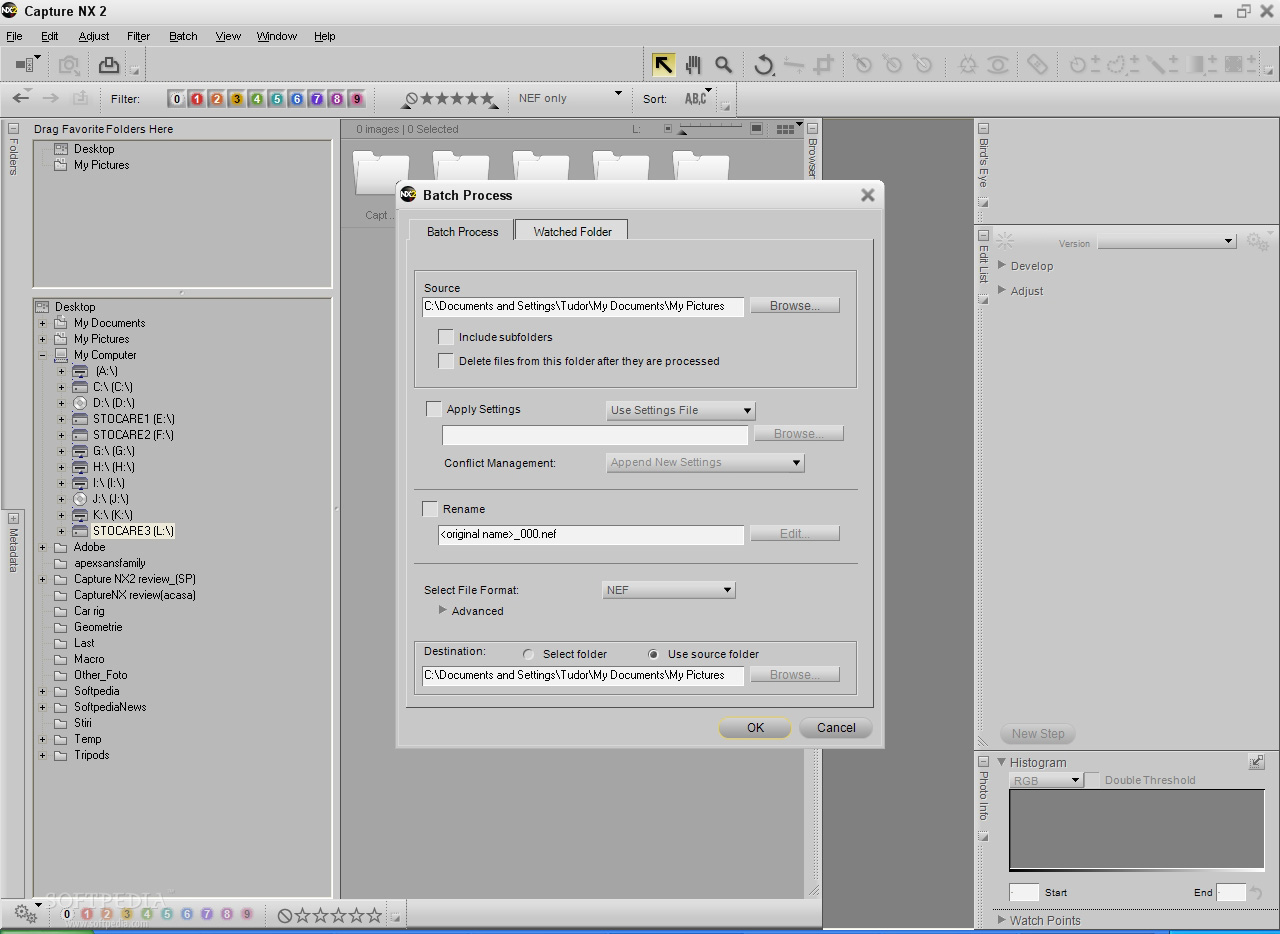
The batching itself is another problematic department in Capture NX 2. Unlike Lightroom and SilkyPix Developer Studio (my personal favorite when dealing with numerous files) where copying and pasting adjustments along with processing several files are easy tasks, Nikon?s converter makes everything complicated. For instance, you cannot copy settings from one image and apply them to the others without initiating a slow batching process, which implies overwriting of the original files.
Bear with me for just a little longer and let?s see the final conclusions.
Conclusions
The Good
Capture NX 2 is definitely a huge step forward for Nikon?s RAW converter and it is most certainly the best thing that could happen to your .nef files. The interface has been completely revamped since Capture NX and, apart from some minor niggles, I found it to be quite excellent. You get full control over the camera settings and can make selective changes via its color control points and the new selection points with extreme ease. Image quality is top-notch and, while the differences between Capture NX 2 and other converters are not major, they do exist.
The new tools, including highlight and shadow adjustments, auto retouch brush, selection control points and the ability to define workspaces are extremely helpful and will definitely improve your workflow.
The Bad
I could sum up Capture NX 2?s problems in four words: speed and batching capabilities. While there are some improvements over the first Capture NX, this version is still a memory hog. For a decent performance, you clearly need 2 gigabytes of memory and even then it will have some annoying hang-ups. I could be persuaded to forget about poor memory management if Capture NX 2 "bribed" me with some state-of-the-art batching capabilities. Unfortunately, it?s not the case and if you shoot gigs of images on an assignment, you won?t get much help from this converter.
Other issues involve the strange way in which Capture NX 2 deals with several adjustment layers and the limited noise reduction and rotate tools.
The Truth
A photographer's workflow is a very delicate matter. Serious pros have carefully studied and "rehearsed routines" to get the most out of RAW files, while at the same time score a high productivity. In fact, these two are the most important factors in one's post-processing. You need both in order to get the best results.
Admittedly, photographers shooting multiple genres may choose an application depending on the task. For instance, let's assume that you are more of a studio guy/gal and you shoot fine-art, which automatically involves careful post-processing focused on obtaining the best image quality rather than speed. At some point in your career, you might need/want to shoot some weddings, which translates into large numbers of files that need your attention.
Using the regular application and watching the progress bar slowly advance towards the end of an editing job might not be a good idea, especially if you're dealing with 8 gigabytes of images. So, you turn to a more speedy software that would reduce post processing time to a minimum, while sacrificing some of the extended controls and perhaps a bit of image quality.
I see Capture NX 2 as one of those apps that are ideal for processing images independently and, if you do not need or don?t use batching, you?ll be extremely happy with what it has to offer. If you do need batching, however, and you shoot a lot of files on every assignment, your productivity will surely suffer, especially if you don?t have a powerful computer.
So, take it for a free spin and decide for yourself if it's worth $180.
