14 DAY TRIAL //
 If you want to record yourself while playing a game or working in an application to create a video guide or tutorial to post on YouTube, you can check out Bandicam Screen Recorder. It features support for webcam and HDMI device recording, in addition to any screen resolution.
Bandicam is a professional video recording application that's available through a user-friendly interface. It gives you the possibility to add image watermarks, show mouse highlights and other effects, record sound coming from your audio device or microphone, draw in the middle of a video recording with whiteboard tools, as well as take screenshots.
We're breaking it down in the following guide to show you how it works. Scroll down to the bottom of this article to play our video guide.
Game, Screen and Device Recording Modes
Bandicam supports three Recordings Modes: Game (using DirectX), Screen (desktop and web) and Device (webcam and HDMI). In Game Recording Mode, it's necessary to select the window of the video game you want to capture to video.
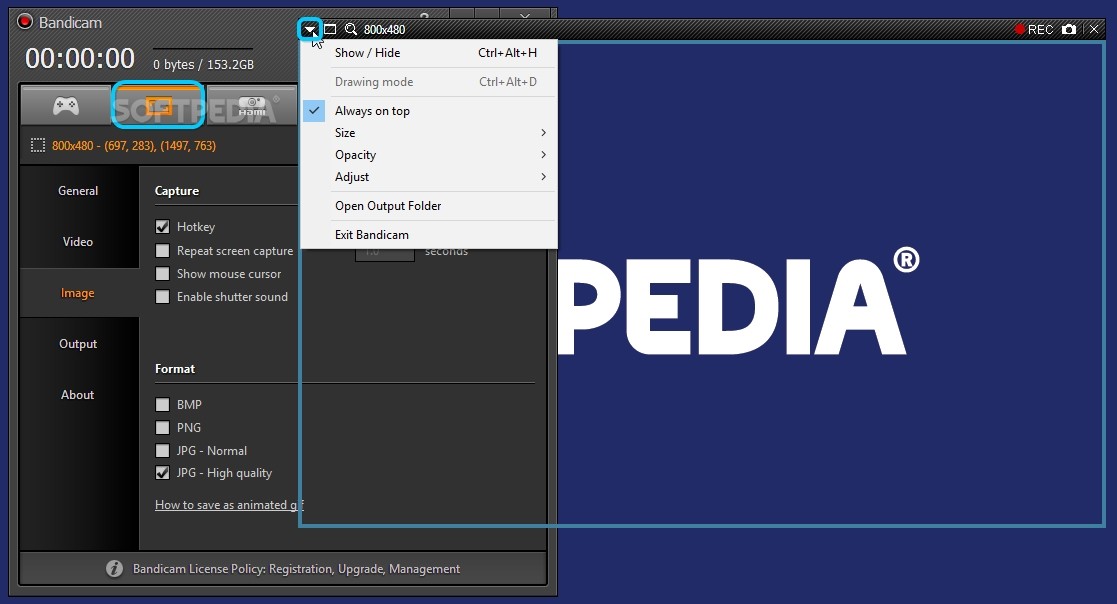
The same principle applies for Screen Recording Mode, whereBandicam shows an empty frame that you can resize and move anywhere on the screen to record whatever it captures. Click the second button on the upper menu to capture Fullscreen, then the first button to open a menu and click Show / Hide (or press Ctrl+Alt+H) to hide the application itself from the recording.
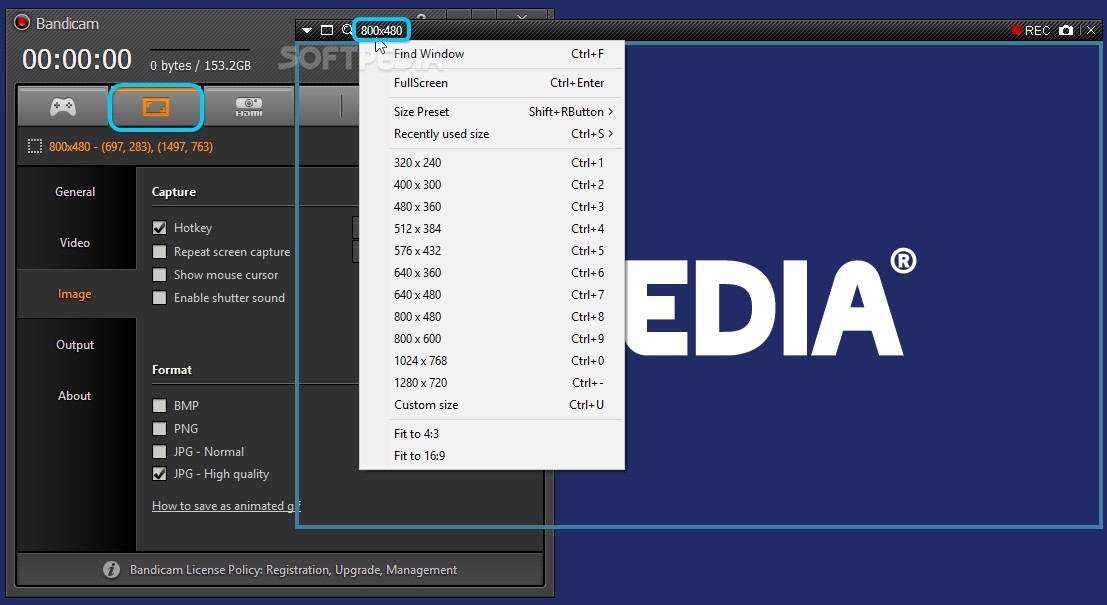
Bandicam's also capable of capturing images while recording videos. To do this, click the button next to Rec on the upper-right side of the capture window (or press F11). Otherwise, you can click the third button on the upper bar to Find Window and capture its activity, or click the resolution to select a predefined width and height, Fit to 4:3 or 16:9 aspect ratio, or specify a Custom size.
To start recording, click the Rec button on the upper-right side of the capture window, the big red Rec button on the main app window, or press F12. During a recording, you can hit the pause or stop button, as well as click the pencil button to enter Drawing mode and use the provided drawing tools (pen, highlighter, box, eraser, select color, linewidth, undo, redo). This is useful if you want to create a presentation, tutorial or demo.
General and FPS tabs
In the General tab of the main app window, you can Open the current Output folder specified by BandiCam or click the ... button to set another location. To keep the app on top of other programs, check the Bandicam window always on top box. You can also Run Bandicam on Windows startup automatically, Start Bandicam minimized to the tray and Start fullscreen recording on startup.
If you want to schedule the application to automatically start a recording session, tick the Set timer for Auto Start Recording box, choose the starting mode (Start in X minutes or Start at X time) and minimize the app to the tray to hide it from the video. Click settings below Auto Complete Recording if you want to limit the video By recording time or By recorded file size (Disable is set by default). Plus, you can set an action to auto-perform After Recording: Start new recording, Stop recording and exit Bandicam, Shutdown your computer (Do nothing is set by default).
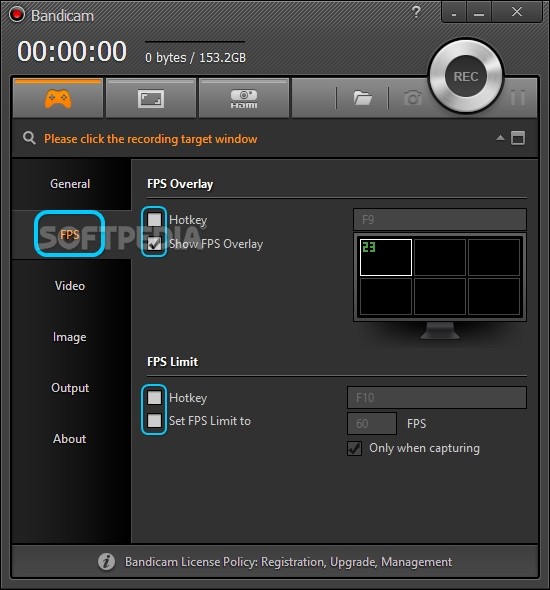
The application shows the FPS (frames per second) by default in the upper-left corner of the videos. To change this, go to the FPS tab, pick a new position on the videos, Set FPS Limit to any number you want, set hotkeys for the FPS Overlay and FPS Limit, or prevent Bandicam from showing the FPS at all (clear the Show FPS Overlay box).
Video tab
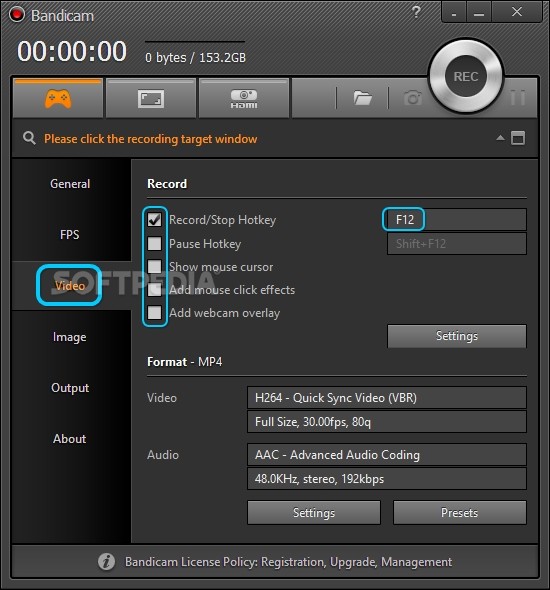
In the Video tab, you can specify the preferred hotkey for starting and stopping video recordings (in the Record/Stop Hotkey box, default is F12) as well as for pausing and resuming the session (tick the Pause Hotkey box, default is Shift+F12). Moreover, you can Show mouse cursor in the clips, Add mouse click effects and Add webcam overlay.
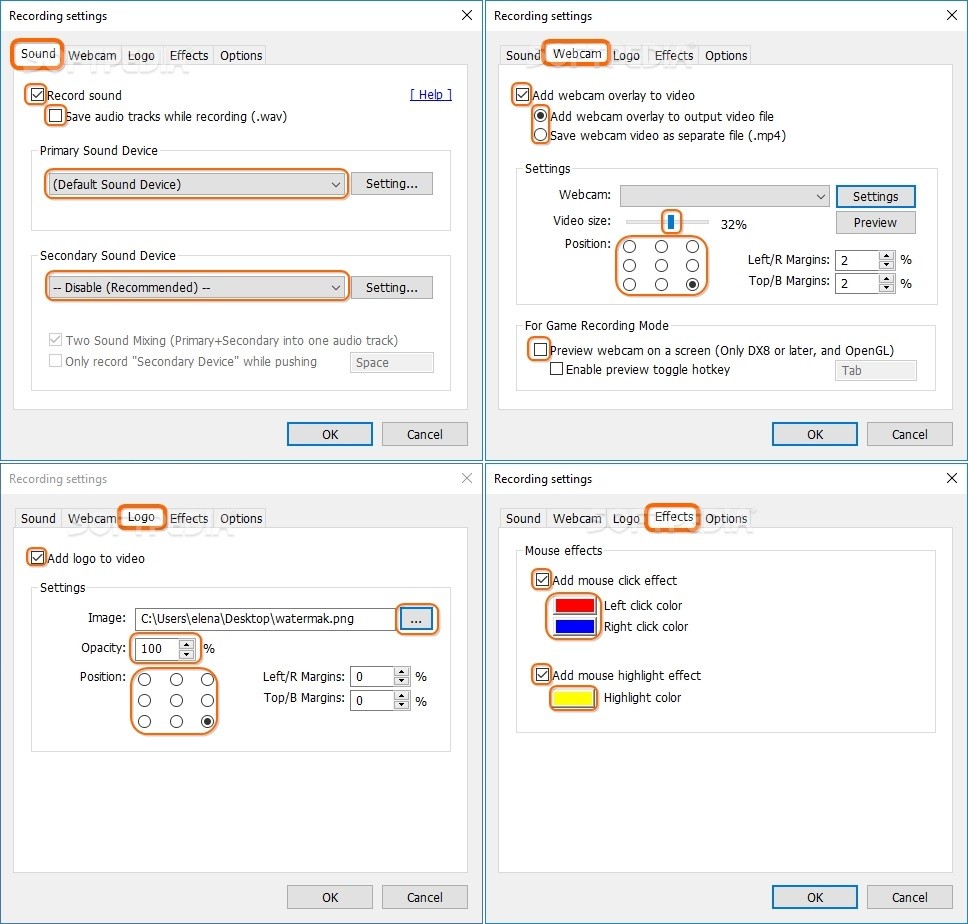
Click the Settings button to configure Recording settings. In the Sound tab, you can set the utility to Save audio tracks while recording (.wav format, separate from the video clips), select the Primary and Secondary Sound device, or don't Record Sound (clear this box).
In the Webcam tab, you can tick the Add webcam overlay to video if you haven't done this already in the Video tab and set the application to Add webcam overlay to the output video file or to Save webcam video as separate file (.mp4 format). Plus, you can pick a preferred Webcam device if you have multiple ones available, adjust the Video size and Position on the clip, or Preview webcam on a screen (for Game Recording Mode).
In the Logo tab, you can Add logo to video by ticking this option, click the ... button to find and open a personal image you want to apply as logo (.png format, transparency is supported), adjust the level of Opacity, and set the watermark Position.
In the Effects tab, you can Add mouse click effect if you haven't already done this in the Video tab as well as select the Left click and Right click color (to tell apart the left and right button clicks, suitable for tutorials). Also, you can Add mouse highlight effect and pick the Highlight color (to easily keep track of mouse movements, especially if fast).
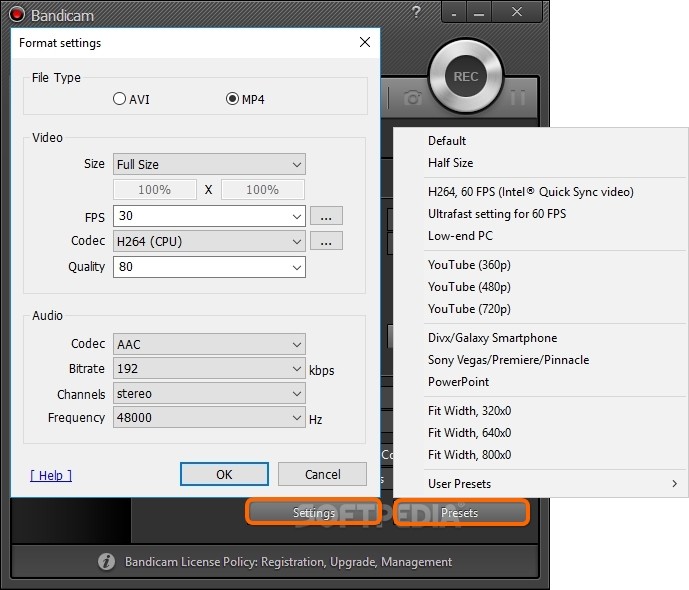
Returning to the Video tab, the default video file type is set to MP4. Click the Settings button if you want to change it to AVI or to edit Audio and Video properties for the output clips (size, FPS, codec, quality, bit rate, channels, frequency). Bandicam also has several presets with audio and video parameters optimized for H264 - 60 FPS, Ultrafast setting for 60FPS, Low-end PC, YouTube (360p, 480p, 720p), and others. Click the Presets button to pick one. You can also Add a New Preset after previously setting the audio and video.
Image and Output tabs
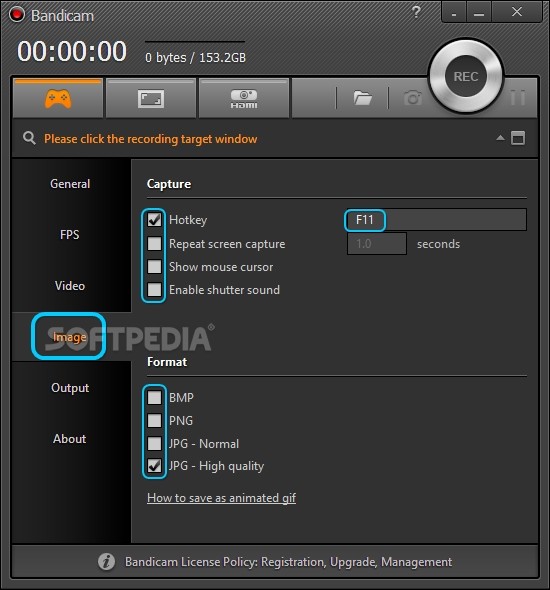
Go to the Image tab, set the Capture Hotkey (default is F11), ask the tool to Repeat screen capture at a specific frequency (set the number of seconds), Show the mouse cursor in the grabbed photos, and Enable shutter sound. The format for saved images is set to JPG - High quality to default, but you can change it to BMP, PNG or JPG - Normal.
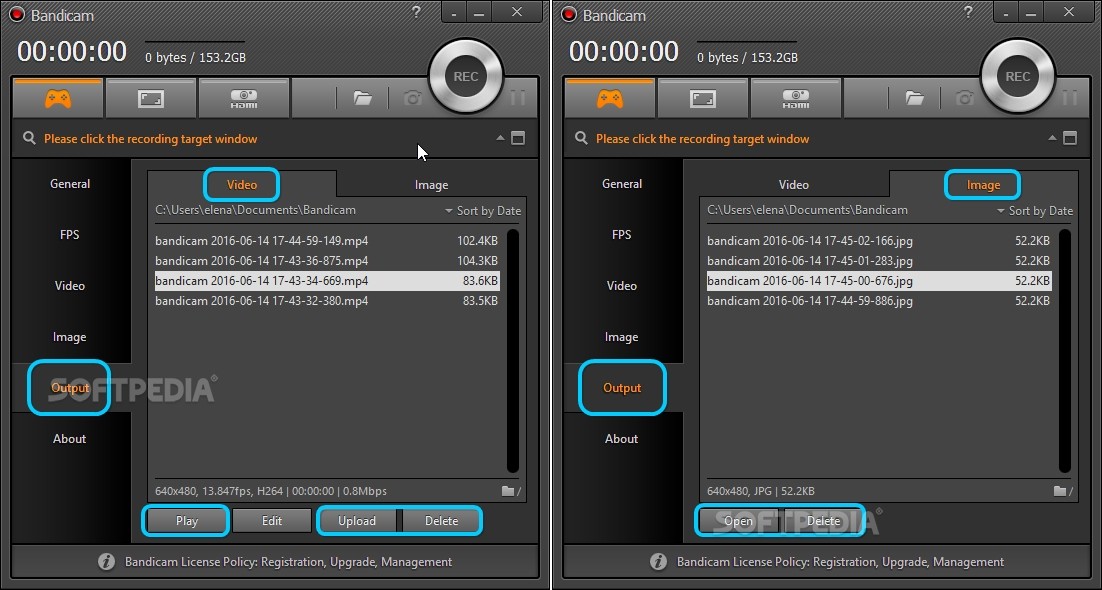
In the Output tab, you can view all saved Video and Image files (in separate areas), Play clips in your default media player, Upload clips to Vimeo.com, Open images in your default graphic viewer, and Delete files.
Play our video guide below to see how this app works (we recorded it with Bandicam). You can also download Bandicam Screen Recorder.
Bandicam Screen Recorder Explained: Usage, Video and Download
Record videos while playing games or working on the computer, capture webcam footage, and take screenshots with Bandicam. Play this video to learn more (btw, it was recorded with Bandicam) and check out our article for more info: http://www.softpedia.com/blog/bandicam-screen-recorder-explained-usage-video-and-download-505239.shtml