14 DAY TRIAL //
 Windows does a pretty good job at copying and moving files from one place to another if the job is relatively easy (there aren't too many files or they have a small size).
However, the OS doesn't deliver the results you'd expect when putting it in charge of handling large-sized files or batches of numerous files and folders. It also sometimes fails to successfully carry out tasks, creating corrupt files after you've spent a lot of time waiting.
Because of this, we have selected three versatile tools to show you how to copy or move files quickly and safely: TeraCopy, Ultracopier and FastCopy. All of them are capable of using the OS buffer size to reduce task time when performing operations between different hard disks.
TeraCopy
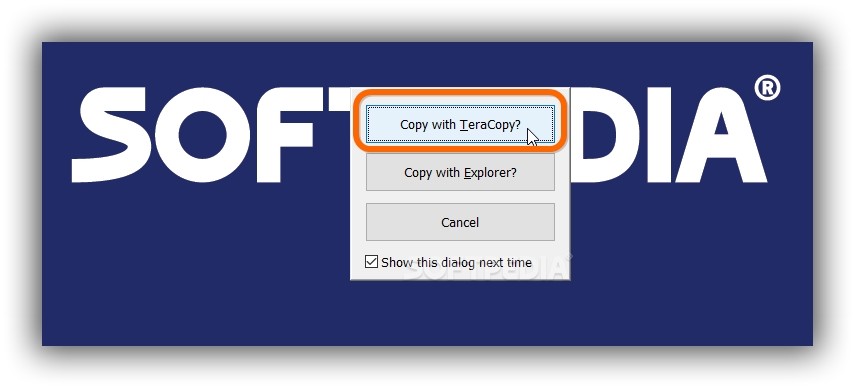
Once installed, TeraCopy gets integrated into the context menu menu of Windows Explorer (TeraCopy...). Click to select a file or folder and hold down Ctrl to select multiple files or folders. If you pick the regular Copy option, then a window appears to ask if you want to Copy with TeraCopy or Copy with Explorer.
However, the panel that pops up on the screen when choosing TeraCopy from the right-click menu is different than the one launched when double-clicking the app's .exe or selecting Copy with TeraCopy.
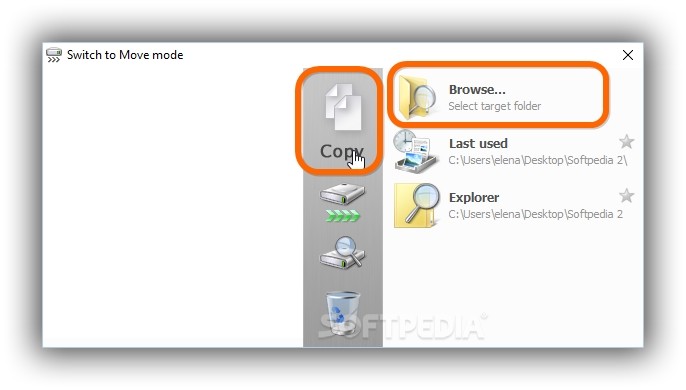
In this case, the Copy option is selected by default but you can Switch to Move mode by just clicking on the Copy button. Click Browse on the right side to Select target folder (where you want to copy the items to). The operation will start as soon as you indicate the directory and confirm the destination.
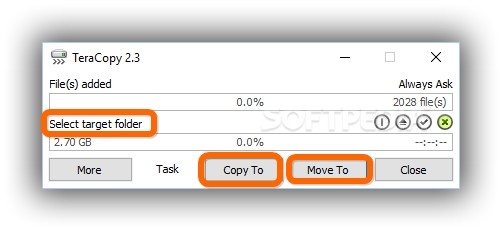
If you double-click the .exe to launch TeraCopy, you can drop as many files and folders as you want into the window (they don't necessarily have to be selected at once) while keeping an eye on the total size (below Select target folder). The size gets updated as soon as you add new items.
Next, click Select target folder to open a menu and Browse the output directory (where you want to transfer items to). Click the Copy or Move button to start the copying or moving operation, depending on your preference.
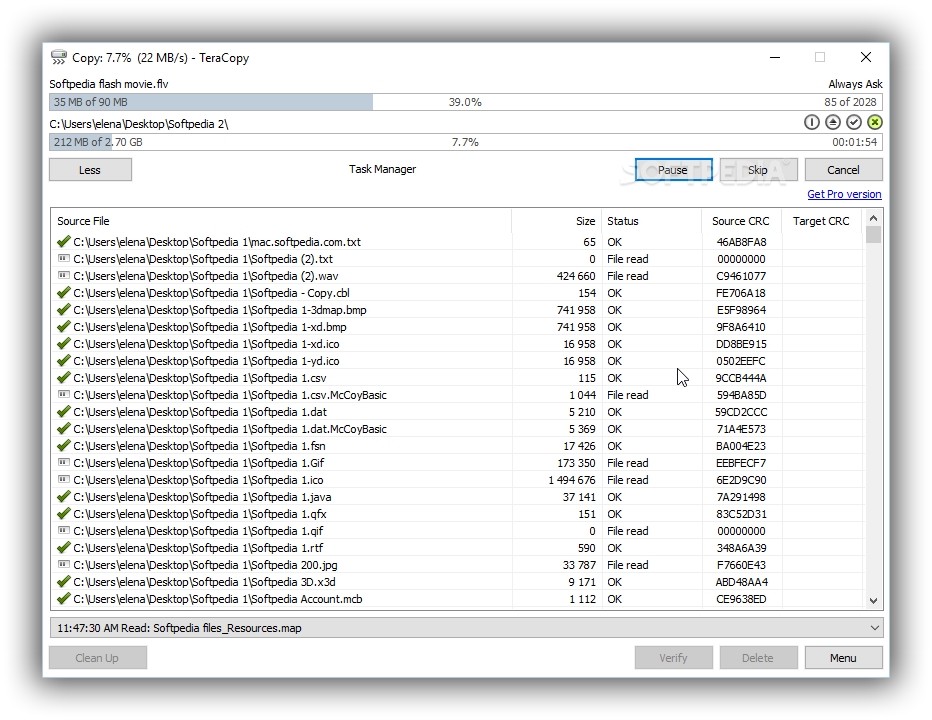
During this time, click the More button to extend the main window and check out the full path of the Source File, along with the Size, Status, Source CRC and Target CRC (checks file integrity).
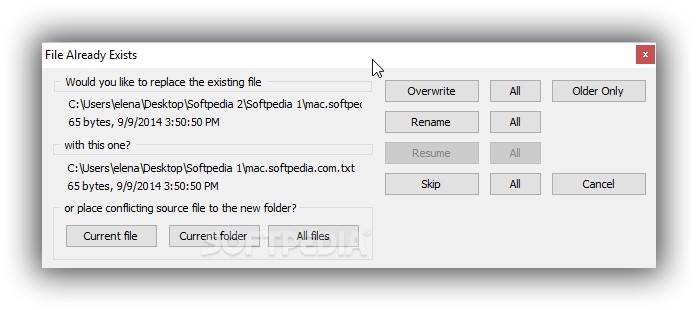
If the File Already Exists, then the program pops up a panel and asks you what to do between Overwrite only the existing file or All with a matching name, overwrite Older Only, Rename only that file or All, Skip copying the file or All, or store the source files into the new directory (Current File, Current Folder, All Files).
Ultracopier
After installation, UItracopier takes over the copy and move operations that are normally performed by Windows Explorer. However, this likely won't work if you already have another similar program installed, such as TeraCopy, so make sure to uninstall the other tool.
Once fired up, Ultracopier creates an icon in the taskbar notifications area (also known as systray, near the computer clock). To prevent it from overwriting Windows Explorer when it comes to the default copy and move actions, click this icon (it becomes greyed out). To re-enable it, click it again.
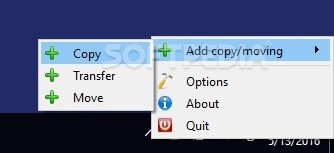
Right-click the tray icon to open a menu, open the Add copy/moving submenu, and click Copy or Move (the Transfer operation is the same as Move). A window with a file browser pops up next, asking you to indicate the source directory (the one you want to copy).
Once you click Select Folder, another file browser is displayed for pointing out the destination (where you want to copy the source folder). After clicking Select folder, the operation starts right away.
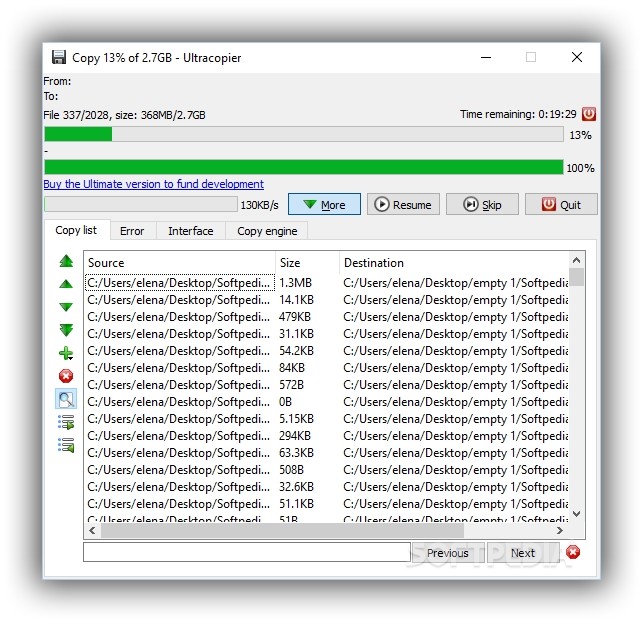
Click More to expand this panel and view the full path of each file's Source and Destination, along with the Size. If you want to copy additional items to the same directory or different locations, click the green + button and select Add file or Add folder. Ultracopier asks if you want to Use the actual destination but you can click No to pick another one.
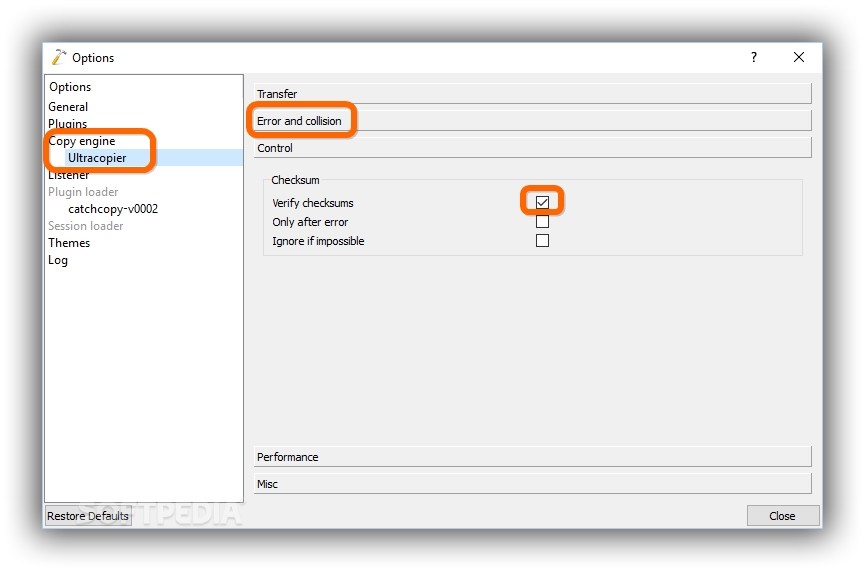
If files or folders with the same name already exist, the tool asks what you want to do. To make it automatically perform an action, right-click the tray icon and select Options, go to Copy engine -> Ultracopier, click the menu next to When file collision to choose Skip, Overwrite, Overwrite if different, Overwrite if newer, Overwrite if older or Rename, and click the menu next to When folder collision to pick Merge, Skip or Rename.
The file verification option is turned off by default, so you can activate it by selecting Control from the Copy engine -> UltraCopier area and ticking the Verify checksums box.
FastCopy
FastCopy has less intuitive options than the previous two programs, and a little bit of configuration is necessary to get started. Check out the Help file if you still can't figure out how it works after reading this article.
The tool has an installer and portable version available, so you can use either one. Even after installation, it doesn't automatically get integrated into the context menu. Instead, you can do this by launching FastCopy with elevation rights (right-click the .exe and select Run as administrator, or click Elevate from the upper-right corner of the main window).
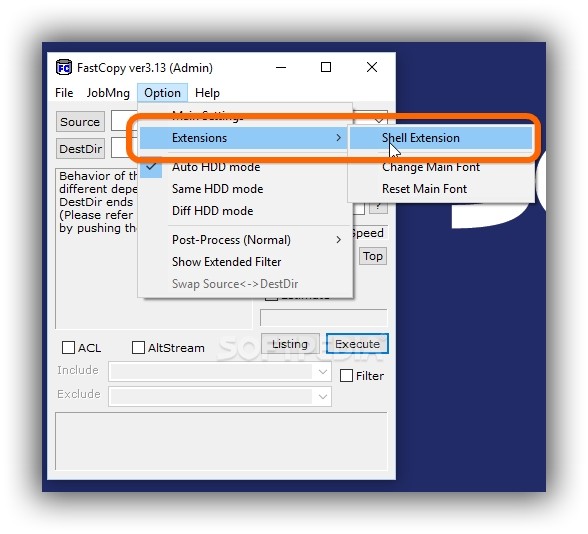
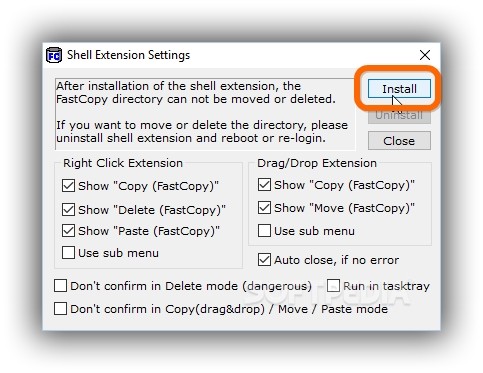
In the next step, go to Option -> Extensions -> Shell Extension and tick the boxes of the entries you want to view when right-clicking one or more selected files or folders: Show "Copy (FastCopy)", Show "Delete (FastCopy)" and Show "Paste (FastCopy)". The tool can also Show "Copy (FastCopy)" and Show "Move (FastCopy)" when dragging and dropping files and folders if you check these two boxes.
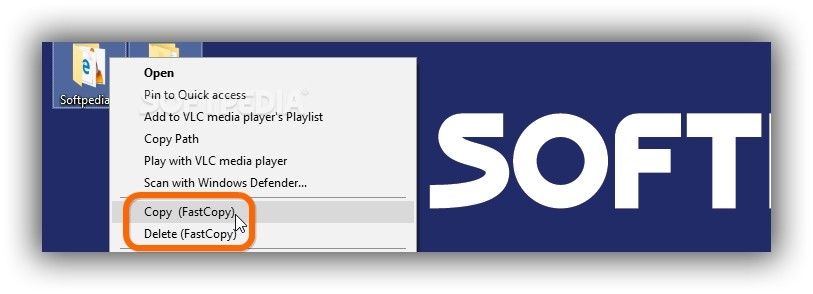
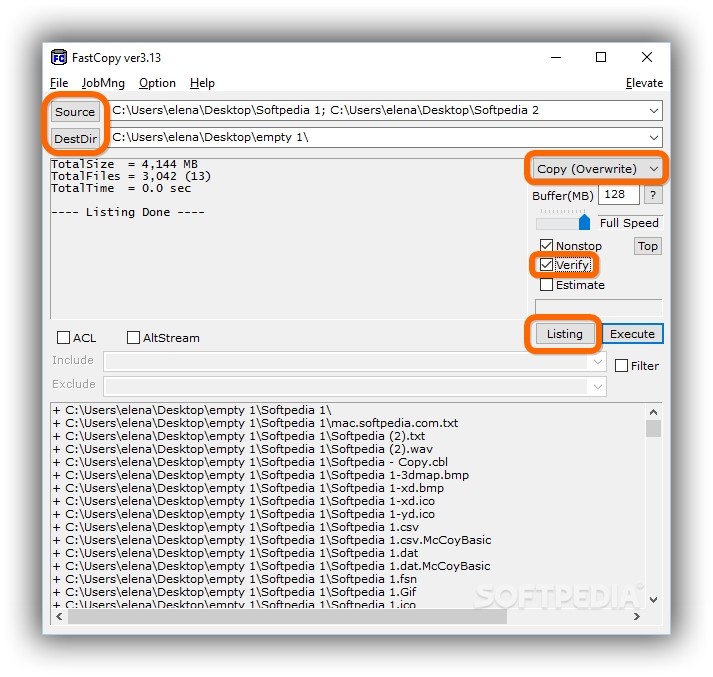
Once this setup is done, select one or more files or folders in Windows Explorer, open the context menu by right-clicking, and click Copy (FastCopy). The main app window is brought up to the screen, and the full paths of the selected items are displayed in the Source box. More files and folders can be added to the Source by directly entering their full paths (separated by ;). Clicking the Source button brings up a tree view to specify the directory to copy, but this doesn't work for adding multiple locations or files.
Click the DestDir button and use the tree view to indicate the destination directory (where you want to copy the items to), as well as pick the operation mode by clicking on Diff (Size/Date) to open a menu: Diff (No Overwrite) copies items but doesn't overwrite any existing files in the destination, Diff (Size/date) copies only if the file sizes and timestamps are different (if any), and Diff (Newer) copies only if the source files are newer than the ones in the destination (if any).
Copy (Overwrite) copies and automatically overwrites any existing files with the same names, Sync (Size/date) performs Diff (No Overwrite) and also deletes any items in the destination which don't exist in the source, Move (Overwrite) moves the files and automatically overwrites any existing ones in the destination, and Delete gets rid of all files and folders by force.
Tick the Verify box to check file integrity using MD5. If you want to view a list with all files and folders included in the operation, click Listing. Click Execute to start.
Check out our video below and find out how to copy files using these three apps. You can also download TeraCopy, Ultracopier and FastCopy.
How to Copy Files Faster and Safer than Using Windows Explorer
Don't use the Windows built-in features to copy or move large or many files. Check out our video and article to find out how to quickly and safely do this with TeraCopy, Ultracopier and FastCopy: http://www.softpedia.com/blog/how-to-copy-files-faster-and-safer-than-using-windows-built-in-features-504028.shtml