Availble for download at SourceForge as well
This program was created in an attempt to simplify the use of Encryption File System (EFS) for the everyday user. This application will allow a user to quickly and easily backup their EFS certificate to a PFX file. The application can also quickly and easily encrypt a file or directory using Encrypting File System (EFS) while also allowing the granting of access to other users in the domain. The instructions are simple which I have included in the topics below.
You can verify whether or not EFS is enabled by issuing the below command
If ((Get-ItemProperty -Path 'HKLM:\SOFTWARE\Microsoft\Windows NT\CurrentVersion\EFS' -Name "EfsConfiguration" -ErrorAction SilentlyContinue) -eq 1) { Write-Output "EFS is Disabled" } Else { Write-Output "EFS is Enabled" }IDEAS FOR FURTURE RELEASES
- Change the backend for granting and removing access to a file
- Attempt to allow a group to be defined in order to add all members of that group to a files permissions If you have any suggestions feel free to reach out to me at info@osbornepro.com.
There are a couple limitations to know when using EFS.
- You are only able to grant EFS permissions to a user, NOT groups. This is because public-private key pairs are used for encryption. The EncrypIT application allows you to define multiple users at a time for access to a file.
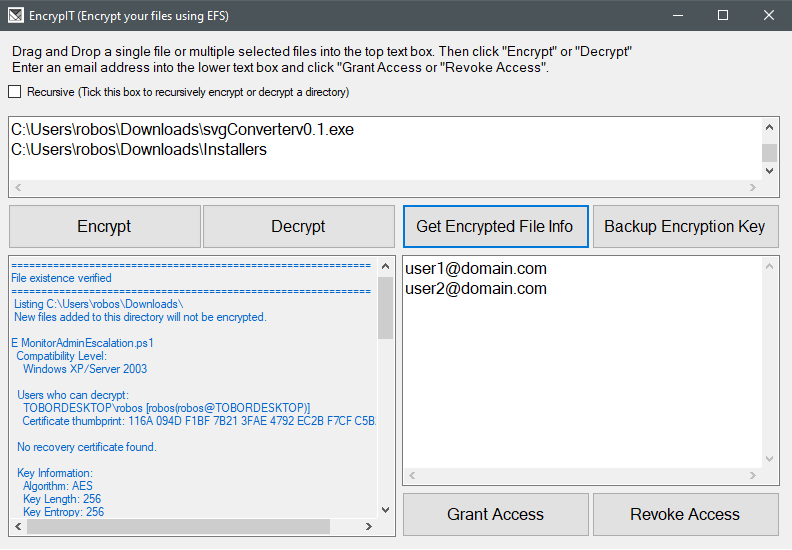
- When encryption is set for a folder, EFS automatically encrypts all new files created in the folder and all files copied or moved into the folder. This means EFS file sharing can be applied only to individual EFS-encrypted files, and not to EFS-encrypted NTFS folders. EncrypIT will allow you to return information on a file that displays whether or not the parent directory is encrypting all if its contents, the encryption algorithm used, users who can decrypt the file, and list recovery certificate users.
- Using file shares for remote EFS operations requires a Windows 2000 or later domain environment because EFS must impersonate the user by using Kerberos delegation to encrypt or decrypt files for the user. This requires that the user must be logged on with a domain account that can be delegated and the computer must be a domain member in a domain that uses Kerberos authentication and the computer must be trusted for delegation.
- Microsoft suggests using "Web Distributed Authoring and Versioning (WebDAV) Web folders" whenever possible for remote storage of encrypted files. Web folders require less administrative effort and are more secure than file shares. Web folders can also securely store and deliver encrypted files over the Internet by using standard HTTP file transfers. EFS encrypted files stored on Network Shares require the user to be able to log into the server. This is because network share files get decrypted on the server before being streamed to the device accessing it. The Web Folders decrypt the file on the local computer instead of the server.
- A user must have either a local profile on the computer where EFS operations will occur or a roaming profile. If the user does not have a local profile on the remote computer or a roaming profile, EFS creates a local profile for the user on the remote computer. RESOURCE: https://docs.microsoft.com/en-us/previous-versions/windows/it-pro/windows-xp/bb457116(v=technet.10)?redirectedfrom=MSDN
To help set up EFS I added a simple script to use that will enable Kerberos Delegation on enabled devices in your domain environment. This only needs to be done on devices hosting network shares. The script is in case you have all computers sharing files through network shares and is likely not required.
FILE: TrustComputersForDelegation.ps1
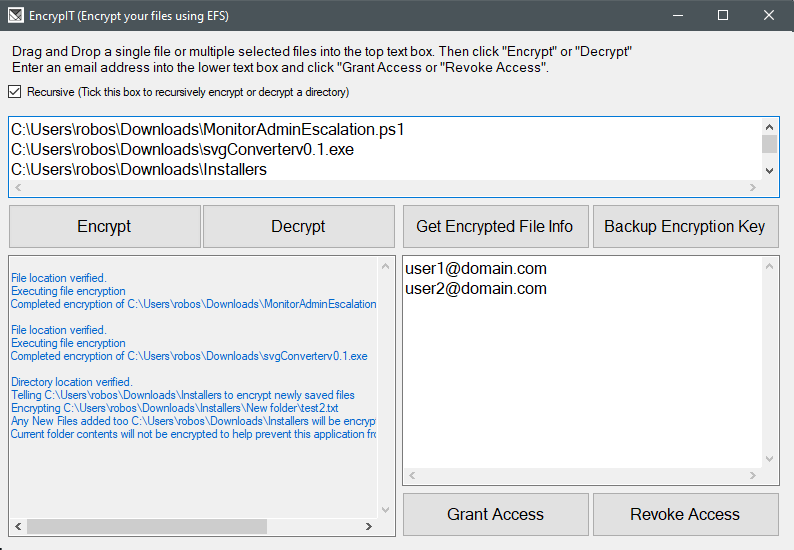
- Open the application
- Drag and Drop a file(s) or folder(s) from File Explorer into the top white area of the application.
- Tick the "Recursive" button to encrypt the contents of any selected folders
- Click the "Encrypt" button
The file(s) are now encrypted using EFS and can only be accessed by the user who performed the encryption.
- Open the application
- Drag and Drop a file(s) or folder(s) from File Explorer into the top white area of the application.
- Tick the "Recursive" button to decrypt the contents of any selected folders
- Click the "Decrypt" button
The file(s) you defined are now decrypted and can be accessed by anyone with appropriate NTFS permissions.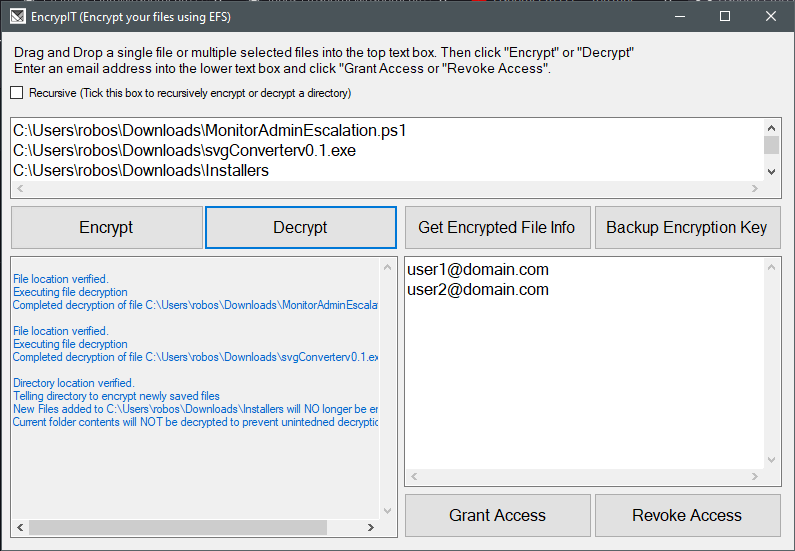
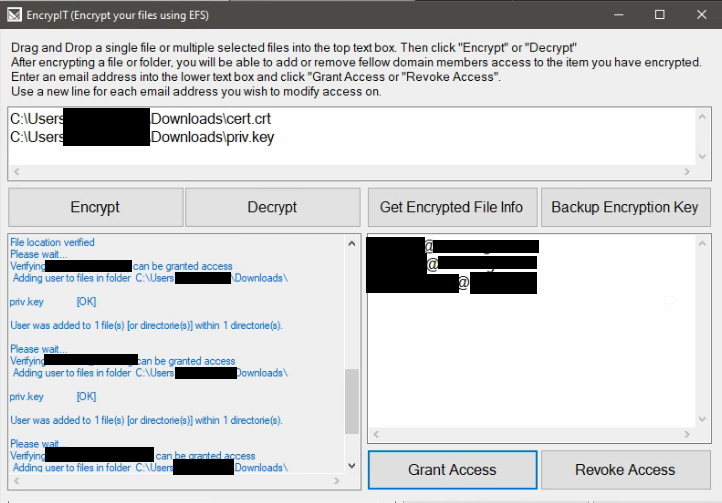
- Open the application
- Drag and Drop a file(s) or folder(s) from File Explorer into the top white area of the application.
- Enter a persons email into the smaller text box. Put each new email address on a new line.
- Click the "Grant Access" button
- Open the application
- Drag and Drop a file(s) or folder(s) from File Explorer into the top white area of the application.
- Enter a persons username into the smaller text box. Put each new email address on a new line.
- Click the "Revoke Access" button
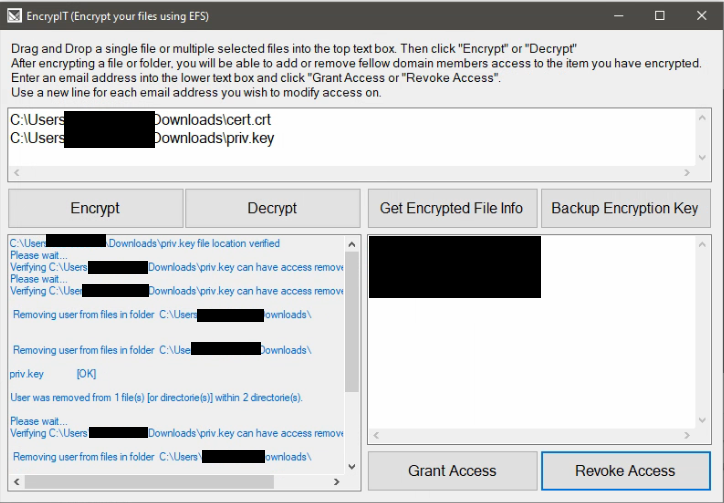
NOTE: The simplest way I found to remove access from a file was through the use of the cipher command. The cipher command requires a certificate thumbprint in order to remove someone's access from a file. In order to obtain that value I had to use some PowerShell cmdlets which makes this process a little bit slower and open a new temporary window.
- Open the application
- Drag and Drop a file(s) or folder(s) from File Explorer into the top white area of the application.
- Click the "Get Encrypted File Info" button
- Open the application
- Click the "Backup Key" button
- Enter a custom password or click "Auto Generate" to have one created for you
- Select a location to save your backup EFS key in PFX file format
- The password you created is now copied to your clipboard. Save it somewhere safe like a password manager
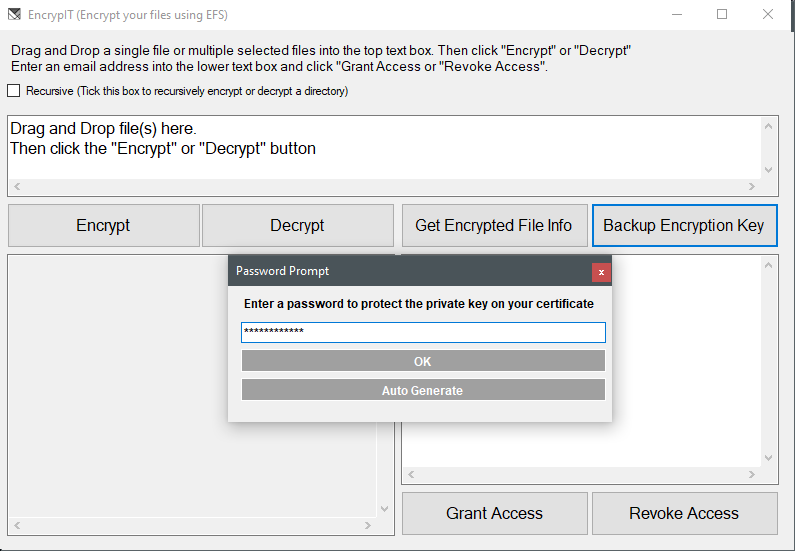
The "Status Information" section of the application will display the password you set as well as the location your backup was saved too.
NOTE: This application discovers the EFS certificate used based on first searching for a template with the name "Basic EFS" in the user's certificate store. If no certificate is found, it next looks for a "Key Usage" value of 32 in the users local certificate store. If you wish to define a different certificate template name to search for, modify line 152's "certTemplateName variable" in the file "Form1.cs" to match your custom EFS template name.
