14 DAY TRIAL //
 Time is money. This saying is as old as time but, especially nowadays, it seems to be more accurate than ever. Or is there anyone you know that does not want to be time efficient? I sincerely doubt it.
But there are plenty of time management tools on the market you can choose from, you might say. Indeed, there are plenty of them but most are quite clumsy. This results in the fact that you experience a feeling of frustration rather than efficiency, and instead of getting more organized or things done in due time, you spend most of your time in the planning phase and by configuring or by trying to understand a set of shiny tools that you do not actually need.
This is why, after a little research, I would like to recommend you the Bee Docs Timeline 3D application. It is not spectacular when it comes to interface or intricate features but gives you exactly the tools you need to integrate all the events and to-do lists that you have probably started and saved in a draft phase in different online or offline applications.
Moreover, this quite good-looking but simple application helps you sync and customize all the event dates, so that all of them are chronologically ordered, in a consistent and easy to understand way.
Thus, by playing with Bee Docs Timeline 3D, you will have more spare time and never forget about your son's birthday or kindergarten party.
The Looks
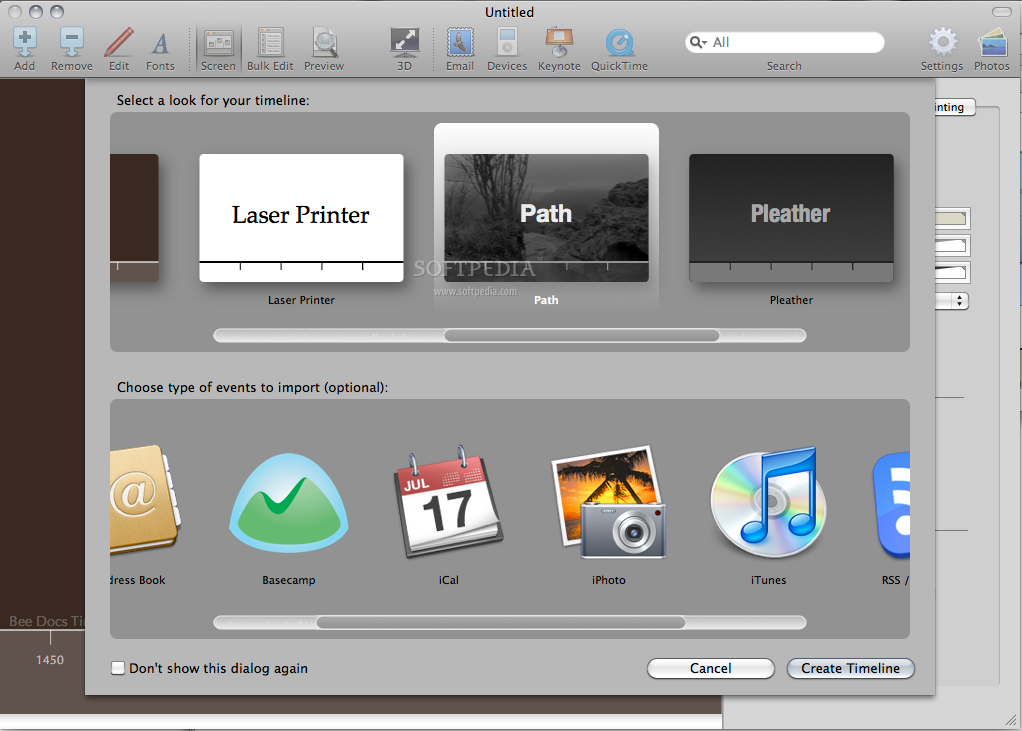
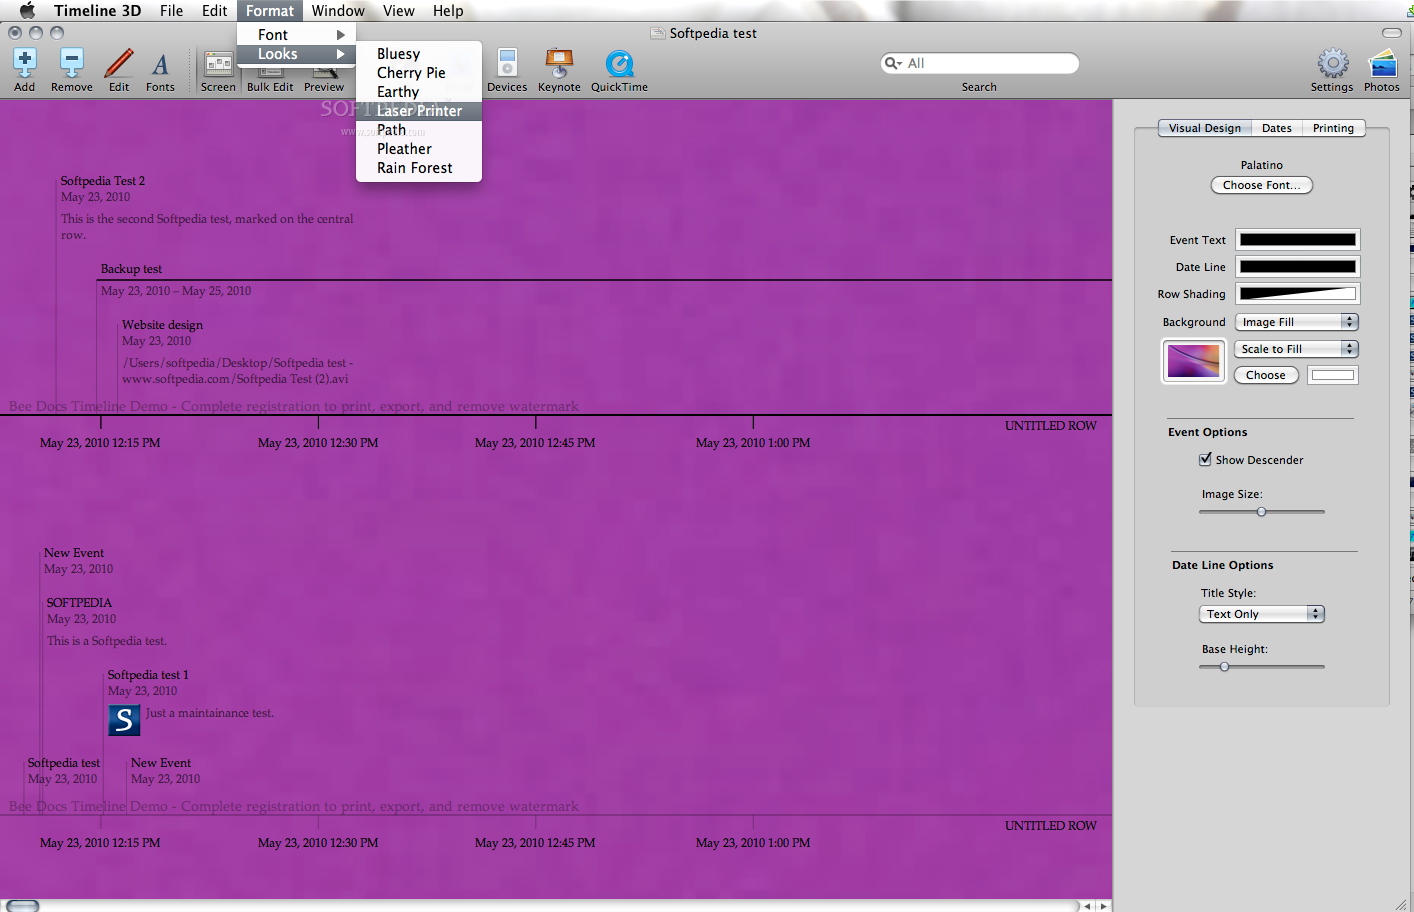
The first thing you are asked to do when you open the Bee Docs Timeline 3D application is to select a background image. Actually, every time you create a new Document, you will be shown the introductory panel by default. This panel lets you choose from seven different looks (Bluesy, Cherry Pie, Earthy, Laser Printer, Path, Pleather and Rain Forest) and displays on the bottom of the page a list with the applications that you can use for importing events from.
Here is a complete list with the types of events that you can include in your timelines: Blank Timeline, Address Book, Basecamp, iCal, iPhoto, iTunes, NetNewsWire, OminiFocus, RSS/Atom Feeds and System Profiler. Once you have chosen a skin for your timeline, you can also start adding events by hand into the application.
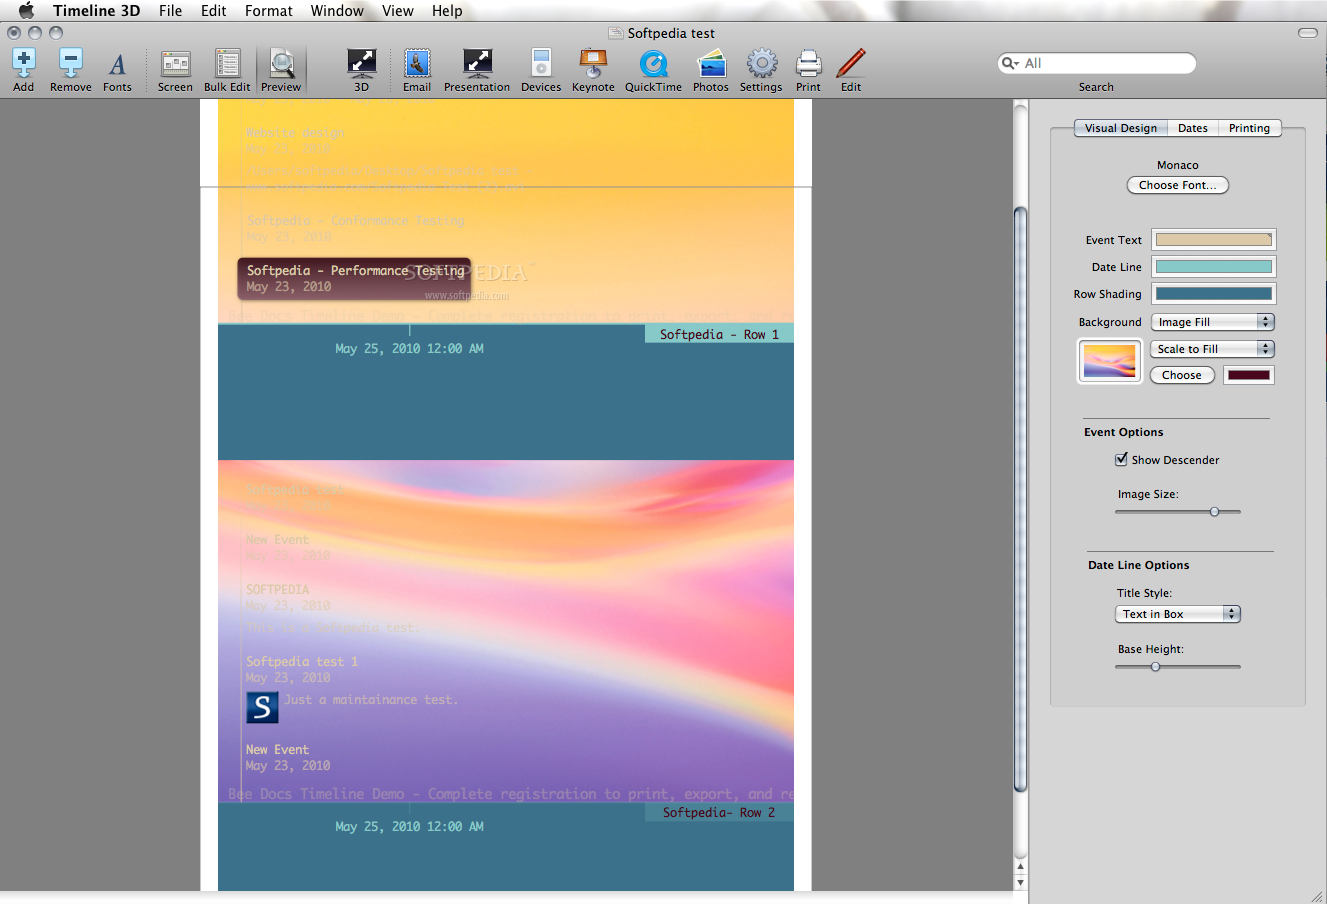
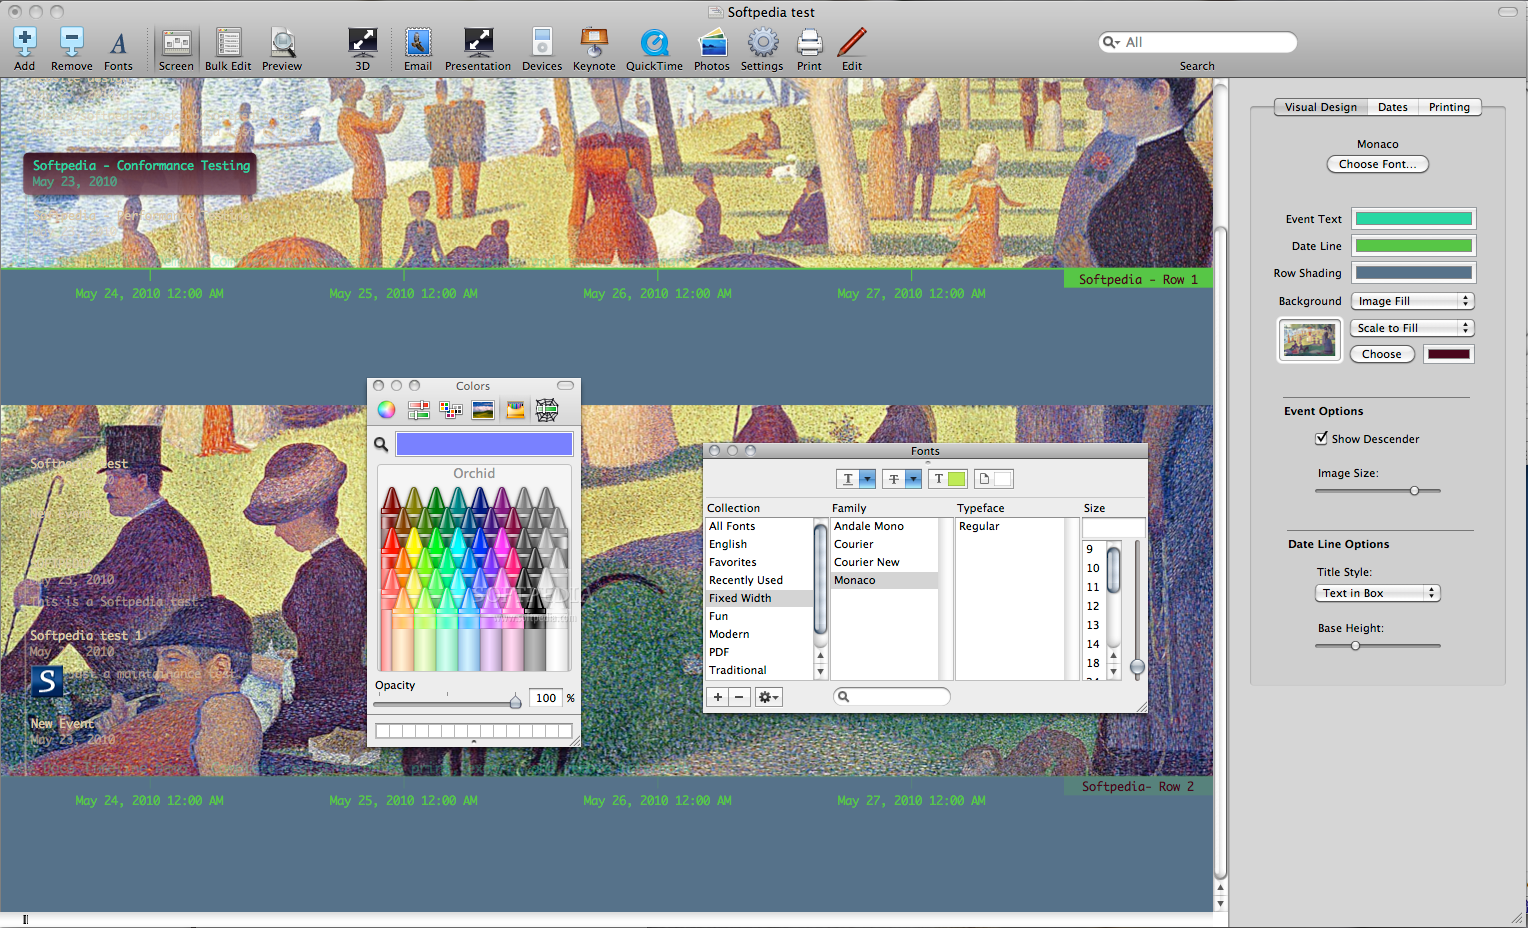
The main window displays an extremely simple interface, consisting of a top toolbar, a central main area, where you can add events in a chronological order and, optionally, a right sidebar with details regarding the visual design. In the demo version you will see, right above the chronological bar, a watermark that will remind you that, after purchasing a license, you will be provided with even more features for printing and exporting your documents.
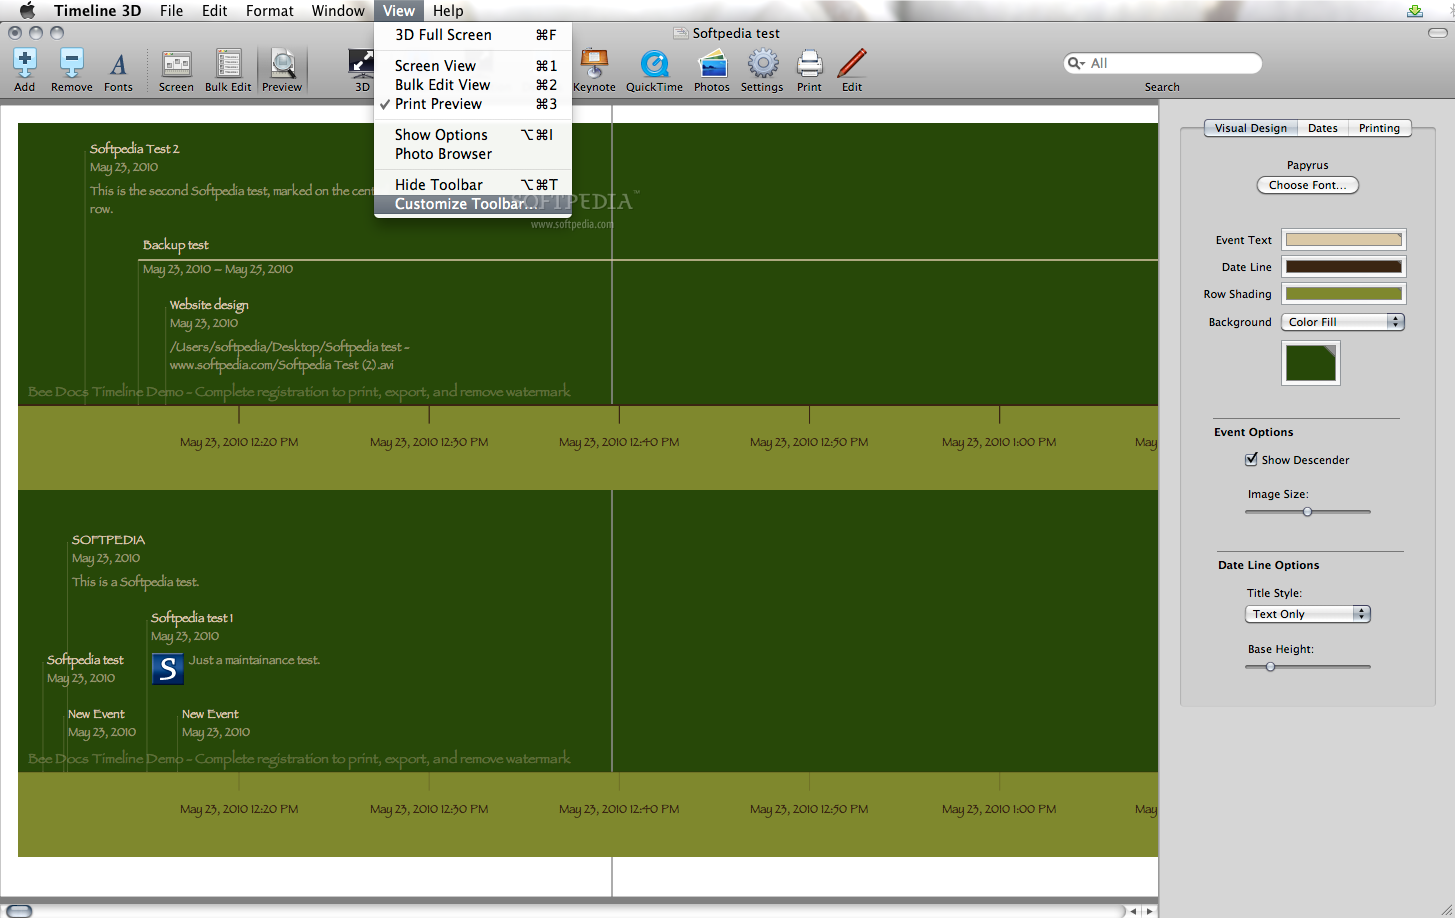
The toolbar can be easily customized by using the right-click contextual menu. By default, it includes the following elements: Add Event, Remove Event, Edit Event, Fonts, Screen View, Bulk Edit View, Print Preview, 3D, Email, Export to Devices, Export to Keynote, Export to QuickTime, Settings and Photos. You can also add other buttons as Separator, Space, Flexible Space, Presentation Mode or Print. Plus, the Toolbar includes a search bar that you can use for searching a keyword in the current document.
The right sidebar displays three tabs: Visual Design, Dates and Printing. In the Visual design window, right under the above presented three tabs, you have a button for quickly changing the fonts and three customizable color strips for adjusting the nuance of the currently selected Event Text, Date Line or Row Shading.
The Background color or image can also be set by choosing the type of fill mode from the provided drop-down list and by matching the tones directly in the color palette.
Above the color options, you will find two progress bars for setting the Event and the Date Line Options. Furthermore, The Dates tab lets you choose the Event Date and the Row Format. Finally, you have a Printing tab for setting the Page Size and the document Margins.
Back to the main window, there is nothing more to be said, except for the fact that it supports different types of Views and Formats for the Date Line that will be discussed in more detail later on.
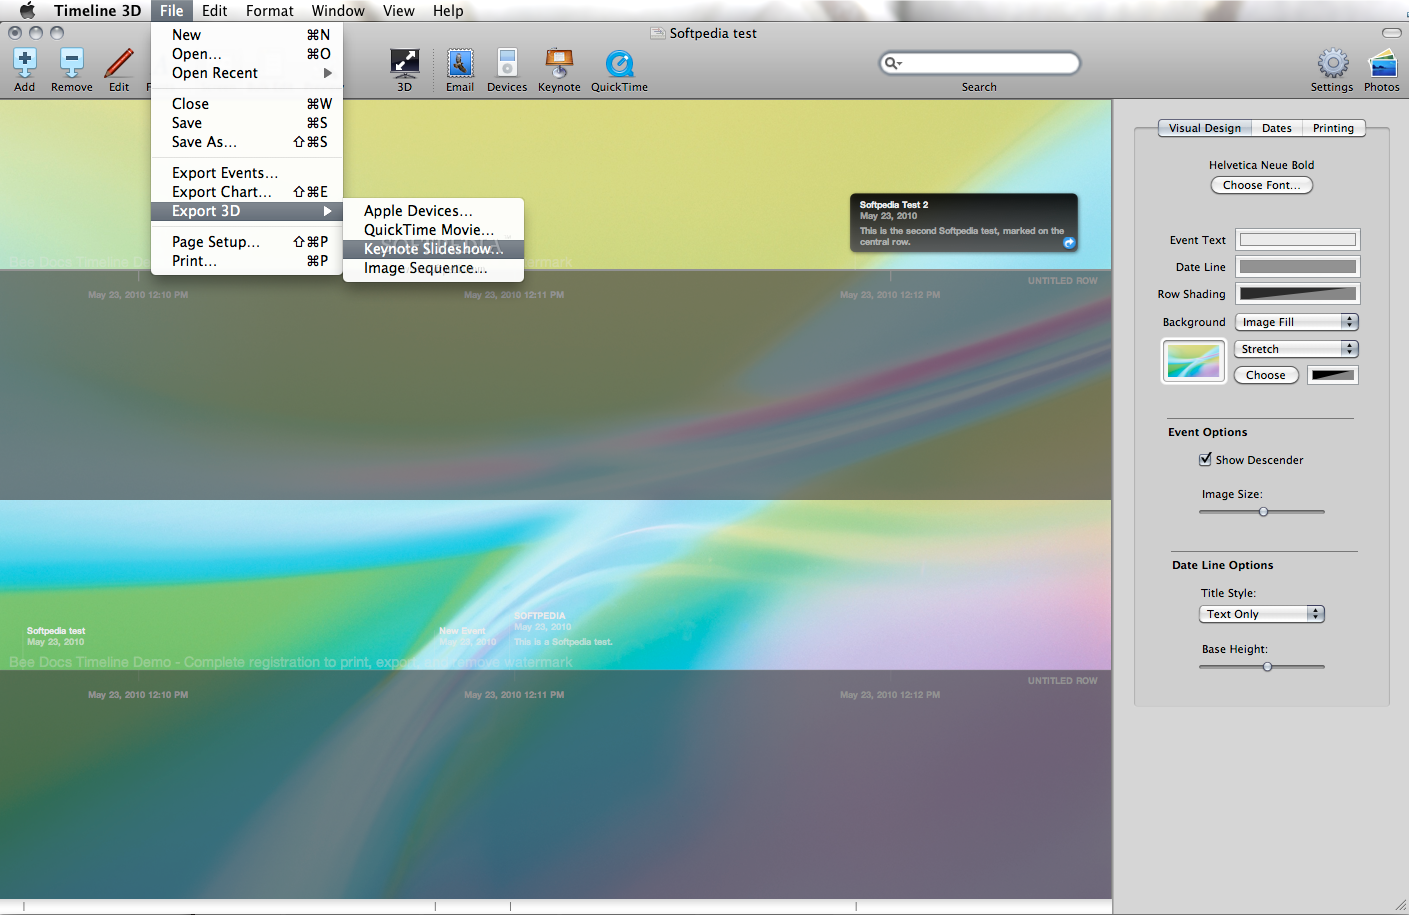
In a nutshell, The File menu allows you, in addition to the classic options, to export Events, Charts and basically any 3D document in an Apple Devices compatible format or as a QuickTime Movie, Keynote Slideshow or Image Sequence.
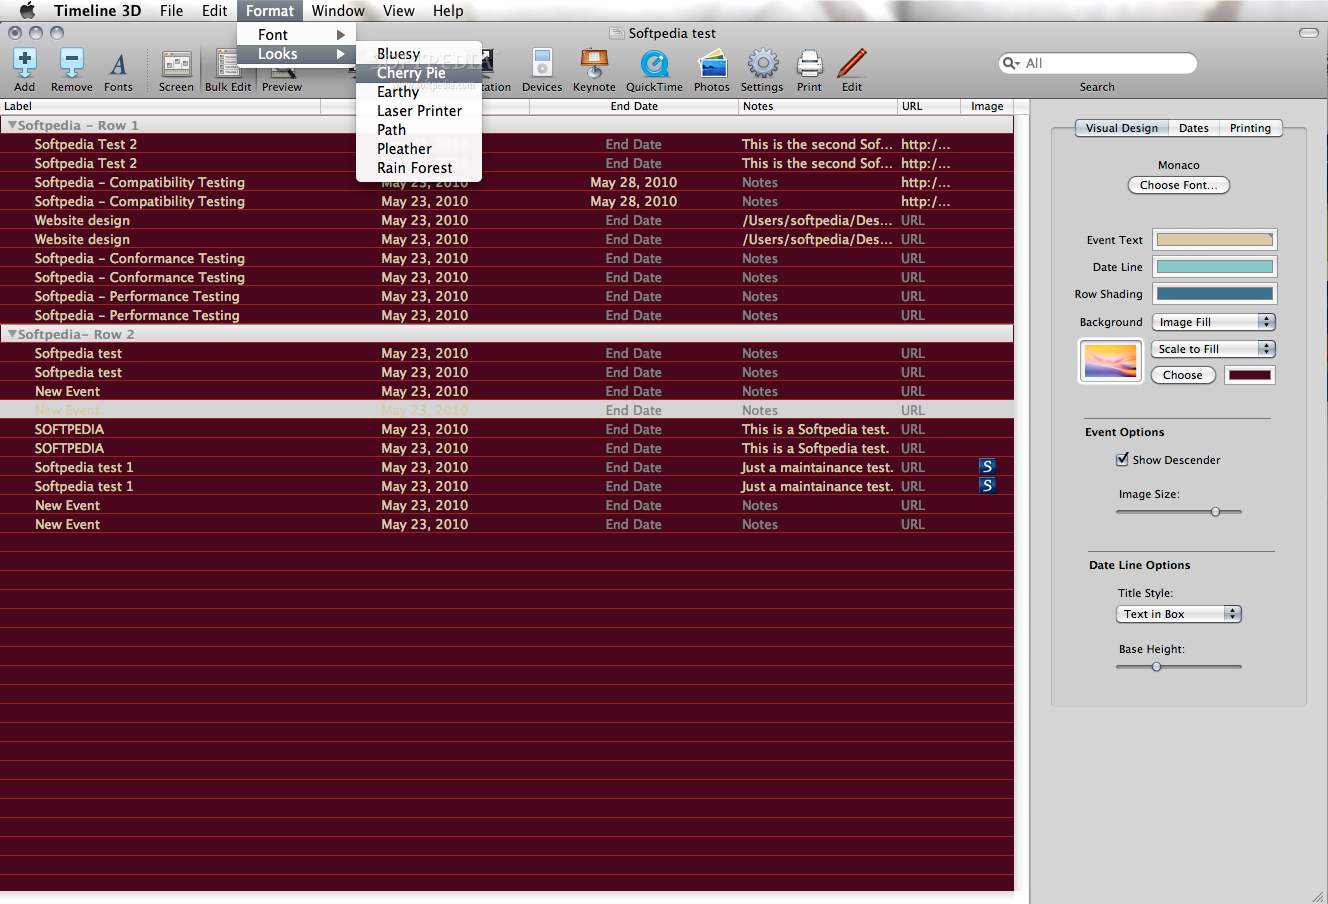
The Format menu tab allows you to quickly switch the fonts and looks. The View menu enables you to toggle between the 3D Full Screen view and the simpler Screen, Bulk Edit or Print views. Also from the View menu, you can hide the Options sidebar and open the image browser.
The Works
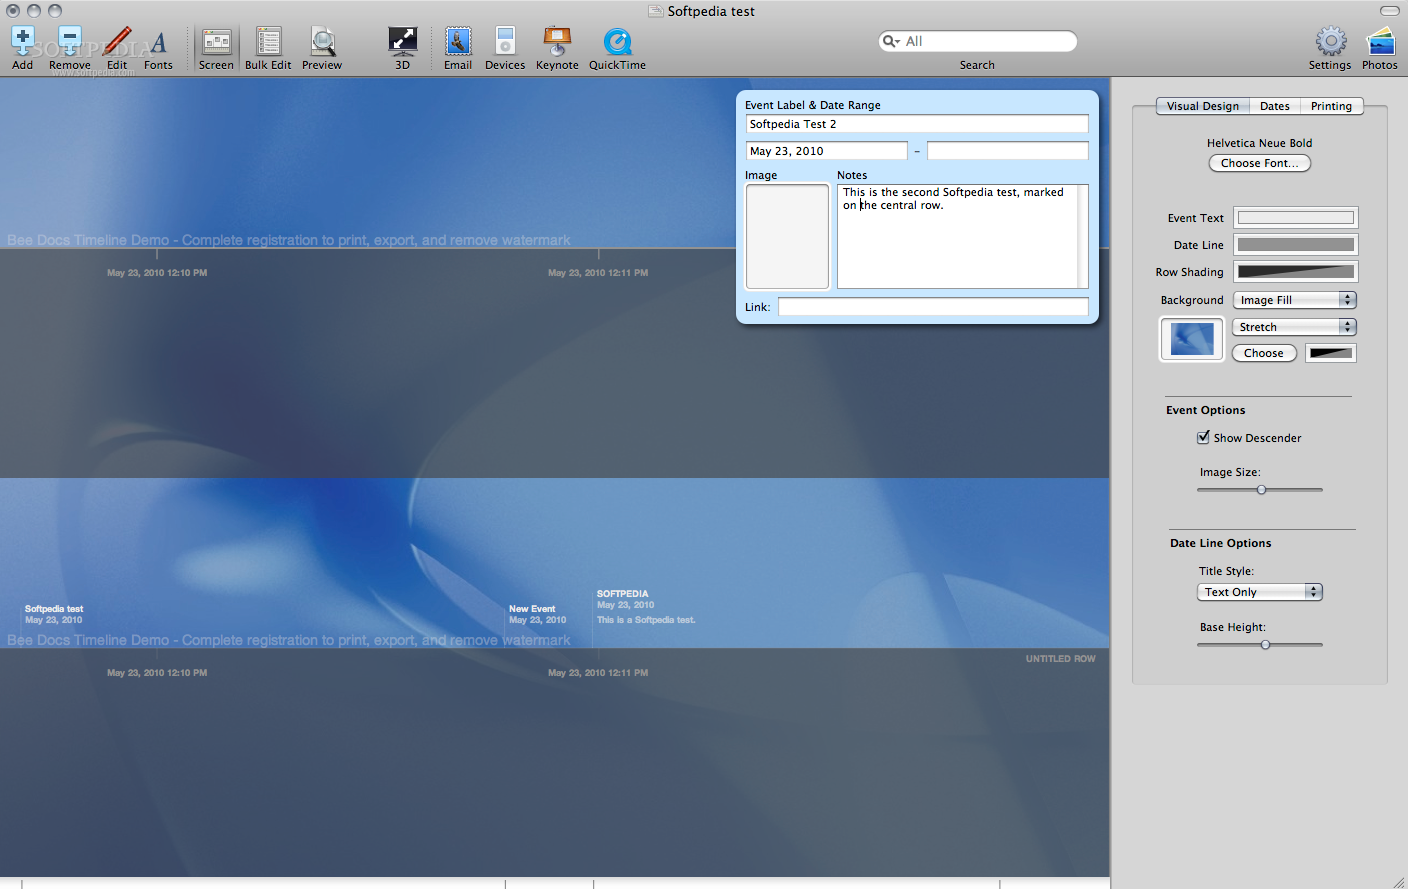
As mentioned before, the first thing you are asked to do when you create a new timeline is to decide yourself for a background image. Next, you are welcomed to populate the main window with events. And how exactly can you do that? It is not complicated at all: simply click on a certain point on the Date Timeline Bar and fill in the small pop-up that opens by default, when such a mouse event occurs. In the pop-up, you can type an Event Label and a Date Range but also drag and drop an image or write a short note regarding that particular event.
Every time you feel like trying a new look, you can use the Format menu or the sidebar options to adjust colors and fonts. The Looks options provided in the Format menu not only lets you switch between a bunch of predefines themes but also enables you to experience different ways of displaying the text, for instance, in cascade or as a plain table with rows and columns.
Also, for previewing how a to-do list looks like as a Keynote presentation or as a QuickTime movie, all you have to do is to choose the appropriate options from the File menu or to hit the buttons in the toolbar.
Furthermore, you can keep the text format from one of the predefined seven looks and change only the background image with one from your own Photo Gallery or from the Desktop Themes provided by your Mac when you install the OS.
The Options sidebar, besides the color customization options, provides you with a whole tab for customizing the Event Date Format. By using the three drop-down lists, you can select a more official or informal date format, as well as an Era and a Time format. By default, every date is stored with sub-second precision but, as a general rule, any date you enter or import will be converted to a precise date and assigned event.
Moreover, the notes you enter will be validated in accordance with the currently selected date format. If you want to enter a date that does not match the date format assigned to an event, you will, most probably, receive an error message. This is why it is recommended to choose a date format that includes as much precision as possible, by the date you edit a particular event.
Another cool feature of the Bee Docs Timeline 3D application is the power to automatically suggest you a layout for your events, so that you can focus on the content and not on the presentation. More exactly, the Auto-Layout feature is the technology that allows you to create complex timelines in no time, by using the automatic importers.
For a better understanding of the way the application works with importers, here is a short list of the elements that can be automatically introduced in your timelines: chart contacts from your Address Book, chart photos with iPhoto, project messages, to-do lists or even milestones or graphs from your online Basecamp projects, chart events from your iCal calendar, chart songs or whole albums from iTunes, news feeds or blog posts through an RSS reader or/and the NetNewsWire application and much more.
Finally, the Preferences window asks you to specify if you want the application to check for software updates at launch or optimize the size of the imported images. It also lets you set the Even Selection Speed or the moment when an event/a slide should be opened.
The Good
The Bad
The Truth
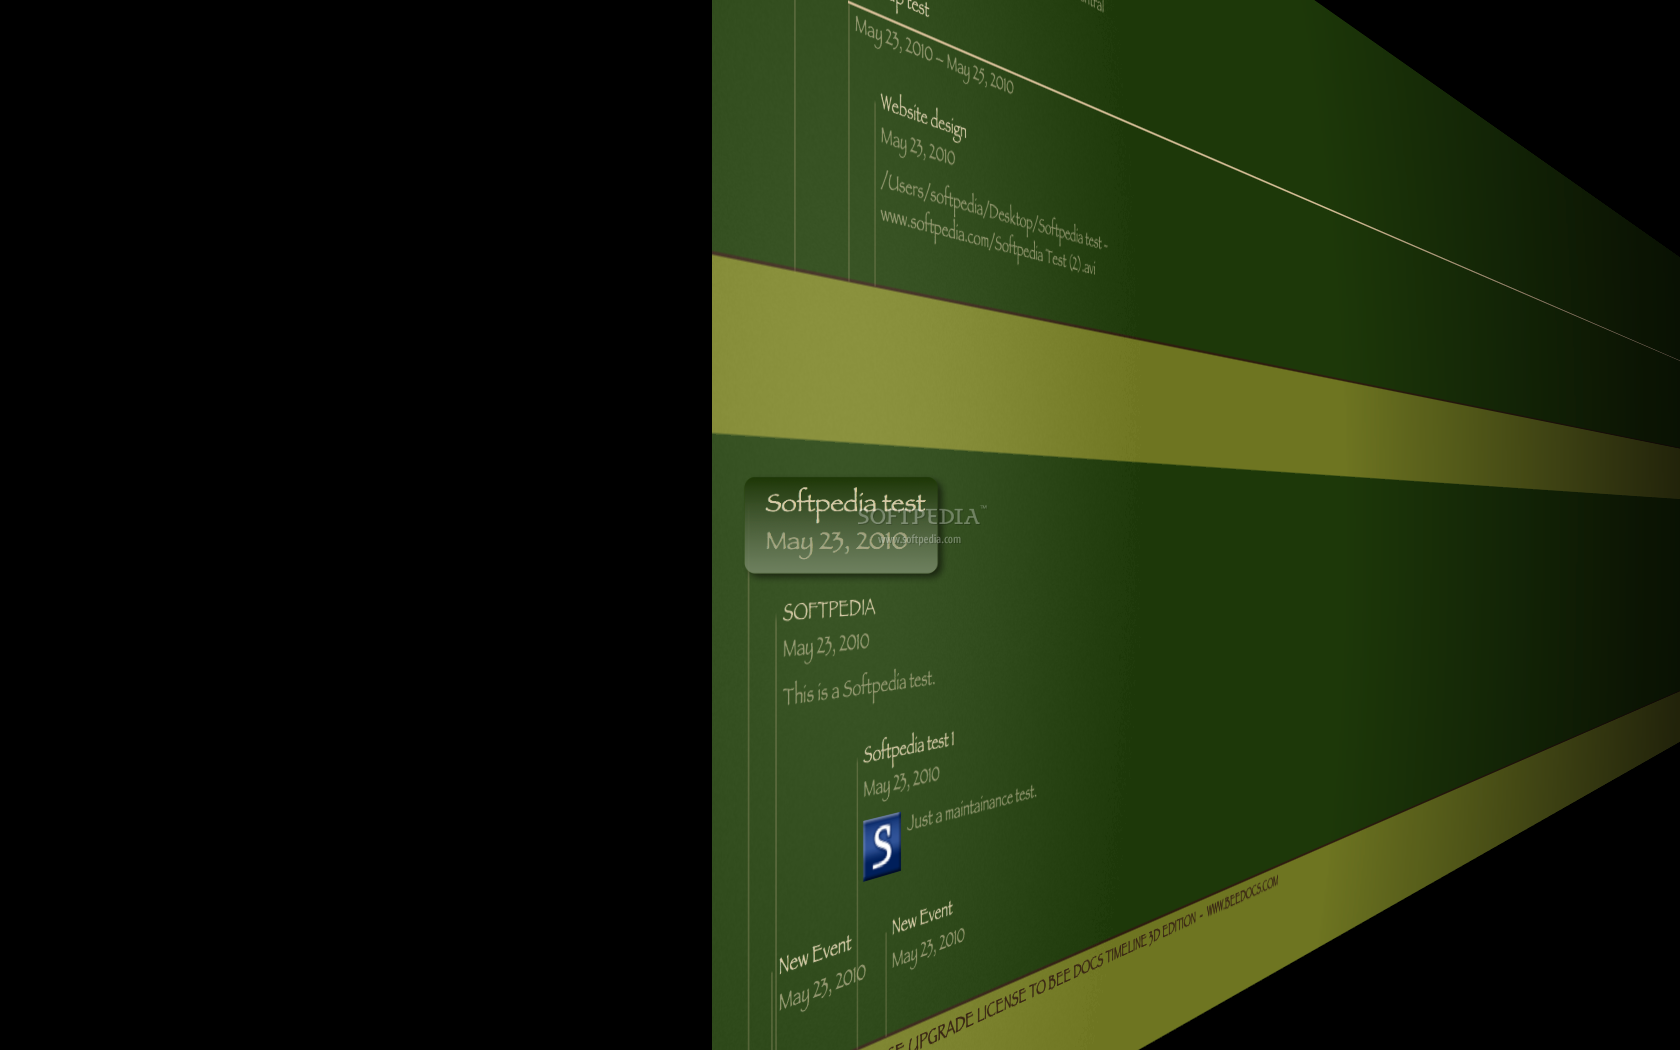
Here are some snapshots of the application in action: