14 DAY TRIAL //
 Creating well-structured and relevant assessment tests for your students is not always as straightforward and simple as it might seem. The tests must comply with a lot of requirements and have to be both interesting and efficient from evaluators’ point of view.
As a teacher, you have to be sure that you have managed to find the perfect balance between questions that imply theoretical and practical knowledge, but also that you have provided all your students with the chance to have a good grade, regardless of their attendance or of their learning method. As a learner, you should, in the first place, be sure you have found the right approach for covering all the topics and understood them thoroughly.
At least for the most comprehensive and complicated chapters that you have to go through for your final exams, it is advisable to use a piece of software like ReCourse - a smart tool that can easily design a set of efficient assessment tests.
So, no mater if you are a teacher or a student, you can fully enjoy the way ReCourse knows how to define phases, actors and conditions. Moreover, you will soon discover that, with ReCourse, assigning roles and resources or creating an arborescent view of the modules and phases in the process of learning is a kid's play.
The Looks
The main window is split into two main areas: the left area, which occupies by default the main part of the window, and the other, where you will see the content and the main elements of your projects plus one right sidebar, where you will see the learning units, and the folders included in the project and/or the resources, organized by categories.
On the bottom of the sidebar, you have five icons that show you how you can toggle among different views. As they do not have a predefined name, we will try to assign each of them a generic name, in accordance with their icons. As a result, we will have the following different views: Learning Designs, Activities, Environments, Roles and Browser.
Back to the main area, placed on the left, you can see on the top of the window a bar with buttons. The first one, representing a little window with a light blue bar on the top and a yellow plus sign on its top right corner lets you browse through the existing Learning Units and through the resources repository but also to open a template or to create a new Unit of Learning.
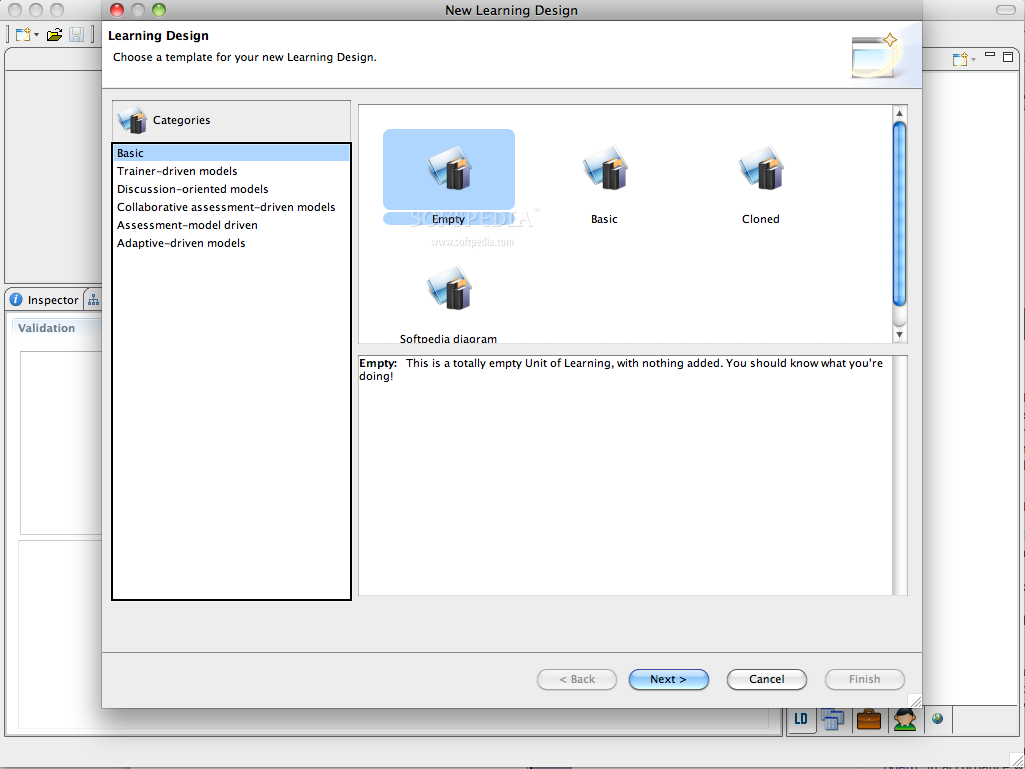
If you choose to create a new Unit of Learning, a fresh window will be opened and you will have the following options: Empty, Basic or Cloned. On the left of the templates, you will see a list including the following Categories: Basic, Trainer-driven models, Discussion-oriented models, Collaborative assessment-driven models, Assessment-model driven and Adaptive-driven models. Each category includes specific templates that will be analyzed later on.
Now, back to the main window of the application, right next to the small white-and-blue window button, placed in the toolbar, you will see in the same group of buttons a mustard icon for opening a folder from your disk, and a blurred, light blue one, symbolizing a diskette for saving the content of your current documents.
In the next group of buttons, you can see two yellow arrows for browsing through the opened windows and a red crossed button for closing the current window. In the next group, you have an icon with arrows and a tree on it for hiding or displaying the right side panel, a round blue button for opening the Inspector window, a Preview and a Checker button and, finally, a button for opening the CopperCore Manager or, in other words, the window where you can see the Units of Learning that have been created up to that moment and that were already placed on the server.
The last group of buttons lets you introduce new Properties and Conditions. The last button shows you an arborescent structure, which means it can be used for visualizing your current project from the top, or from different perspectives, in the Visualizer window.
The main menu does not have any special options, except for the Tools tab where you can find an option for opening the OpenDocuments.net website and one for handling with the Query Widget Server.
The Windows menu tab, as expected, lets you quickly jump to one of the abovementioned main views: Library, Inspector, Preview, Checker, CopperCore Manager, Browser, Properties, Conditions and Visualizer.
The Works
If we were to give a name to the area placed on the left side of the main window, we should probably refer to it as the Contents frame, as it is called in the Help menu. Anyway, regardless of its name, if you want to see something in this area, you should first create a new Unit of Learning or open an existing one from your disk.
In case you have decided to create a new one, the first thing you are asked to do is to specify a Name and a Location for your new Learning Design (LD) unit. When you are done, hit the Next button, placed on the bottom of the temporary opened pane, for going to the next phase of the designing process. Here comes the Overview pane, where you can add a Title, as well as some Learning Objectives and the Prerequisites for your project.
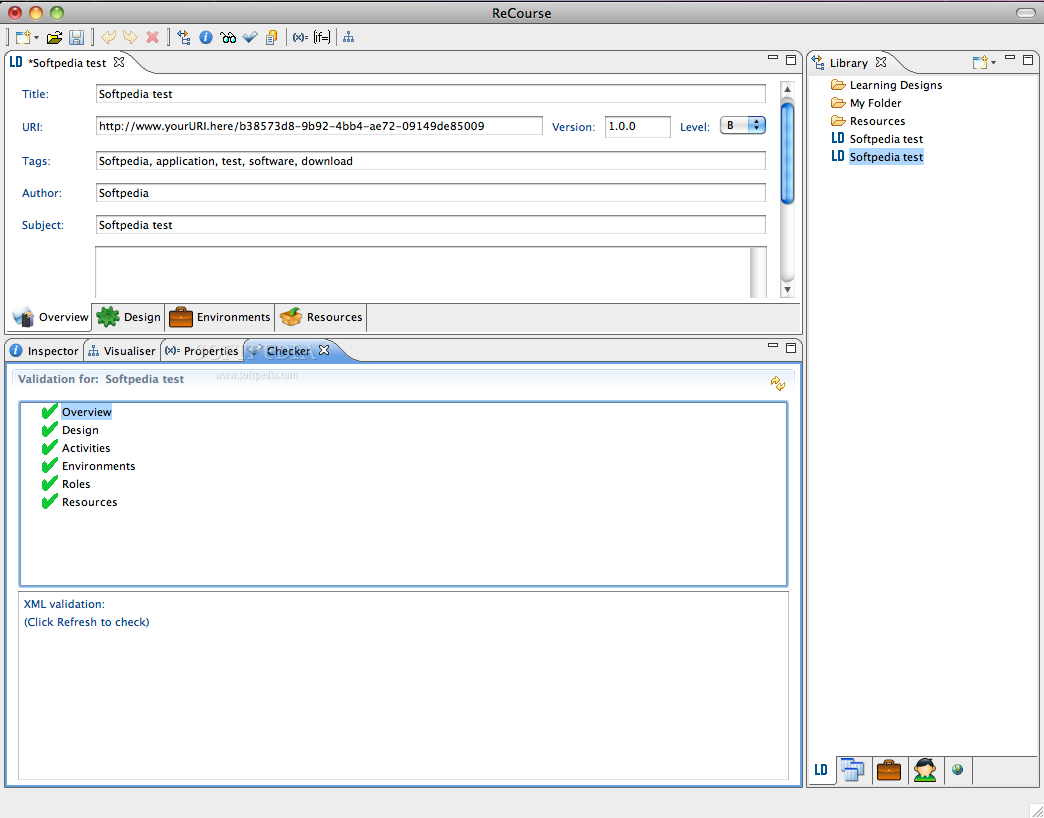
The last phase in the designing process for your freshly created Unit of Learning is the one where you can see, in a single window, a summary of the data assigned to your current LD, including the following pieces of information: Title, URI, Version, Level, Tags, Author, Subject, Description, Learning Objectives, Prerequisites and Rules for completing the respective Unit of Learning. On the bottom of the main window, there are four tabs for switching among the main perspectives: Overview, Design, Environments and Resources.
In the Design window, you can see, on the left side, the main Modules and the Phases or the status of the main activities. On the right side of the main window, you will notice a table with three columns revealing the name of the Learner and that of its assigned Teacher for each type of activity.
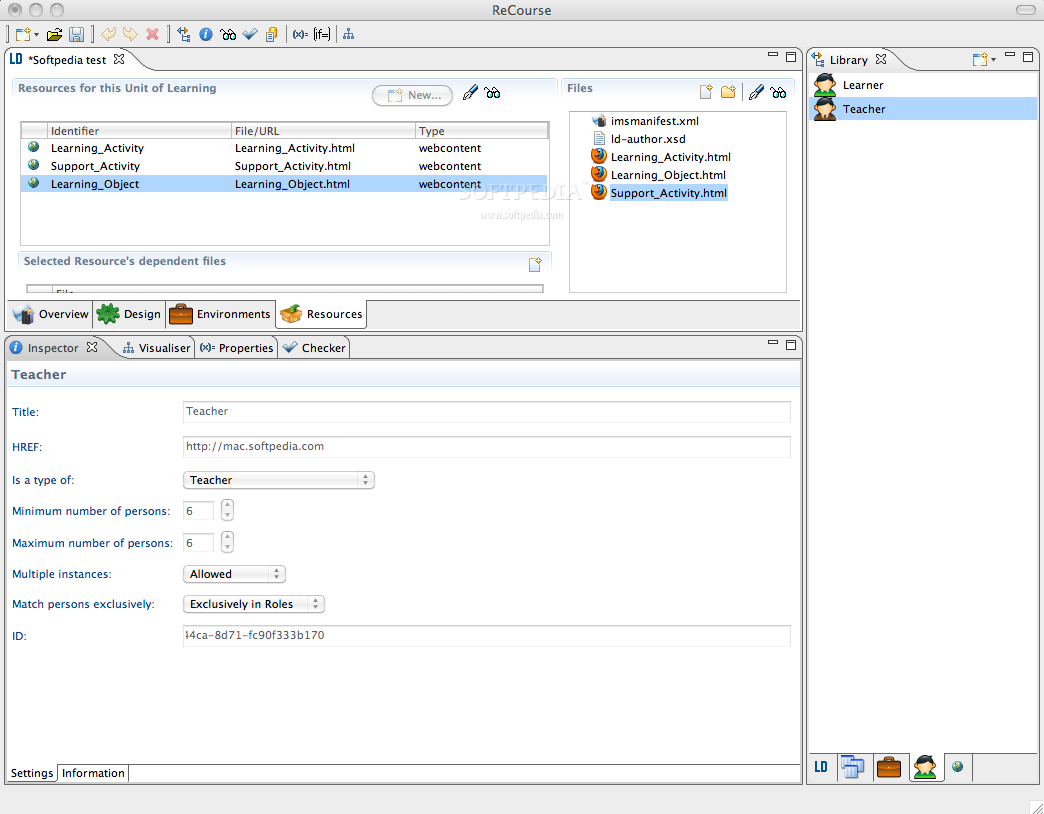
Furthermore, the Environments tab displays on the left a list with the environments that have been created up to that moment and a Palette side bar, on the right. This lets you perform the following actions: Add Environment, Connect Environments, Add new Components as, for instance, Knowledge Object, Tool Object, Send Mail, Conference, Index Search, Monitor, Note and manage Controls. At the end, the Resources tab lets you view a list with all the activities and objects that were assigned to the current LD, with their Identifier, File/URL and document type.
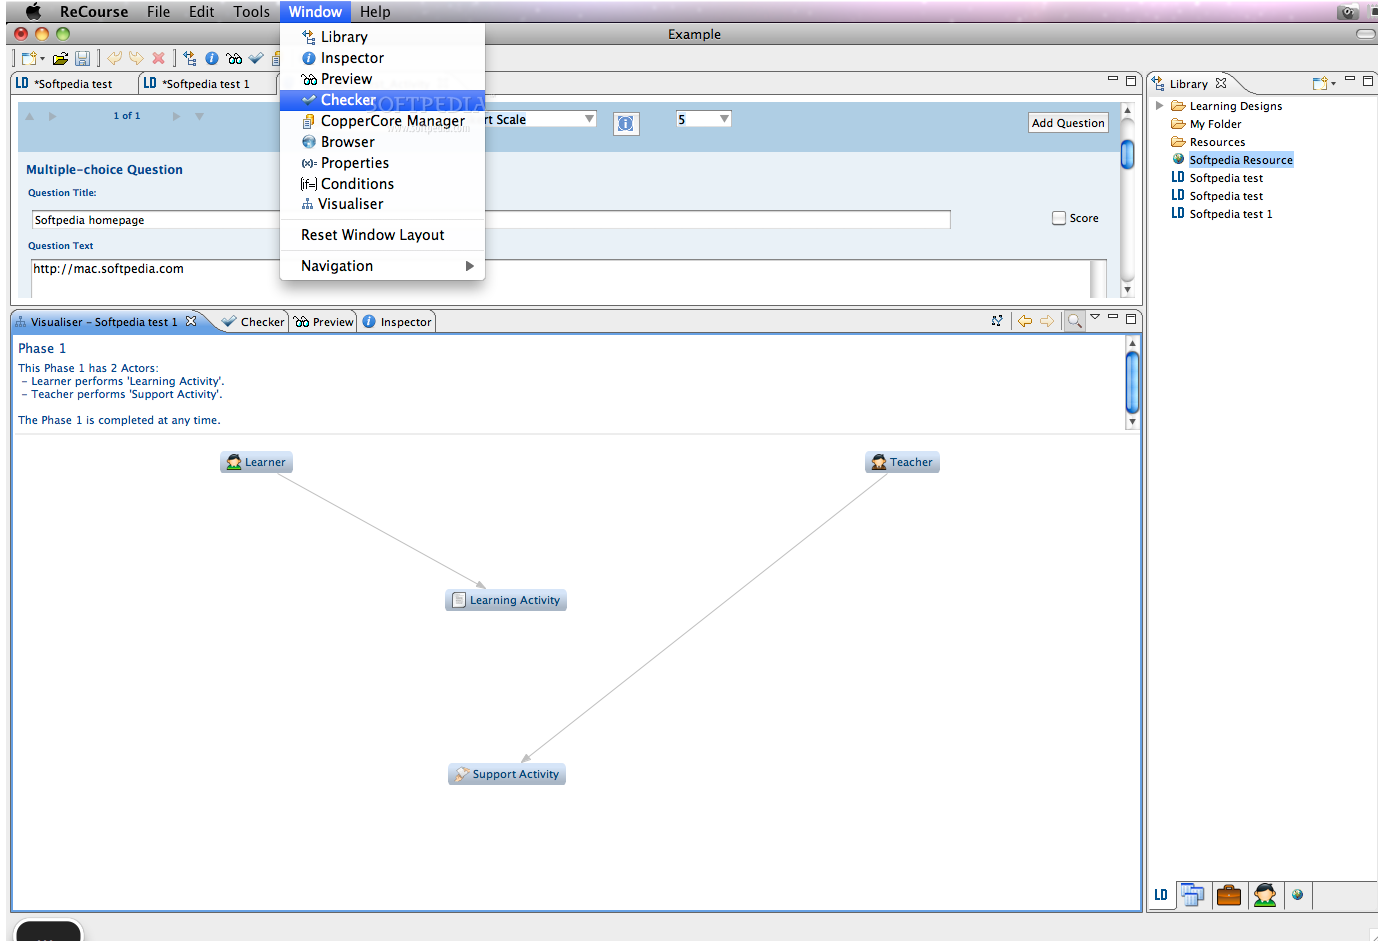
To toggle views, use the Window menu. From here, you can quickly open an Inspector window for a selected element, see a Preview of the tree or open the Checker window, where you can ask for an XML validation.
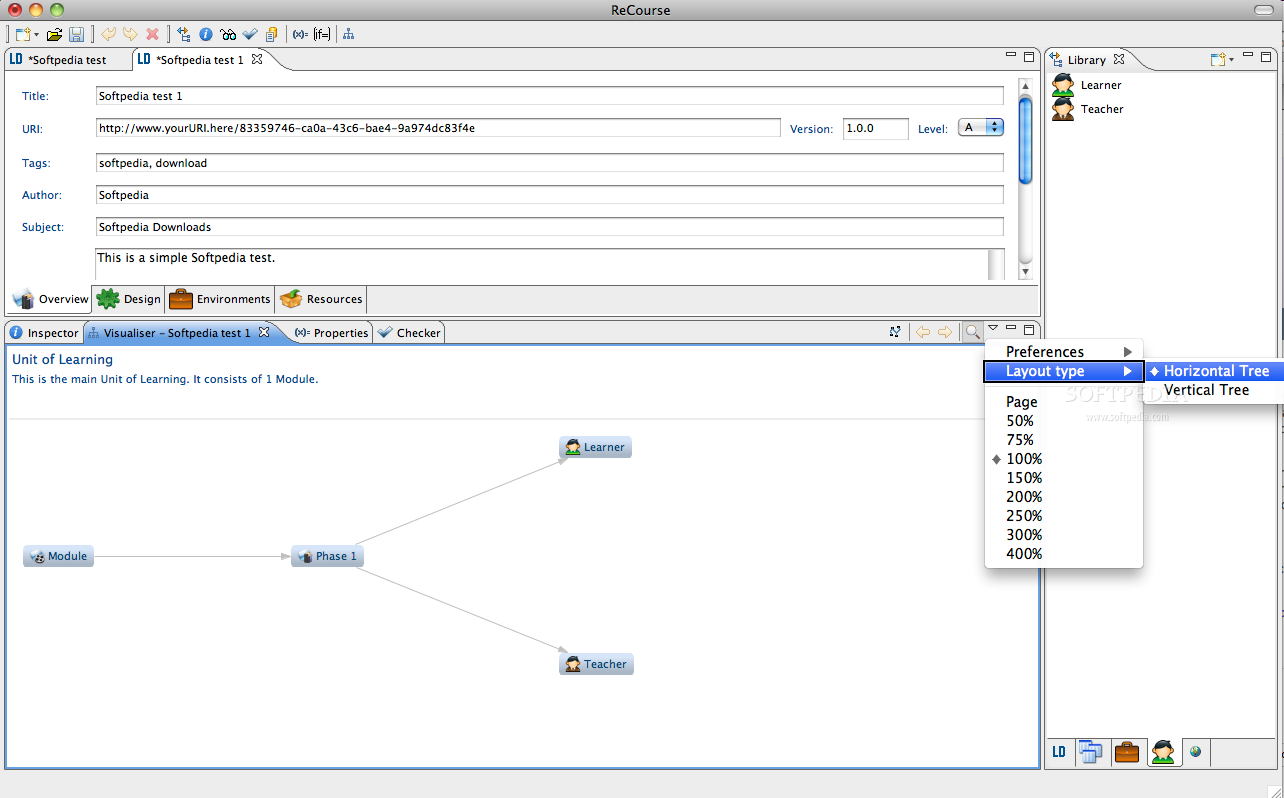
The Visualiser option opens a new window with Modules, Phases, Learners and Teachers displayed as nodes in a graph. When you click on a node, the contextual menu lets you modify the Layout or open the selected node in Inspector. The right-click menu also lets you pin or unpin the selected node, go Back or Forward and zoom the current window.
So, let us take the case of a Learner node. If you choose to expand it in the Inspector window, you will have the option of editing the following fields in the Settings tab: Title, HREF, Is a type of, Minimum number of persons, Maximum number of persons, Multiple instances, Match persons exclusively and ID. The Information tab, placed on the bottom of the window, lets you add new items. In our case, as we have chosen to expand a Learner node, in the New Resource Item widow, there are the following fields: Title, File Type, Type of content, URL, Existing File or Existing Resource.
To return to the arborescent view, use the arrows placed on the top right corner of each section or click directly on the Visualizer tab. In line with the yellow navigation arrows, you can find a small transparent arrow pointing down that, when clicked, enables you to access the Preferences pane or modify the Layout type of the nodes, so that you can easily switch between the Horizontal and the Vertical Tree Views.
In case you want to define new Properties and Conditions, click on the (x)= and on the (if=) button, respectively. These are placed on the top of the main window and, when click opening a new window, you can see more info about each item.
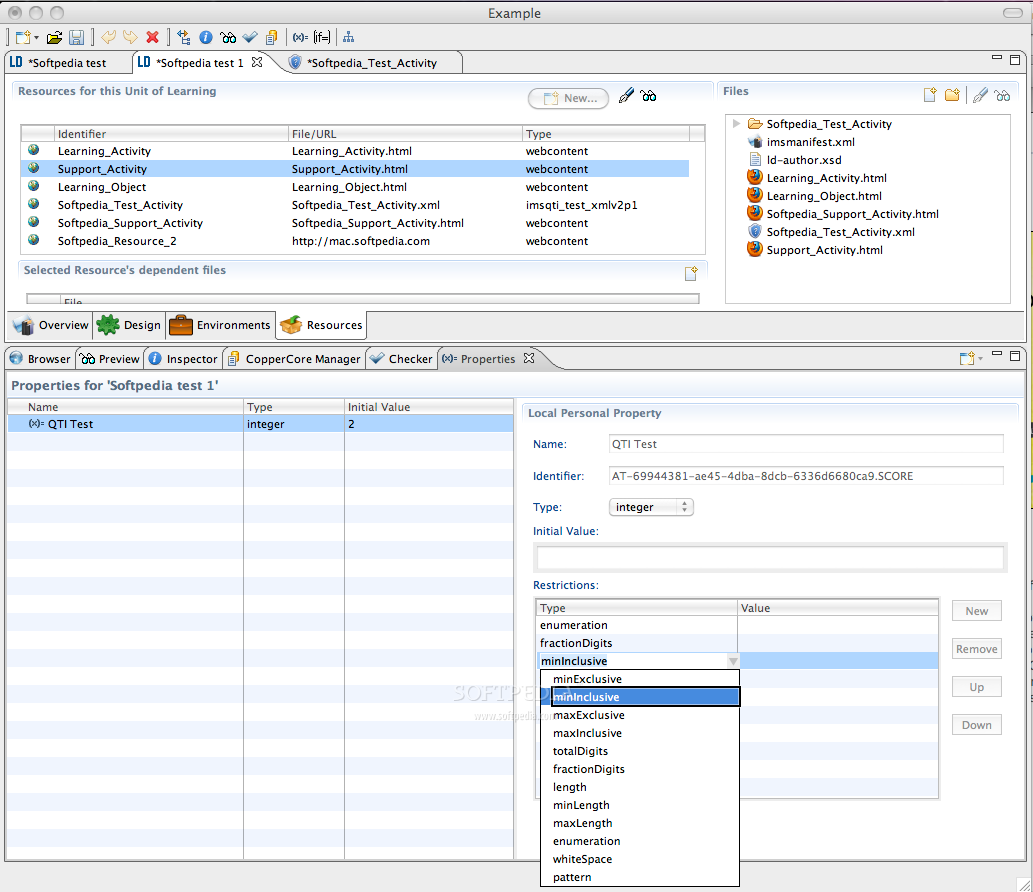
The Properties window displays the info in a table and lets you add new items with a click on the white-and-blue window button, placed on the top right corner of the current opened frame. You can choose among a New Local Property, a New Local Personal Property, a New Local Role Property, a New Global Property, a New Global Personal Property and a New Group.
For a Local Property, you can edit, for instance, the following fields: Name, Identifier, Type (String, Boolean, Integer, URI, datetime, real, text, other), Initial Value and add a list of Restrictions (enumeration, fractionDigits, minInclusive, maxExclusive, totalDigits, length, whiteSpace, pattern, etc.). The Conditions tab provides you with only two options, namely, to create a New Conditions Collection or a simple Than-Else condition.
Furthermore, the Tools menu, as mentioned before, enables you to connect to a server and submit queries to a database. For this, you have to enter a valid URL for the Query Widget Server.
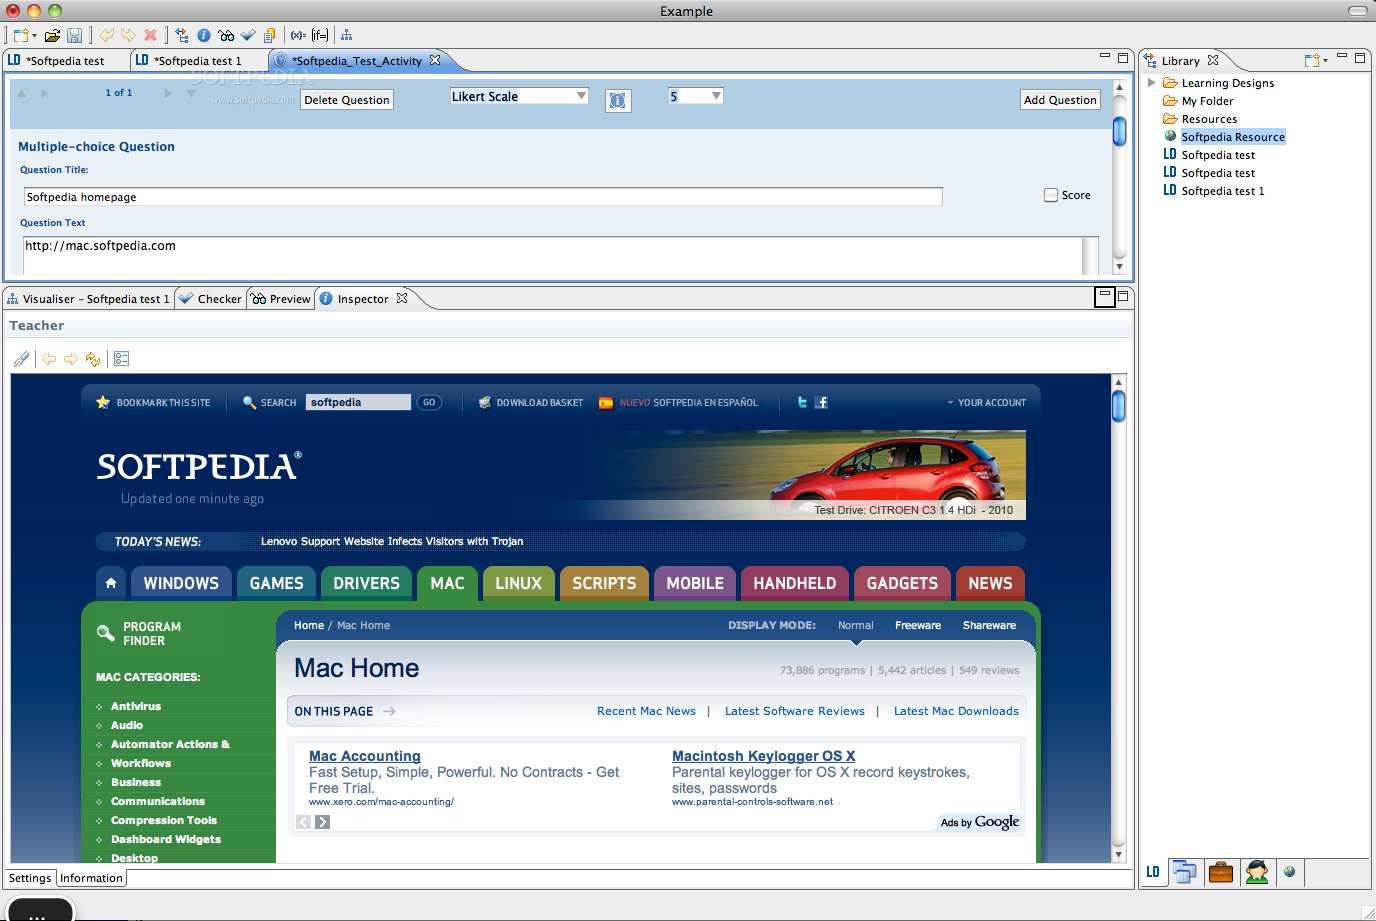
As for Resources, you have quite a lot of options to choose from. The most comprehensive and easy to use is, of course, the one that lets you load a whole webpage as a resource.
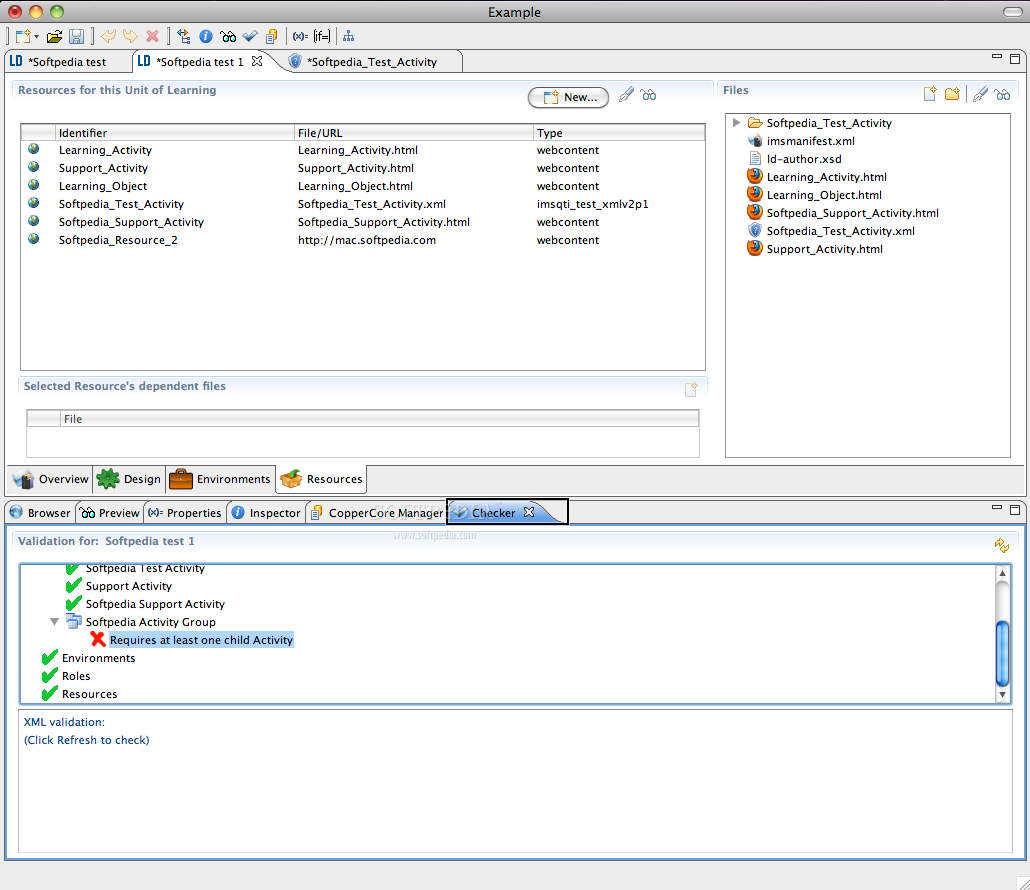
To verify the status of the project and see what needs to be added, use the Checker option in the Window menu. Here, you can easily drag and drop the tree nodes and see the phases and actors at a glance.
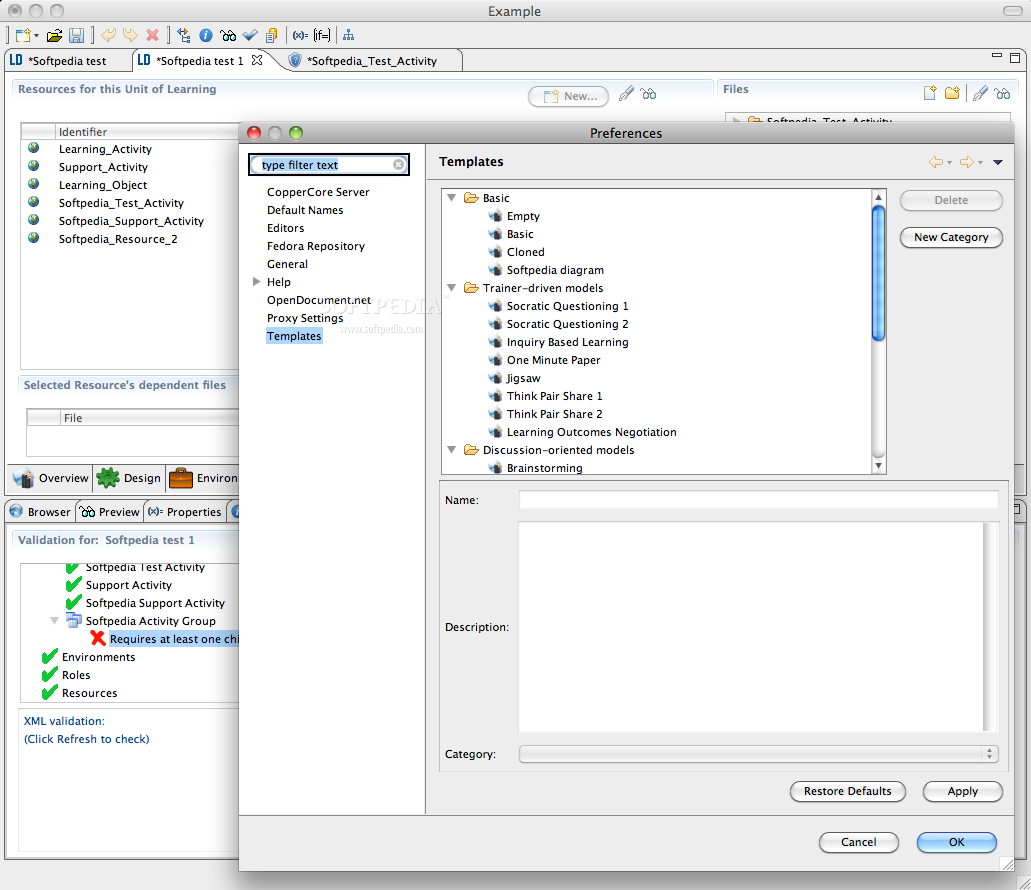
Finally, you can use the Templates included in the Preferences menu to further polish your projects. Here are just a few of the available templates: Basic (Empty, Cloned, Diagram), Trainer-driven models (Socratic Questioning, Inquiry Based Learning, One Minute Paper, Jigsaw, Learning Outcomes Negotiation), Discussion-oriented models (Brainstorming, Debate, Guided Discussion, 360 Degree Feedback), Assessment-model driven (Formative Assessment, Summative Assessment), Adaptive-driven models (Adaptive Assessment).
The Good
The Bad
Also, the navigation options are often a bit clumsy. I personally found myself in the situation of not knowing how I should go back to the previous view, without closing all the opened windows.
The Truth
All in all, ReCourse is a useful tool for creating nice-looking and well-structured assessment models, by topics and scope. It might get you to the point where you don't know what you should do next or how you could go back to the previous phase, as the navigation methods are not always so intuitive but, at the end, it will probably do what you have asked it to, including sending queries to an online server.
This article is also available in Spanish: Creador de exámenes para profesores y alumnos.
Here are some snapshots of the application in action: