14 DAY TRIAL //
 Some say that a good product will sell itself but today’s salesmen know better: advertising and display are as important as quality. Planograms is an application that allows you to easily create your own schematics, so that your merchandise will have the same look and feel, regardless of its location.
Creating a brand requires consistency, so having the same product(s) arranged in the same way in different stores will make it/them easier to remember by customers, creating the illusion of familiarity which leads to comfort, and in the end translates to spending money.
In case you’re not a retail connoisseur, you should know that most store managers use diagrams / planograms to keep track of and plan how certain products should be displayed and combined on each shelf.
In the race for the best sales possible, the use of the retail space must be optimized, and one cannot argue that it is better to see things in perspective before actually going to work.
The thing that sets Planograms apart from any other diagrams editor is the fact that it is able to store the products specification, outside the diagrams, making the centralization process a lot easier.
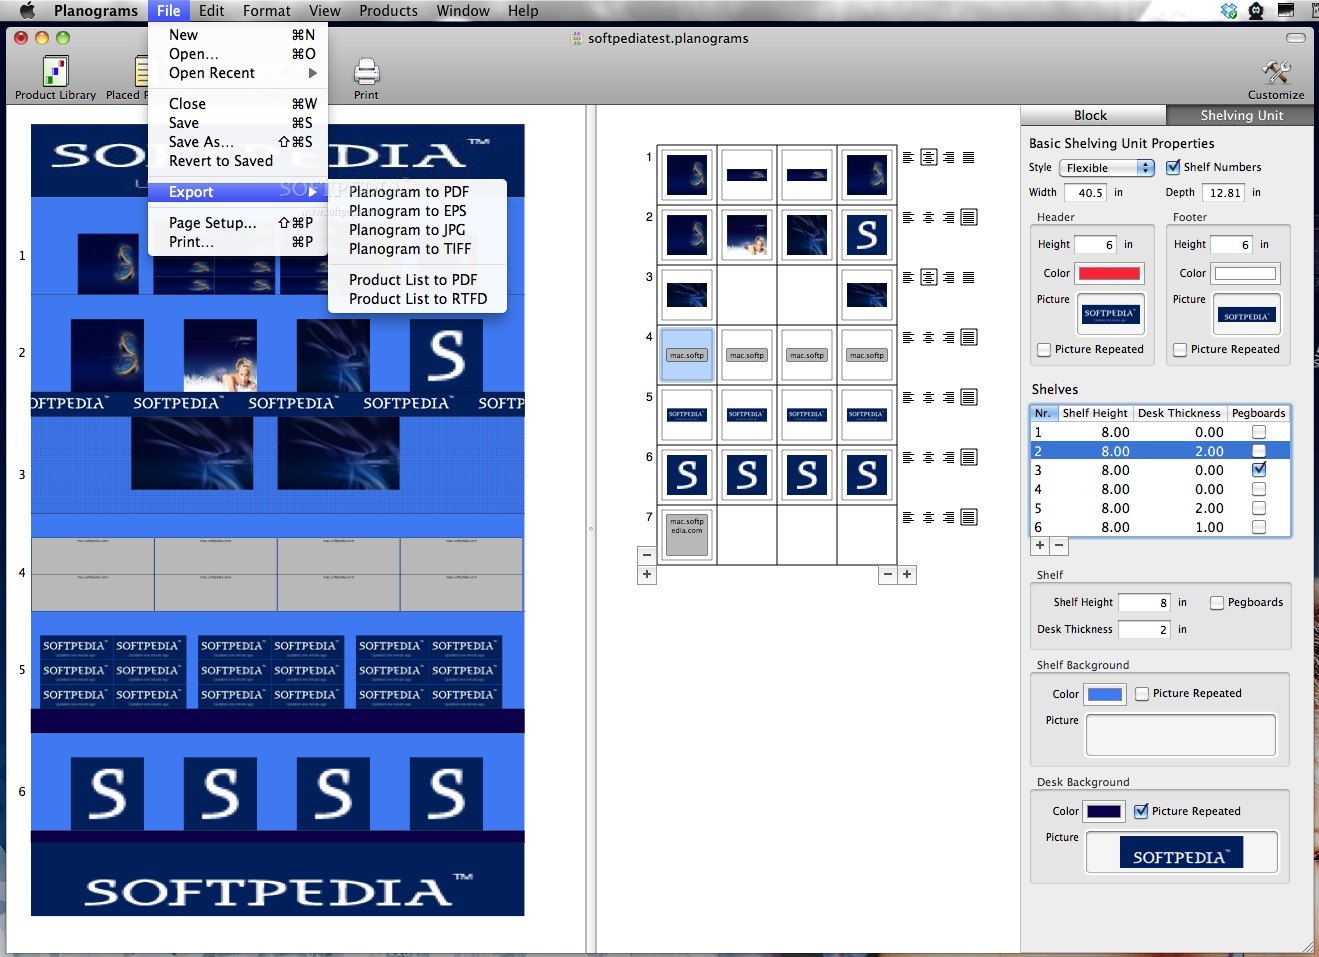
Planograms tries to meet the needs of any sales representative by offering the tools for creating professional looking diagrams in no time, and export them to different formats: PDF, JPG, EPS or TIFF.
The Looks
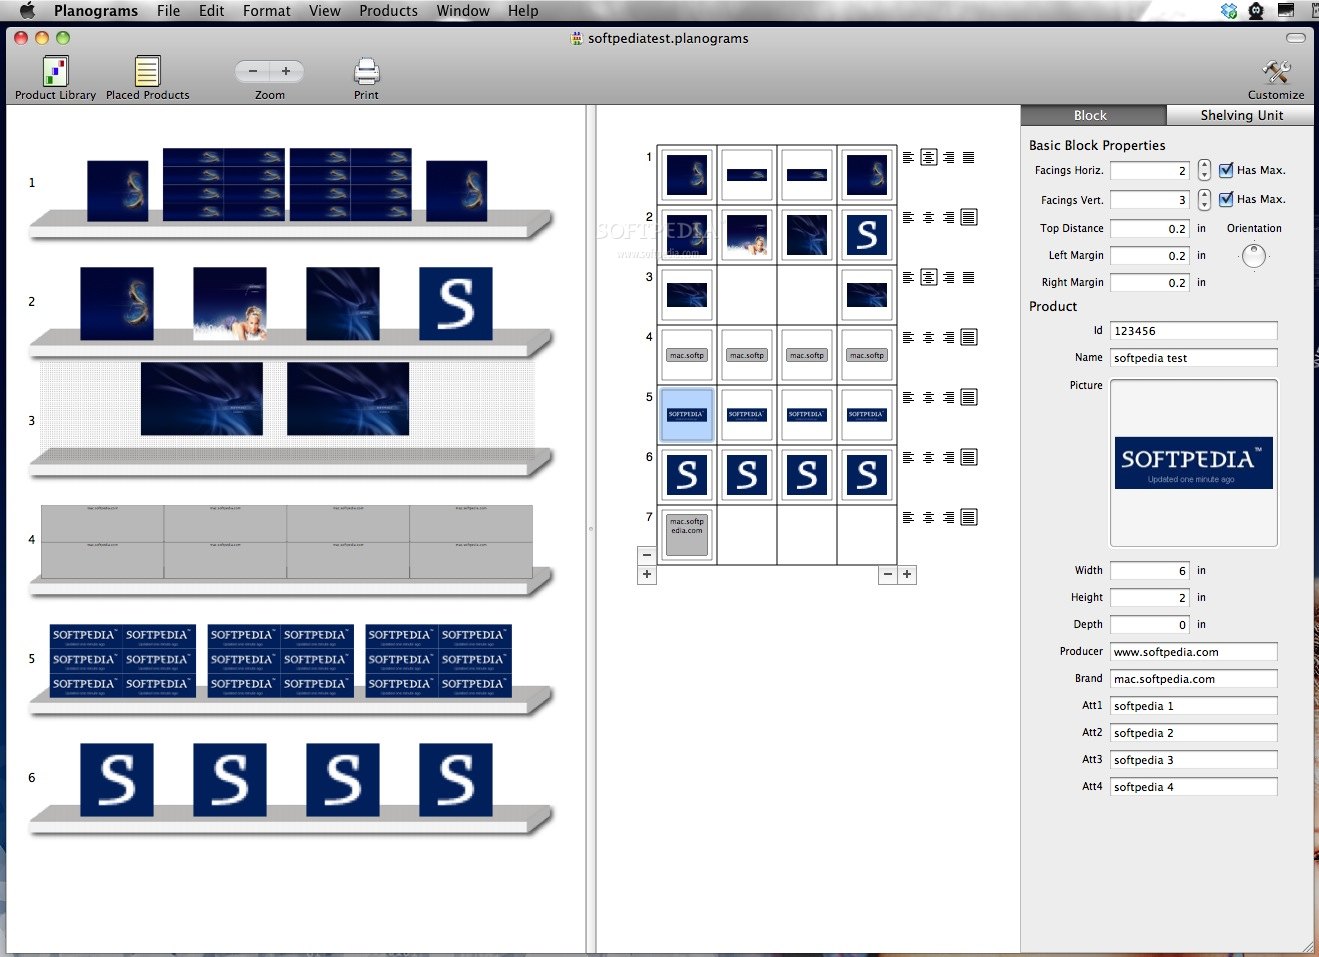
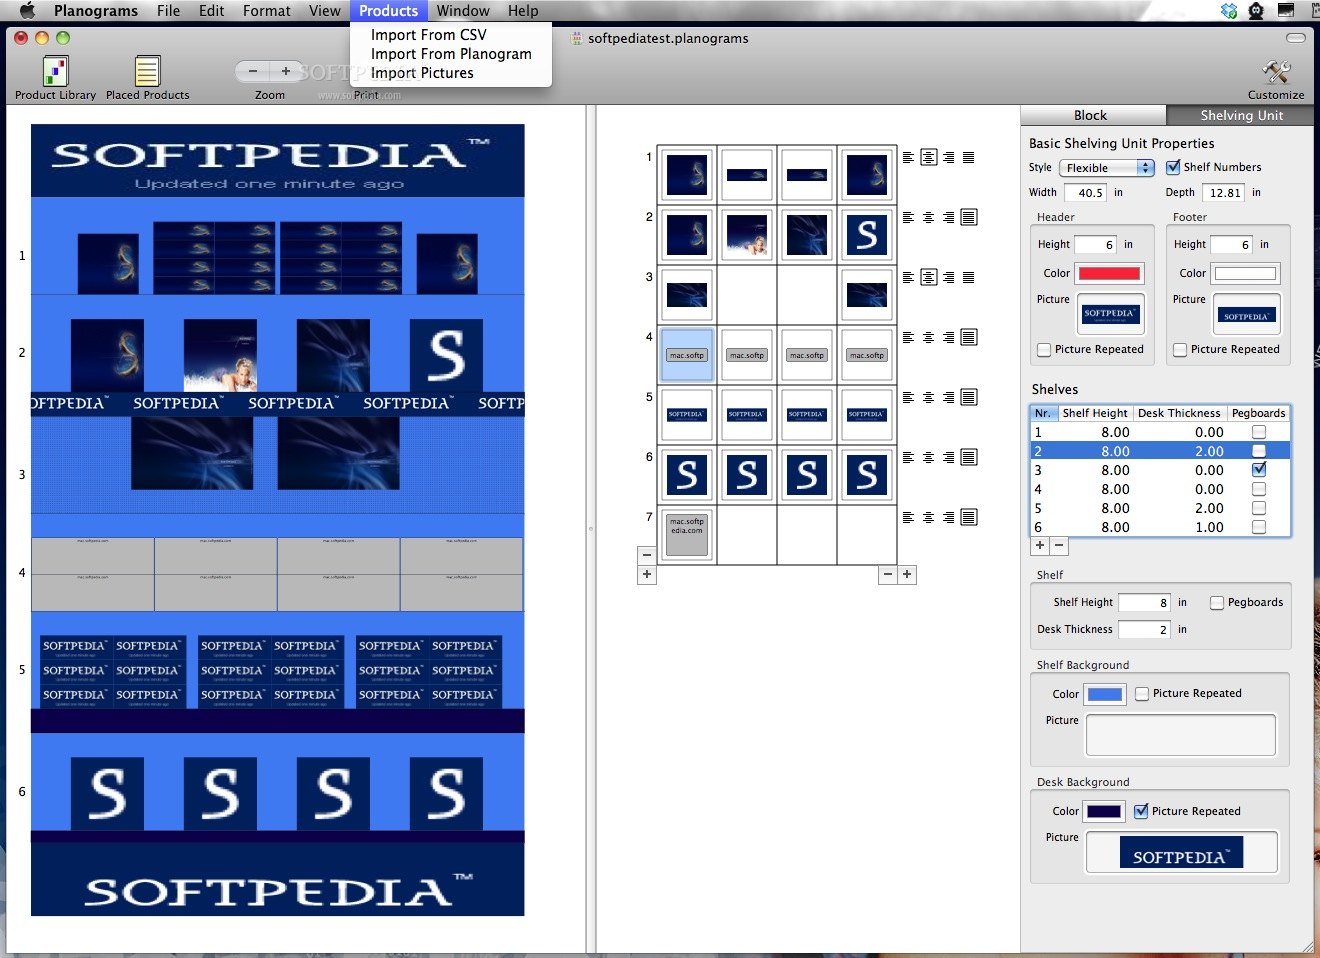
Planograms’ interface is simple, plain, well organized, looking to provide everything it has to offer on the spot, without the need for an extensive research. The application’s workflow is based on two elements: the products database and the shelving unit that will be in the end the planogram.
The main window deals with the second one and is divided in three different areas: the shelving unit preview, the products smart grid and the editor area where two tabs allow you to customize the blocks or the shelving unit.
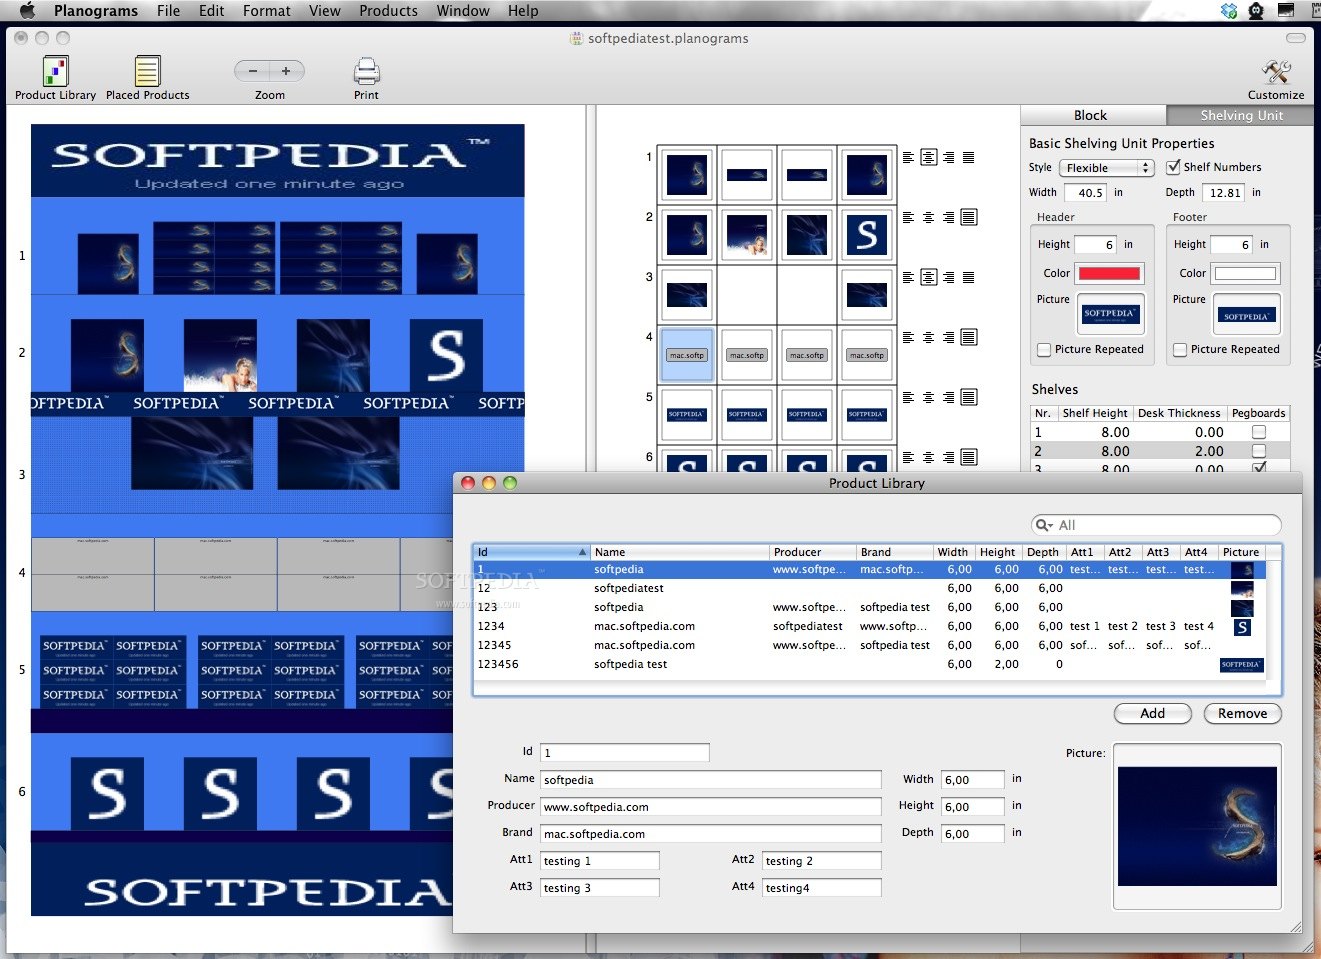
The products database can be accessed via a button situated on the top toolbar and opens up in a new window, where you can easily browse your products, add new ones or remove the ones that are no longer in stock.
Besides general data like the products ID, name, producer, brand and different specifications that can be stored in attachment fields, a product entry can also include an image.
Regardless the initial image size, within Planograms you can specify the image width, height and depth, and the picture will be automatically resized proportionally.
If you do not add an image, Planograms will generate one containing the product name but you must make sure to set the appropriate picture size (by default all values are 0).
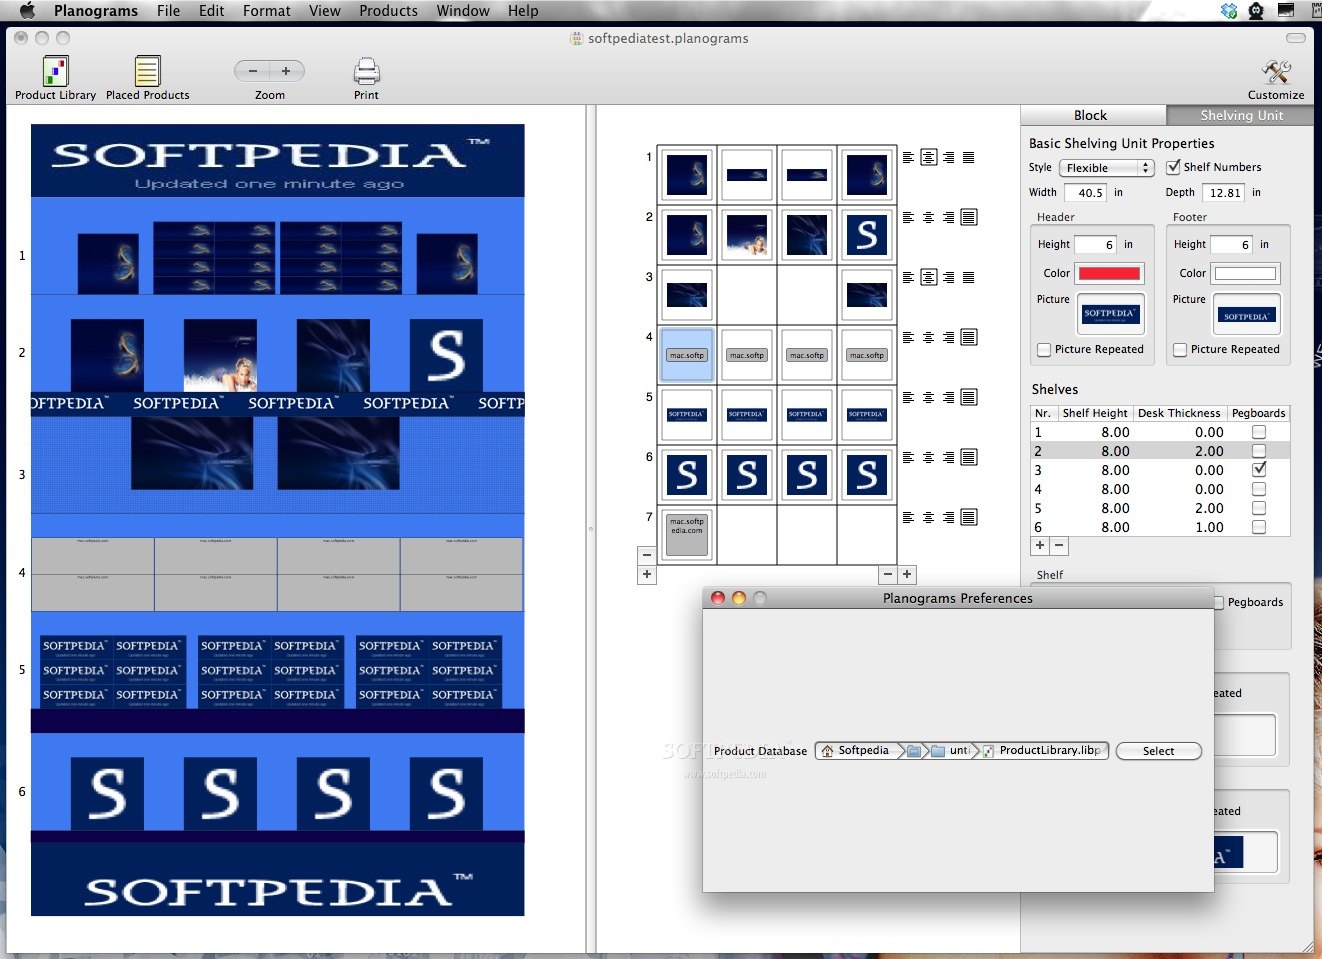
As far as I can deduce, the measurement unit is inch and you cannot change it: the Planograms’ preferences only gives you the possibility to change the path to the products database.
Still, that is useful for two different reasons: first, you can easily backup you data just by storing the file in a secure location, and second you will be able to easily share your database with your colleagues.
Tip: Close the application before making a copy of the products library file to make sure it will include the latest changes.
The Works
To get things going a product's database is required: that will remain constant, no matter which products you use in a certain planogram. The good thing is that you don’t have to create it manually, from scratch.
You can easily import products from another planogram (take into account that if some of them are already in your database they will be duplicated) or from a CSV file.
The best part is that you can also automatically import the product pictures: all you need to do is place them is a separate folder and match the picture name with the product ID.
Unfortunately you will have to go to each entry or make a multiple selection, and manually adjust the image size in the products database window (you do not have the possibility to change the default image size).
Once you've created a database, a simple drag and drop in the smart grid will place the product on the shelf. The smart grid is intended to be a virtual place where you can set the number of rows and columns for each shelving unit, and their intersection generates blocks.
For each row you can specify the products alignment (left, right, center or justify) but the Block Properties tab on the right offers the most important customization options.
You will be able to specify how many products you want to have placed in each block (horizontally or vertically), the distance that has to be kept from the top or from the shelf margins and the products orientation.
Note that all these are possible only if the product’s image size allows it: if not the user customizations will be ignored (fortunately the image size can be changed from the bottom of the tab, without having to access the products library).
The best part is that you can make the adjustments for multiple blocks at the same time: just make sure the ones you want to process are selected.
If you finished arranging a certain block and you simply want to change its location a simple drag and drop to an empty block will get the job done. This way you will be able to mix up your products until you are satisfied with the result.
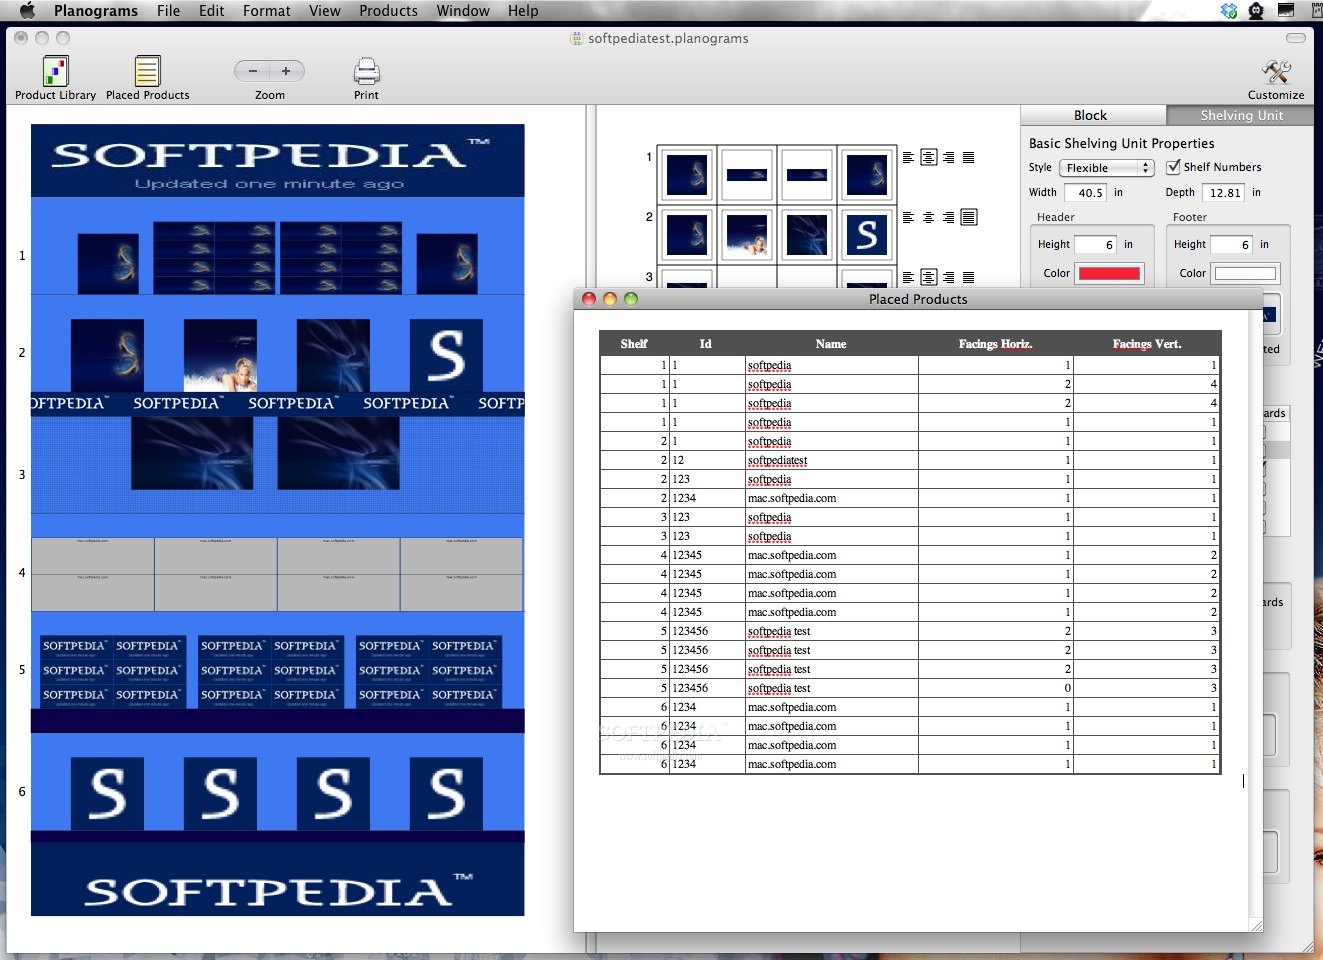
Planograms is able to generate a list of the placed products where you can see the product’s ID, name, the shelf number and how many of them are placed horizontally or vertically.
The list can be edited but the changes will not be reflected in the planogram, it does not draw any conclusions (like how many items are placed on a shelf/shelving unit and so on), but it can be copied to another application, or exported to PDF or RTFD.
I suppose this list can be useful if you are not interested in illustrating exactly how the products should be placed and you are only looking at things from a quantitative point of view.
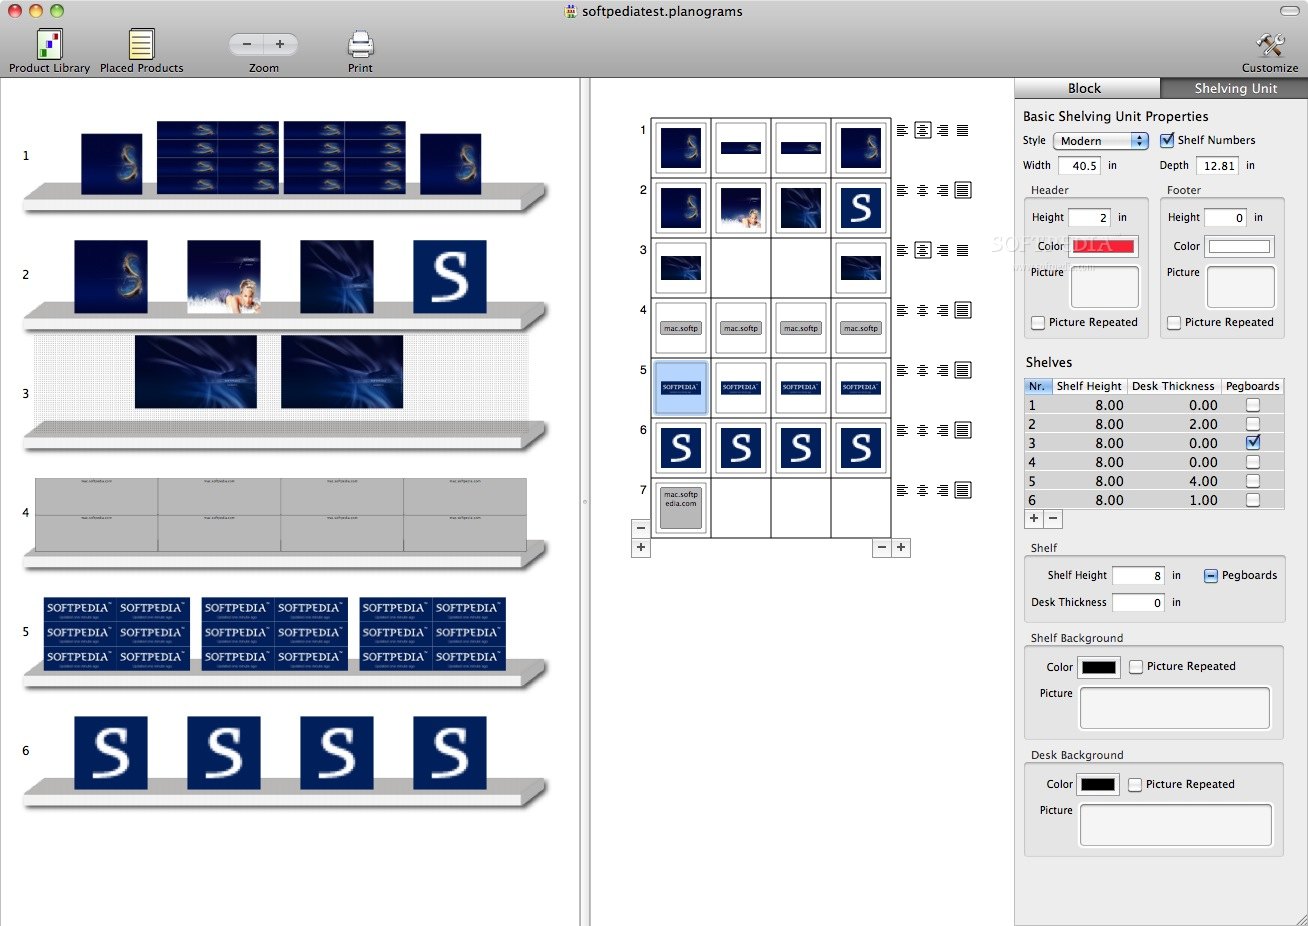
On the other hand, if you want to take advantage of all the visual customizations offered by Planograms, the Shelving Unit editor will become your best friend.
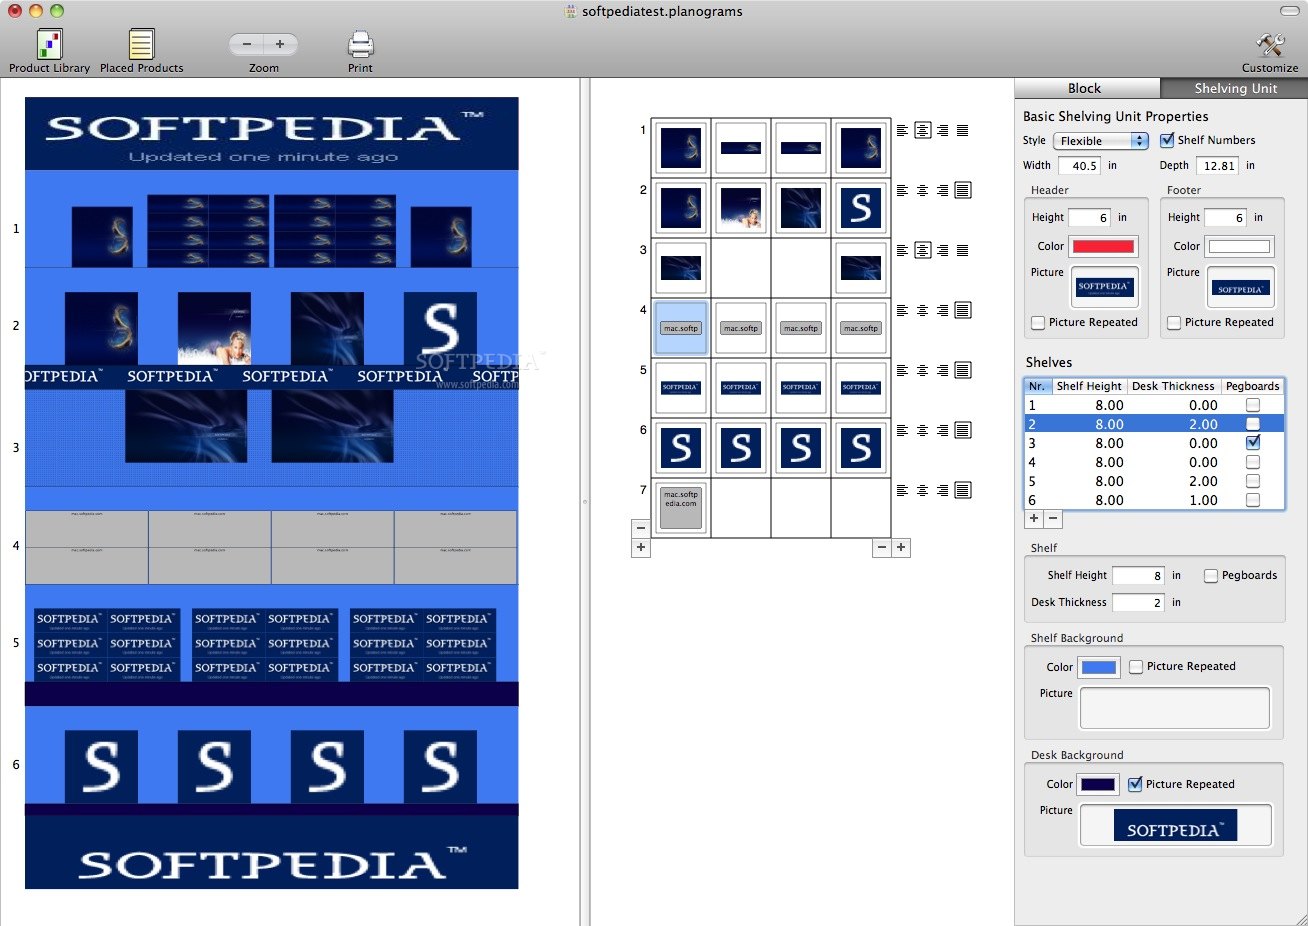
First of all you can choose the shelves style: flexible or modern. Taking that into account, further adjustments are available: if the shelving unit style is modern you can change the width and depth and also the height of each shelf.
If the shelving unit style is flexible, you can also generate a header or a footer, change the desk thickness and background, or set a new shelf background. In both cases you can choose to see the shelves number or use pegboards.
The result can be shared using the default Planograms file format or you can easily export the planogram to PDF, EPS, JPG or TIFF. Considering that Planograms is offering support for vector graphics (you can use EPS files for the products pictures), regardless the final format, the document should look clean and professional.
The Good
The good part is that Planograms makes a clear distinction between the products library and the diagrams. This way you can easily create different planograms using the same products. On the other hand you can use a planogram to import products to your database.
Further, the fact that you can customize the shelves and the shelving unit appearance to match the real ones is great, making the instructions crystal clear and, as a result, the users will not waste time trying to decipher your diagrams.
The Bad
The fact that you do not receive error messages in case some of your settings cannot be applied is also a bit frustrating. Also, Planograms cannot identify and skip the duplicates when products are imported from a planogram file which will lead to unnecessary work.
Last but not least, the user cannot change the default picture size which is annoying, since the modifications have to be done manually.
Things are sweetened a bit by the fact that you can make a multiple selection and change the dimensions for several products at the same time, but even so, if you have to deal with a large products database looking for the ones that need adjustments, it can get quite tiresome (you cannot sort the products to find the latest additions).
The worst part is that during testing I have encountered a faulty behavior in certain areas: the delete function does not work properly and Planograms is ignoring the number of shelves you have set up in the smart grid.
The Truth
The best part is that you can make all the modifications in a virtual space and simply share the result with you colleagues in an explicit form.
In the end, you will be able to save the time you usually spend trying to make yourself understood by providing professional looking documents: as usual, it is up to you to make the most of it. NOTE 1: Planograms detects and uses the measurement unit for the entire system. Taking that into account, if you need to change the measurement unit, simply change it from the System Preferences and Planograms will recalculate the values next time when you start the application.
NOTE 2: Planograms does not generate new shelves taking into consideration the Smart Grid: to create new shelves you must add them via the Shelving Unit editor (this way a Shelving Unit can have more that 6 shelves).
NOTE 3: You can delete a product block in the smart grid by selecting the respective button and pressing the backspace key.
Here are some snapshots of the application in action: