14 DAY TRIAL //
 Photo editing is a regular thing nowadays. We all use it more or less. It helps us eliminate the minor deficiencies of our pictures and bring more quality. I used to edit the pictures where I had all sorts of blemishes on my face. My girlfriend used to ask me to make her look a little younger or remove the traces of fatigue on her face.
Computer users can very easily apply all sorts of effects and can turn a simple picture in a real work of art. Different softwares are used for different effects. From the complicated PhotoShop to simple programs that will automatically apply a certain effect.
The software to be analyzed is easy to use, and has a pretty low complexity degree. It will bring you fast to the desired result with no fuss at all.
Auto Photo Editor is a zeallsoft.com software, designed to edit your pictures and to batch convert them. The software costs $39.95 and you have a trial period of 7 days to test the program and decide if it is worth the money or not.
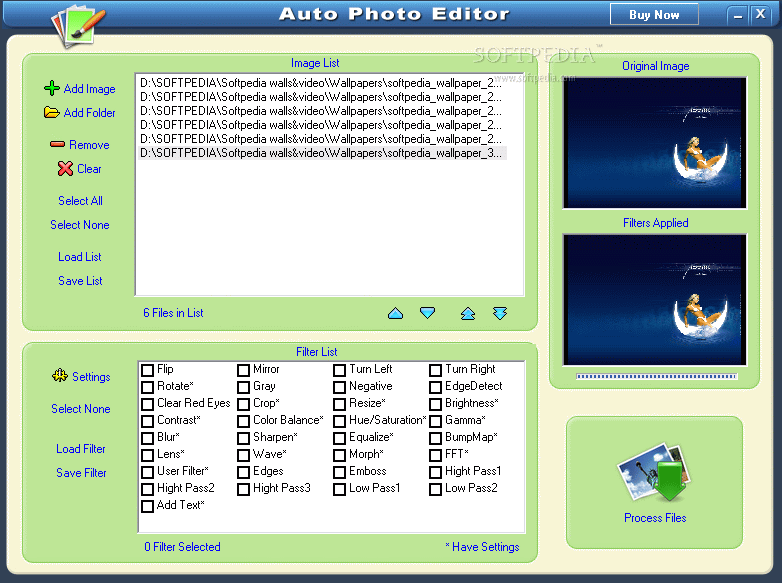
The interface is pretty nice, although the greenish background is not appealing to me. The application window is divided into three main windows. The first one is image list where the user adds all the images s/he wants to apply effects to. The second one is right beneath the first one and is called Filter List. Here there are displayed all the filters the program comes with. The third window on the right side of the application window and is split in two: the first displays the original image and the second one shows the image with the applied filters.
In Image list the options are displayed on the left side, vertically. They will allow you to add single images or entire folders or remove the files in the list. Load List and Save List are designed to ease your work when you have to work with the same batch of pictures more than one time and they are in different folders of your computer. Just add the files and click save List button. Now every time you want to work with those file all you have to do is load the list.
The Filters section also contains some options of its own. The Settings button is for configuring the filters. Be careful, as not all the filters have settings, but only those that are marked with an asterisk at the end of their name. To enter the settings menu of a filter you just have to select it and press Settings. Selecting the filter is not done by checking the box in front of it, but by clicking on the name.
If you check the box you will be applying the already configured filter to the selected picture. You will notice a slight change in the preview window. After you have configured and selected the filters for your image all there is left is click on the Process Files button in the lower right part of the main window.
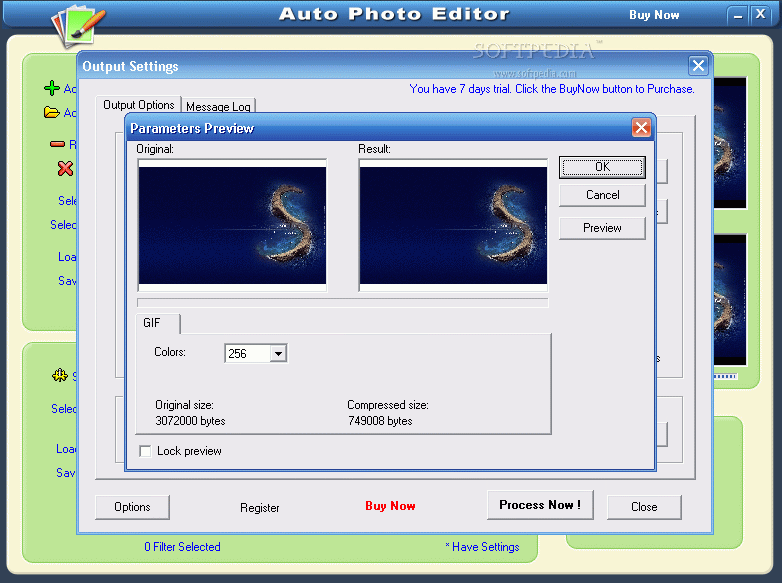
A new window will popup, requiring you to select the output options: the file format and the output folder. The supported formats are numerous and the user can meddle with options too. The same pattern as in filter settings is available in here. Only the asterisked formats have settings. The file format options are not as many as for filters and all you can change is the Compression and the colors. You will be provided with the size of the compressed file and of the original, as well as with a preview of the original and the result.
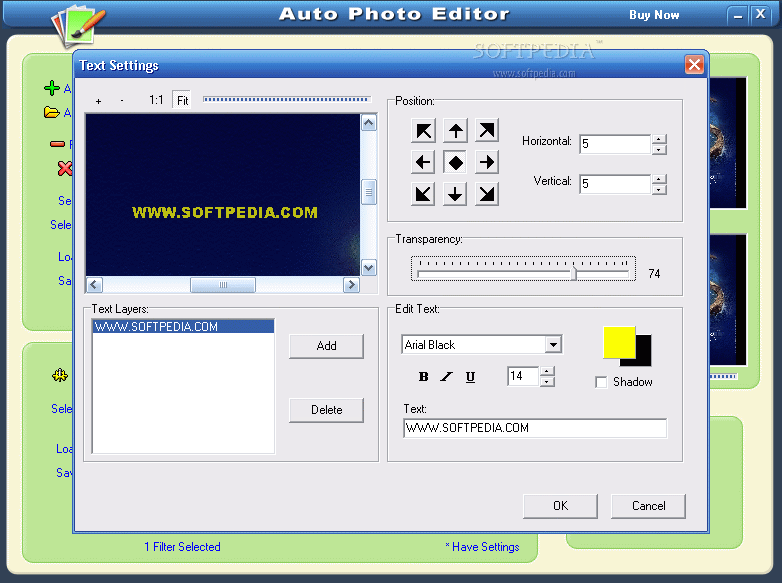
The filters of the software include rotation, contrast, lens, add text, crop, brightness, gamma etc. I will present only two of them just to give you an idea about the complexity of the software. My favorite is add text. The Text Settings window will allow the user to choose the position of the text, transparency, style, font, size, color (of both text and shadow). But to unlock all these options you have to enter the text first. At the beginning I thought I could insert only one line of text, but the software permits adding as many lines as you want and define all of them separately.
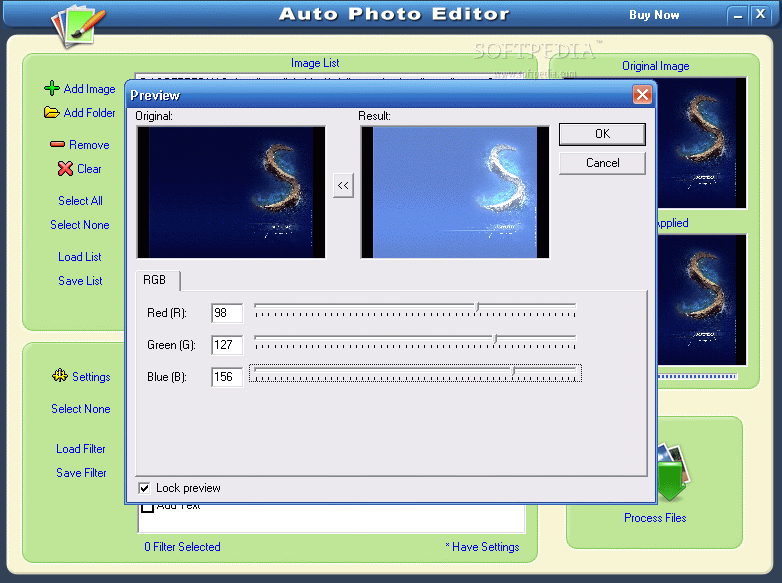
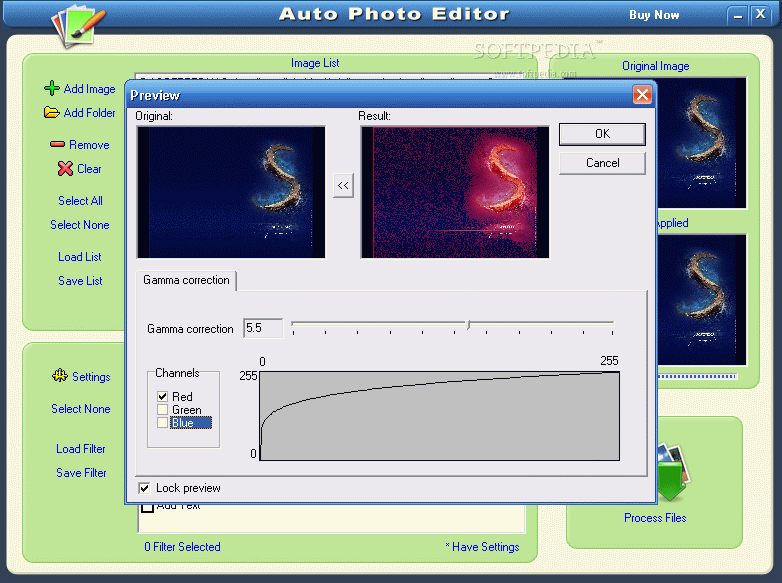
The Gamma filter is very simple to use (as any other filter) and you can configure the RGB channels with absolutely no difficulty. You simply select the channels and you drag the slider to the right or to the left until you reach the desired effect.
The Good
The software is extremely easy to use and the abundance of filters allows you great flexibility in changing the images.
The output formats are also numerous and you can even save the files as TIFF or PSD.
The Bad
The simplicity of the software is extreme and so is the price. Almost $40 bucks for a set of filters that cannot be configured in detail, but only generally.
The Truth
The software moves fast and if you are not looking for dramatically changing the images, than this is for you. From its simplicity I can draw only one conclusion: it is not intended for expert or medium skilled users. It is designed for users that want just minor correction of the pictures with regards to the brightness, colors, blurring, etc.
Here are some snapshots of the application in action: