 14 DAY TRIAL //
 With the rise of video websites more and more users are interested in putting up movies of all sorts on their websites. If you do not have the right tools this is easier said than done. First of all you will have to convert to flash format the piece of video you want to upload to your web place. Why? Because flash is one helluva compromise between quality and size. It is a lightweight video format that gets along well with the web and with its small size it will guarantee fast streaming and, depending on the bandwidth of the viewer, it can in some cases eliminate the need for buffering.
After the conversion is over, you will have to create the code to embed the video and the player in your webpage. For a novice this would require resorting to a professional to do the little coding necessary. Luckily there is a better way. Costly, but with guaranteed results.
Flash Video MX Pro is an $89 solution to the above-mentioned hiccup on the way of putting video on your website. It comes as a demo that can be used indefinitely for evaluation purposes as it places a visual as well as audio watermark on the resulting video and audio track, making the output useless for any other purpose but testing the app.
You will not have too much head-banging to do with this software because it is built as a wizard designed to give you a hand at each step you have to take in order to reach your goal. Of course, there are additional settings to be done on the way.
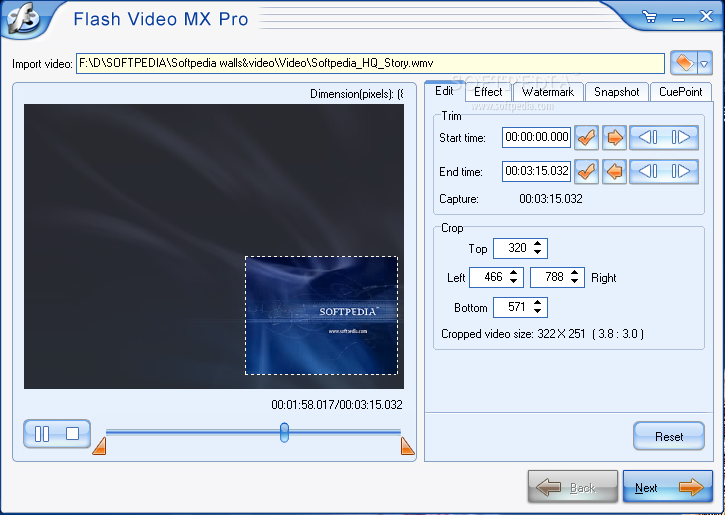
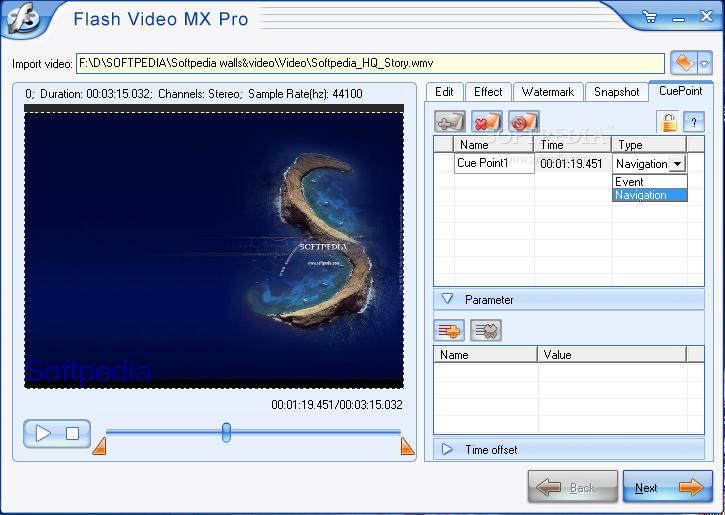
The first screen is intended for loading up the video and preparing it the way you want it to be. This means that there's a little editing involved, you get to mend it a bit, apply a watermark, take a snapshot for the thumb picture or add cuepoints.
Editing the video is no fancy stuff and includes trimming and cropping it to the right sizes. You can set the start and end points of the movie, as well as crop it to a smaller or larger part of the film. The values for trimming can be set manually or you can do it from the video preview window by dragging the limits of the progress bar to enclose the desired part of the movie. Either way the job is simple enough for a greenhorn to tackle. Cropping the video to another size is not much different, as you can grab it by the sides and drag it to fit the part you want or simply type in the confinement values yourself.
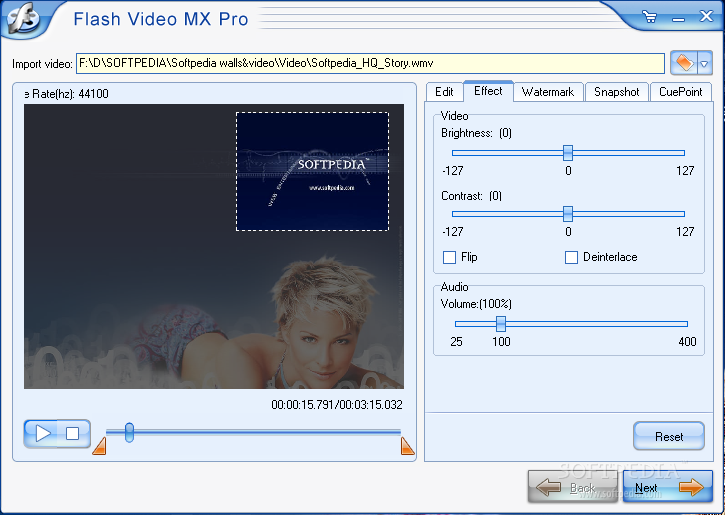
The set of effects available in this first step of the wizard includes brightness and contrast. Although these do not fully qualify as effects but rather as adjustments to improving the original video, there is easy working with them. All you have to do is drag by a slider to increase/decrease contrast and brightness. The result is on the spot and you can clearly view the modifications in the video preview window. An additional option is flipping the video and turning it upside down. Increasing the audio level is done in the exact same way, by dragging by the slider.
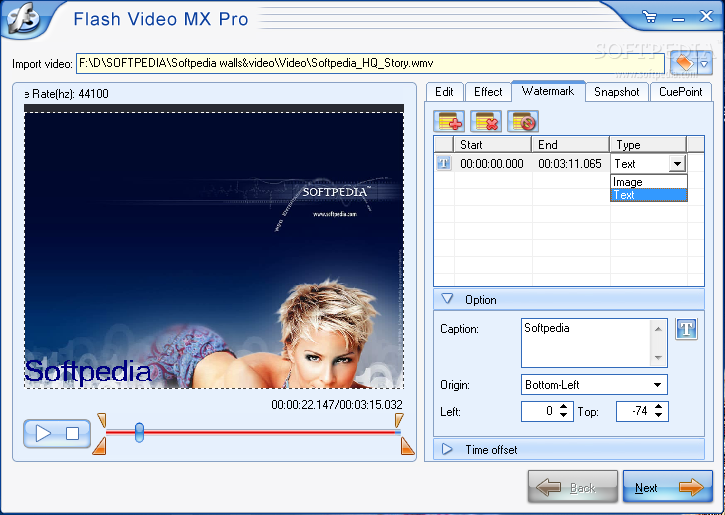
Personalizing the video is also an option in this first step of the wizard. You can watermark it either with an image or with a string of text and place it almost anywhere on the screen. Here's where the application shows its lack of flexibility because you cannot drag the watermark just anywhere, but instead you have to choose one of the preset positions available: top-left, top-center, top-right, left-center, center, right c-center, bottom-left, bottom-center and bottom-right. On the other hand, you are given the possibility to choose the time interval the watermark should be shown (time offset) and enable fade in/out effect.
During our testing we noticed that any adjustment or change we would make to the video would immediately result in raising the CPU usage beyond the regular limits. This perpetrated even when we skipped from one frame to another in the video preview, or when cropping the image, modifying the contrast and brightness, and even when selecting the time offset for the watermark. Testing the app on a Dual Core processor working at 2GHz with 3GB of RAM still managed to put a 50% stress on the CPU.
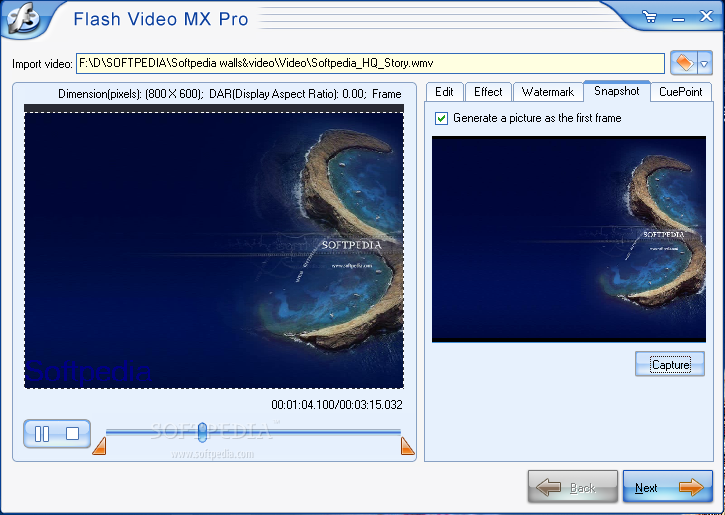
The fourth option in Flash Video MX Pro's first wizard step is choosing an image from the video as the welcoming frame. There's nothing to it and all that needs to be done is go to the desired frame in the preview window and press the Capture button in the right hand part of the screen.


Cuepoint is the last option in this first step and it addresses more experienced users. Cuepoints are parts in the video file that dispatch an event while the movie is playing. In Flash Video MX Pro there are two types of cuepoints: navigation and event. Navigation simply allows you to seek to a particular frame in the FLV file while Event permits synchronization of a point in the FLV file with an external event on the web page.
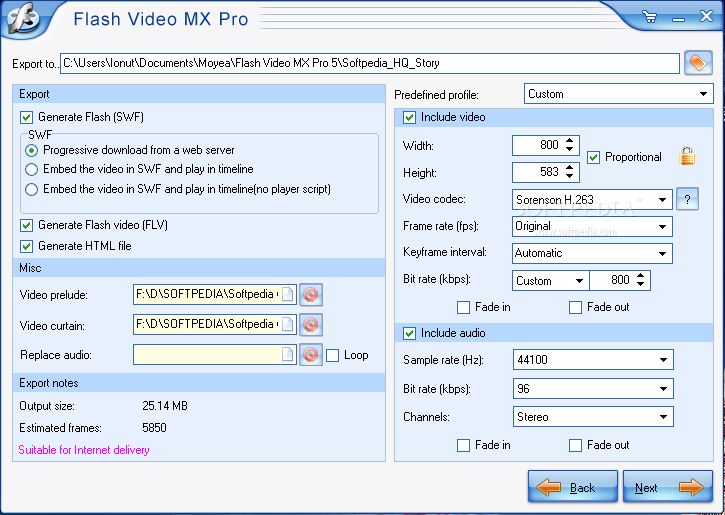
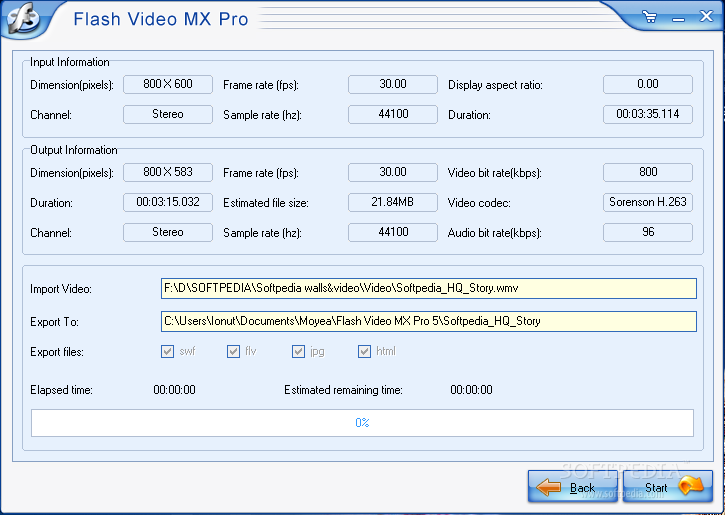
The next step of the wizard deals with video export options, Internet delivery settings and encoding profiles. Video export configuration provides options for SWF, FLV and HTML file generation. Depending on what you choose, the application can create all the files needed for a seamless integration of the video into the webpage, all the code and even the player. Additionally you have the possibility to replace the original audio with a track of your own (MP3, MP1, MP2, WMA, WAV or OGG), which can be looped to cover all the video.
Flash Video MX Pro is quite advanced in options and also offers the possibility to add an opening and closing video to your movie. Unfortunately during our testing it failed to add the “curtain” and only the “prelude” was present in the output result.
Encoding options at your disposal include selecting the codec (Sorenson H.263, Flash 8, Flash 8 alpha video, F4V or H.264). Should the system not have installed, a pop up window will activate alerting you of the fact and providing an online link for more information. Adjusting the video framerate, keyframe interval, resolution for video, as well as sample rate and channels for audio are options included in this second step.
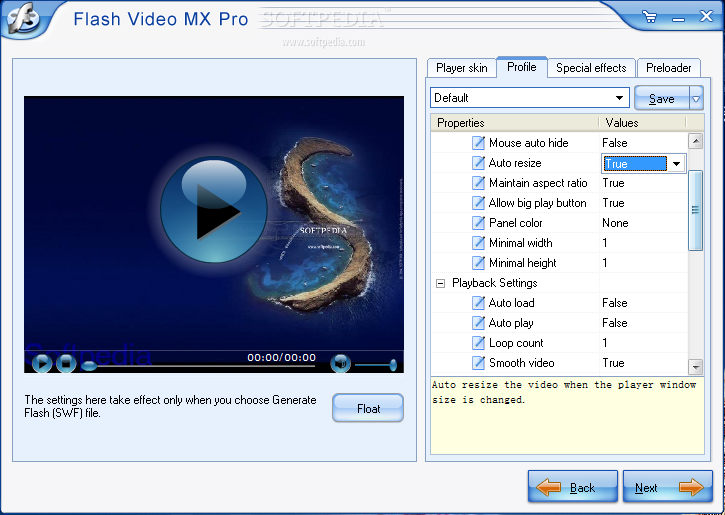
If you chose to generate SWF file in Export options, for the next step you will be able to customize the web flash player in terms of interface and add some special features. There are plenty of skins to pick from, organized in four different sections (Classic, Opaque, Translucent and Transparent). All in all, a total of 30 skins await. Among these there are popular skins like the ones for Google Video or YouTube, but also some less-known but great-looking ones (check Transparent and Translucent sections).
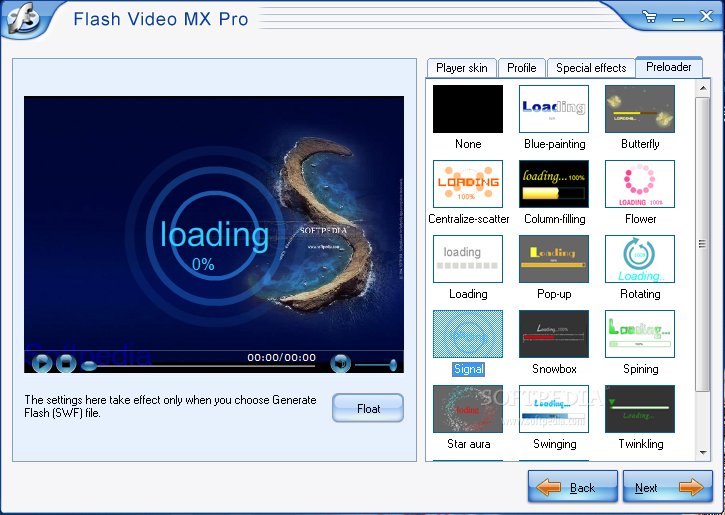
But the application does not stop at this and lets you add some special effects and a preloader. These are the light options, but more advanced customization can be found under the Profile tab. Customization in this area extends to skin (auto-hide, auto-resize, hide delay, maintaining aspect ratio, etc.) and playback settings (auto-load, auto-play, loop, buffer time or volume), navigation on click, navigation at end, play action and event. These are all explained in the lower part of the interface as soon as an option is selected.
In the case of the special effects that should have been applied in the resulting movie Flash Video MX Pro showed a glitch with the Goldfish effect (which is marvelous in the preview) and instead of displaying the beautiful animated effects all over the video screen it kept the elements flickering in the same place.
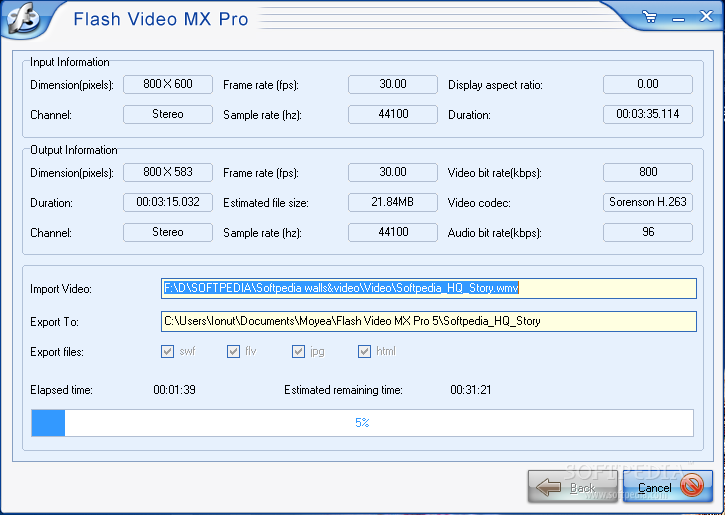
The final step in turning your video (MPEG, Windows Media Video, AVI, QuickTime Movie, Real Media, VOB, Mobile Video and DV files) into web-ready flash is to confirm all your settings. This is the last chance you're going to get to return to a step and make a modification. After starting the process there is only the option of canceling it and starting all over again. Luckily you won't get back to square one as the app remembers all the previous settings if not closed after the conversion process is done.
It will not take too long to finish the entire process and the resource usage during the conversion is not extremely high, reaching values of 56% CPU usage and about 120MB of RAM. In the context of video encoding and the average system specs of computers today, the values are quite decent.
| Next
