CDs and DVDs used to be the standard storage type for installing Windows on personal computers, but this changed when we got comfortable with the small size, enhanced portability and, more importantly, speed provided by USB flash drives.
Regardless of the Windows version you're using, whether it's 10, 8.1, 8, 7 or older, it's advisable to create an emergency bootable USB drive in case the worst case scenario occurs and you have to reinstall the operating system on your computer or help out a friend.
Windows has native support for making bootable USB drives and computer geeks are welcomed to tinker with command lines in PowerShell, but if you want to spare yourself the effort and you're not the most tech-savvy person you know, then third-party software solutions come to the rescue, promising to make the job a lot easier. We are looking into three popular utilities, WiNToBootic, Rufus and WinSetupFromUSB, by skipping the technical lingo to get a piece of the action.
Getting started
Prepare a USB flash drive with a storage capacity large enough to fit the bootable files of Windows. It's preferable to have USB 3.0 since this edition is faster than older versions (plug it into the blue USB 3.0 connector of your computer unit to maximize performance). USB 2.0 works too, although slower.
In the following step, create backups of the USB drive contents (if any) to prepare for cleanup. It's not necessary to format the device yourself because this is done by the programs automatically.
Next, you should have an ISO file with the operating system ready. Follow our guide to learn how to make an ISO image from a Windows installation disc.
WiNToBootic
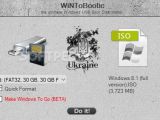
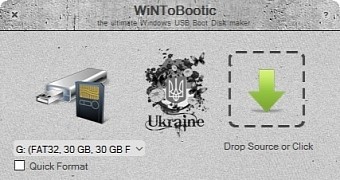
Out of all three, WiNToBootic has the lightest set of options. In the main window, you can click the menu below the image with the USB drive to pick the device if you have more than one attached to the PC, as well as click the image to open the drive's location in Windows Explorer to make sure it's the right one.
Next, you can click the image with the green arrow to locate and pick the Windows ISO image, or just drop the file onto this area from Explorer. If this is supported by the OS version, you can tick the Make Windows To Go box if you plan to run the OS directly from the USB flash drive instead of using a regular setup kit to perform installations. Additionally, you can check the Quick Format box instead of running a normal format.
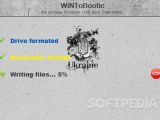
To start the operation, click Do it! and Ok in the two following dialog prompts to confirm the action.
Rufus
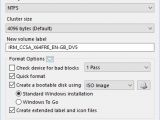
The interface of Rufus has only one window that shows all settings available. Click on the menu below Device to select a USB if there are multiple drives plugged into the computer. At Partition scheme and target system type, set MBR partition scheme for BIOS or UEFI-CSM as it's the safest choice out of the three, File system to NTFS and Cluster size to 4096 bytes (Default).
Click inside the box below New volume label to enter the preferred display name for the USB drive, the Create a bootable disk using menu to pick ISO image, along with the CD image next to it to specify the source by locating and indicating the Windows ISO image. Two new options appear at this stage, so you can select Standard Windows installation if you intend to install the OS or Windows To Go if you want to run it directly from the USB drive.
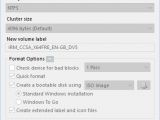
The remaining options can be left as they are: Quick format and Create extended label and icon files are checked. If you have already tried to create a bootable USB drive and failed, you can ask Rufus to check and fix errors by ticking Check device for bad blocks and by clicking to select the number of passes, ranging from 1 (quick but less efficient) to 4 (slow but more efficient).
Click Start to begin the operation and Ok in the prompt message to confirm it.
WinSetupFromUSB
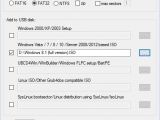
WinSetupFromUSB has a lot of expert settings which are confusing for casual users. However, if you want to just create a drive from an ISO image, click on the menu underneath USB disk selection and format tools to pick the drive letter if there are multiple devices plugged into the machine, as well as check the Auto format it with FBinst box. Leave the default configuration to FAT32.
In the Add to USB disk section, check the second box with Windows Vista / 7 / 8 / 10 / Server 2008 / 2013 based ISO and click the button with the suspension marks to find and select your ISO image with the Windows installation files.
Click Go to start the process and Ok in the following two dialogs for confirmation.
If any of these steps sounded confusing, feel free to check out our video guide. You can also download WiNToBootic, Rufus or WinSetupFromUSB.
Learn How to Install Windows from USB and Stop Worrying about DVDs
In Softpedia App Rundown #6 we showed you how to create an ISO image from a Windows installation disc. Now, we're taking it a bit further and making a bootable USB flash drive using the ISO files: http://www.softpedia.com/blog/learn-how-to-install-windows-from-usb-and-stop-worrying-about-dvds-503725.shtml
 14 DAY TRIAL //

