14 DAY TRIAL //
 Making a copy of your Windows original disc is highly recommended if you happen to lose, misplace or damage it. Arguably the easiest way to do so is by compiling an ISO image of the operating system using its installation files.
Next, you can either store the ISO on an external hard disk or prepare your computer for an emergency OS reinstall by making a bootable USB flash drive.
Windows doesn't have a way of creating ISO files without resorting to various software products, so we're going to take a look at three applications for the job. The host of features offered by InfraRecorder, CDBurnerXP and ImgBurn is quite extensive since they are comprehensive disc burners, so we're just going to show you the quickest steps for creating an ISO image with Windows from an installation disc.
Getting ready
Before starting a task using any of these programs, insert your Windows installation disc into the computer and make sure it can be accessed by clicking its drive in Windows Explorer and exploring its files and folders. If you already know where you want to save the new ISO image, it's also a good idea to check the designated partition for free space.
InfraRecorder
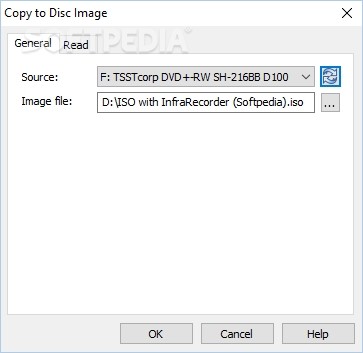
Out of all three programs, the interface of InfraRecorder is the cleanest. A window with six tasks is shown at startup. Click the last option, Read Disc to copy the contents of the Windows disc to an ISO image. The following window has two panes, General and Read.
In General, click on the menu next to Source and pick the drive letter with the Windows installation disc if you have more than two discs in the machine. Afterward, click the button with the suspension marks next to the Image file box to specify where you want to save the new ISO image, as well as the file name.
The options from the Read pane can be left unchanged: Ignore read errors is unchecked, Read all sub-channel data and the full TOC is unchecked, Read speed is set to Maximum.
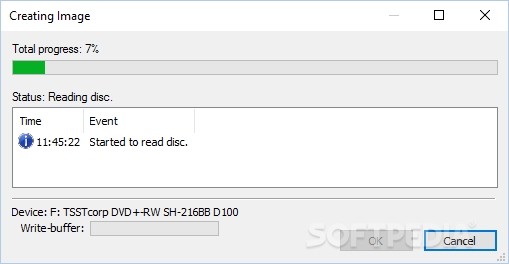
Once you're done, click Ok to start the task and view a progress bar with log details or minimize this panel to the taskbar to continue working on the computer.
CDBurnerXP
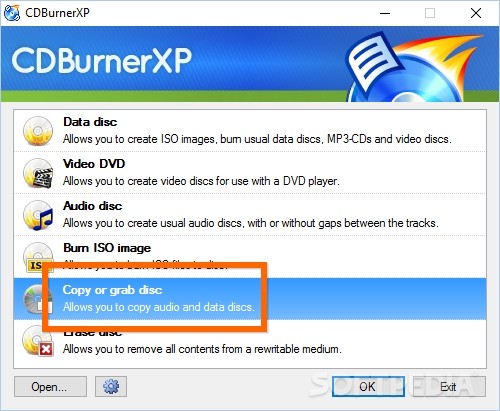
When starting up CDBurnerXP, you're welcomed by a menu bar with a list of tasks. Double-click Copy or grab disc to open a new window with two panes. In Copy Options, click the menu next to Device (in Source, on the upper part of the window) and select the drive letter with Windows. Unless you have two or more discs in the PC unit, the Windows disc should be selected automatically.
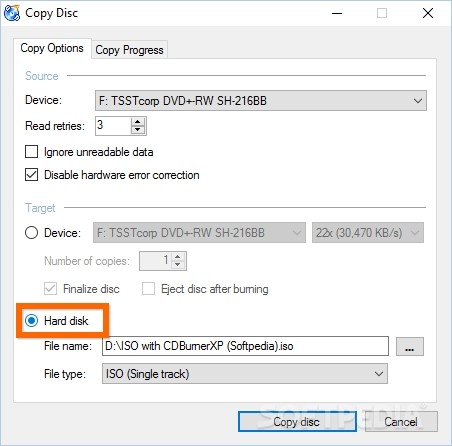
Leave the remaining settings in Source untouched: Read retries is set to three, Ignore unreadable data is unchecked, and Disable hardware error correction is ticked.
Moving on to the Target area (bottom part of the window), check the button next to Hard disk to select this option instead of Device (the Hard disk settings become available while the Device options are greyed out). The File type should be set to ISO (Single track) by default but if this isn't your case, click on the menu and select it.
All you have to do now is click the button with suspension marks next to the File name box, point out the directory where you want to save the new ISO image, and give it a name.
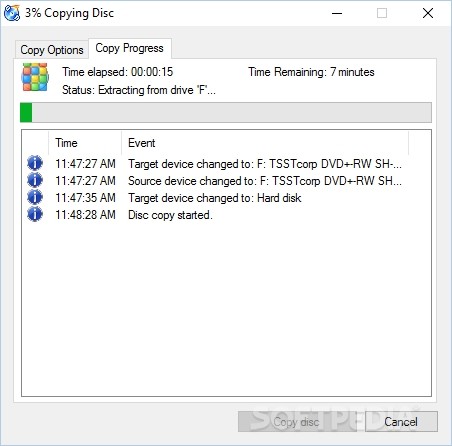
Once the configuration is made, click Copy disc next to the Cancel button on the lower-right corner of the panel to begin the task and make a Windows ISO image. CDBurnerXP automatically goes to the Copy Progress pane and shows a progress bar, event details and remaining time. You can either wait for the job to finish or minimize this window to do something else on the computer.
ImgBurn
The interface of ImgBurn is quite intimidating when using it for the first time. After launching the application, you're greeted by two windows with the main menu and log details. It's not mandatory to leave the log window opened to keep IMGBurn running so you can close it (click Yes in the prompt window for confirmation).
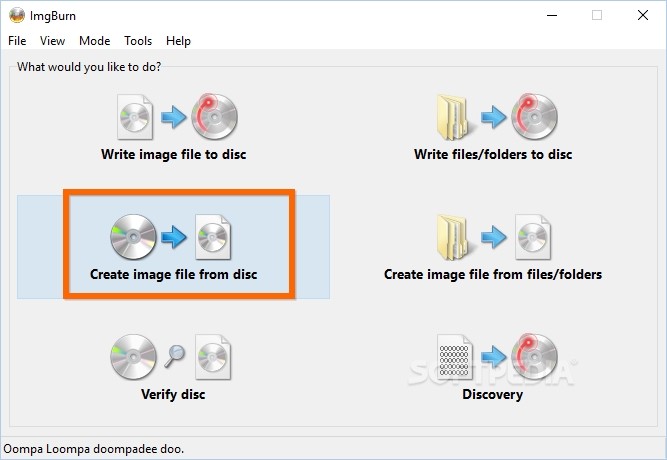
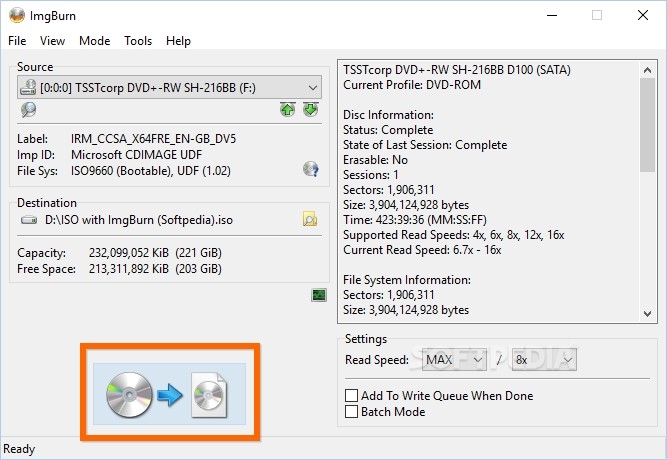
The main menu shows buttons for six tasks, and the one you're interested in is Create image file from disc. You don't have to review all information displayed in the next panel. Click on the menu underneath Source to select the Windows disc if you have multiple discs inserted into the PC, click the folder icon in Destination, as well as set the saving location and file name for the new ISO image.
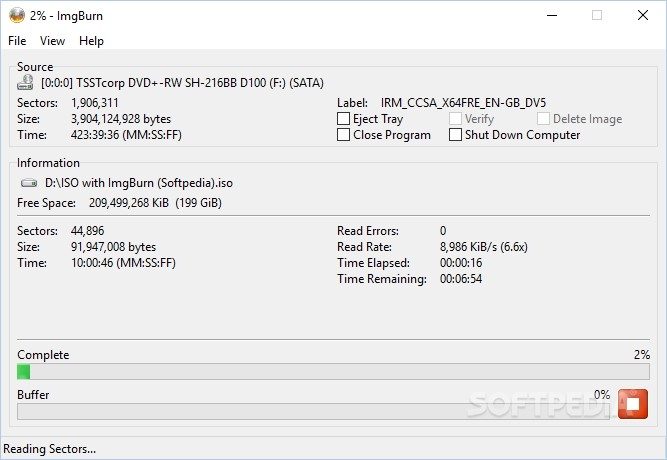
To start the copy operation, click the large button on the lower-left part of the window, whose image depicts a CD pointing to another CD wrapped in a file. Just like in the case of CDBurnerXP, you can view task info or minimize this panel to the taskbar to continue with your typical desktop activity.
Check out our video to find out exactly what we're talking about. You can also download InfraRecorder, CDBurnerXP or ImgBurn to make an ISO image from a Windows disc.
ISOs are Forever: How to Transfer Your Windows Installation Discs
To install Windows using a bootable USB drive, you have to create an ISO image first. Check out our video guide and article to find out how to quickly create ISO files using InfraRecorder, CDBurnerXP and ImgBurn: http://www.softpedia.com/blog/isos-are-forever-how-to-transfer-and-preserve-your-windows-installation-discs-503710.shtml