14 DAY TRIAL //
 Sooner or later, we all get accustomed with the limitations of our camera: certain effects can only be the result of post-processing adjustments. Flare intends to make the entire process a lot easier that one might think.
Everybody can take a picture, and thanks to the right effects, almost any image can look absolutely amazing. Since photography is in the end an artistic act, the final result depends in a big proportion on your taste and skill, but Flare allows you to create beautiful effects even if you are not a professional.
The novelty of the application stands in the fact that you can easily access presets created by others, although you can also make and share your own. Once you learn how to use all the color, lens and creative effects, imagination will become your ultimate limitation.
The Looks
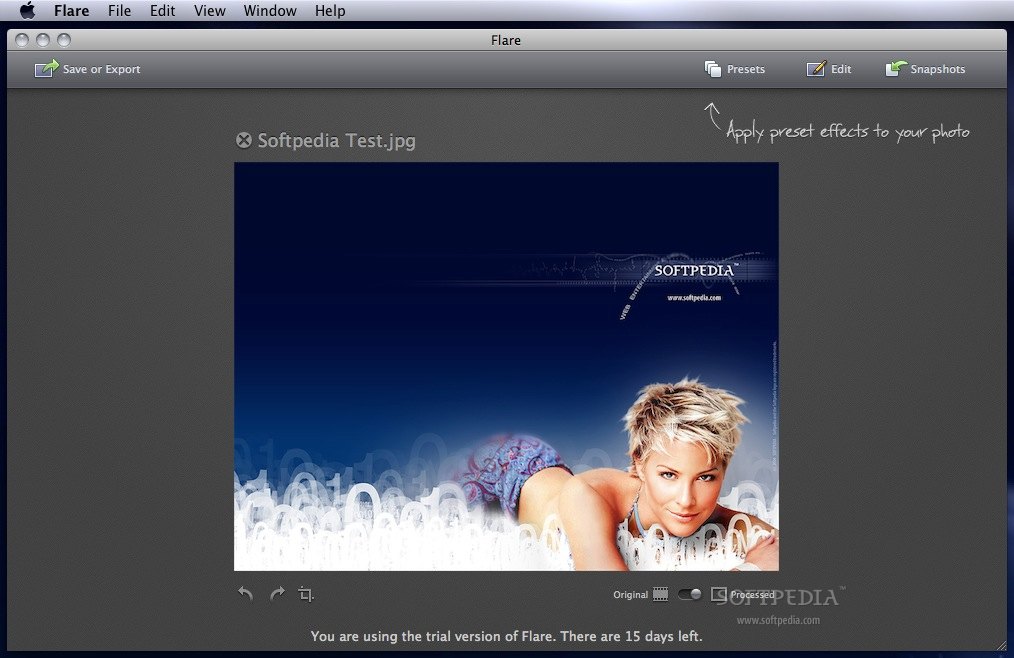
Things start to get interesting after you import an image and the main window transforms in order to include the most important functions (Save or Export, Presets, Edit and Snapshots - accessible from the top toolbar).
Flare does not raise any exceptional issues as far as the interface goes: the main window integrates smoothly in the Mac OS X design, it is very organized and the purpose of each button is quite intuitive.
The main area will be reserved to previewing the picture, while from the bottom you will be able to change its orientation, access the cropping panel and toggle between the processed and the original image.
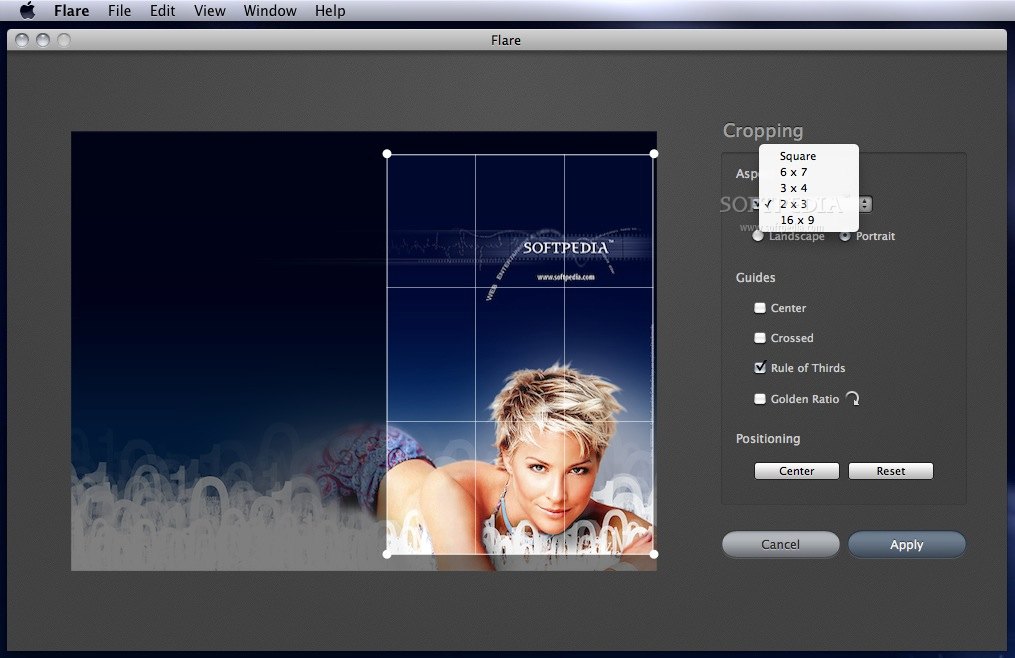
The only situation in which the main window changes completely is when you access the cropping panel. The image preview will still be available and you will have to specify the area you want cropped via drag and drop, or by using some of the advanced functions made available on the right.
The Works
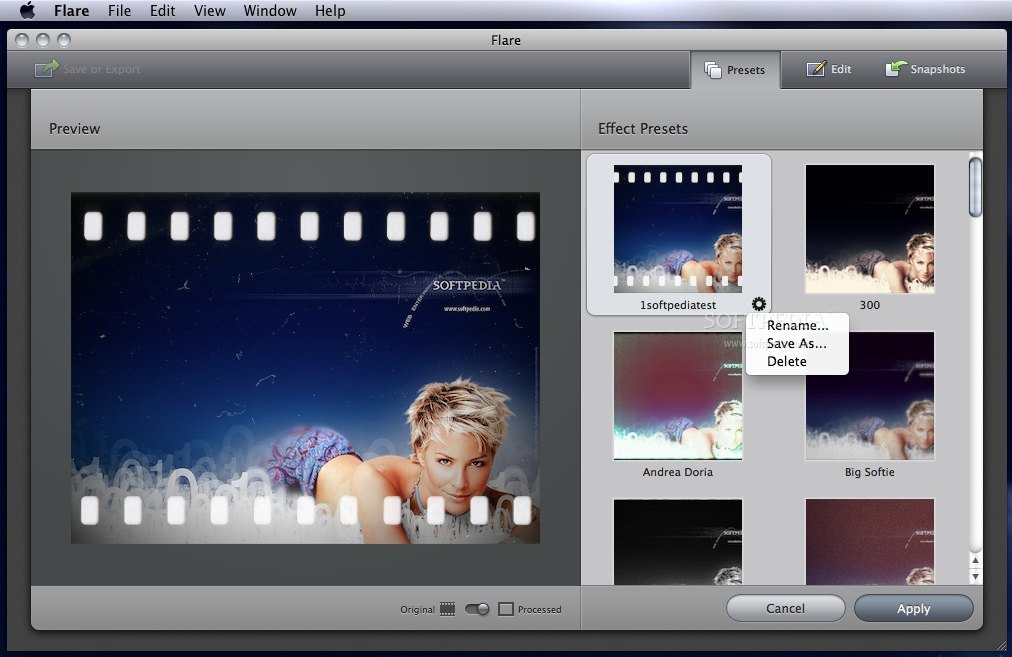
The most interesting functions offered by Flare can be found in the Presets and Edit panels, that can be activated from the top right corner of the main window. If the first one is selected, a new panel will become active to the right and you will be able to easily apply one of the default presets that are integrated within the application.
If you want more, you can also access the Flare online presets gallery HERE, download and quickly install the ones you like (the presets are available free of charge, and you can also submit your own, in order to have them added to the gallery).
The Presets panel is able to automatically generate thumbnails for each entry, illustrating how that particular group of effects should look on your current image. The process usually takes a while, but in the end I believe it is worth waiting.
Simply select a preset to preview the result on the left side of the main window, but keep in mind that the toggle button is still present on the bottom, so the original image is always one click away.
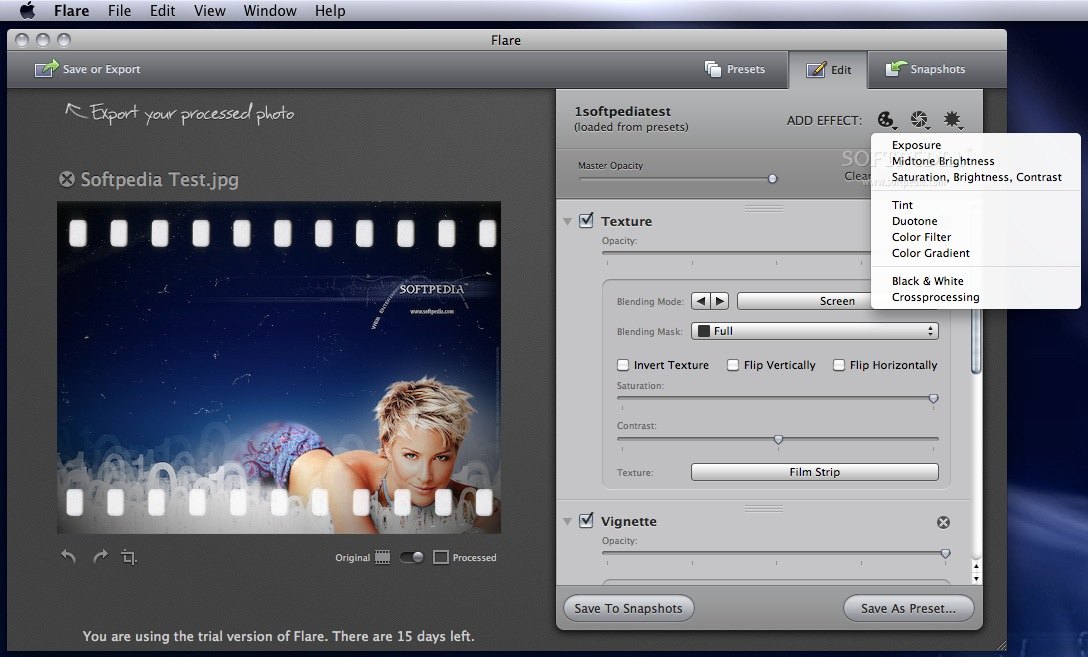
The Edit tab is governed by almost the same rules but you will still have access to the crop and rotation functions. A major difference is the fact that here you can manually choose, adjust and combine effects in order to create your own presets.
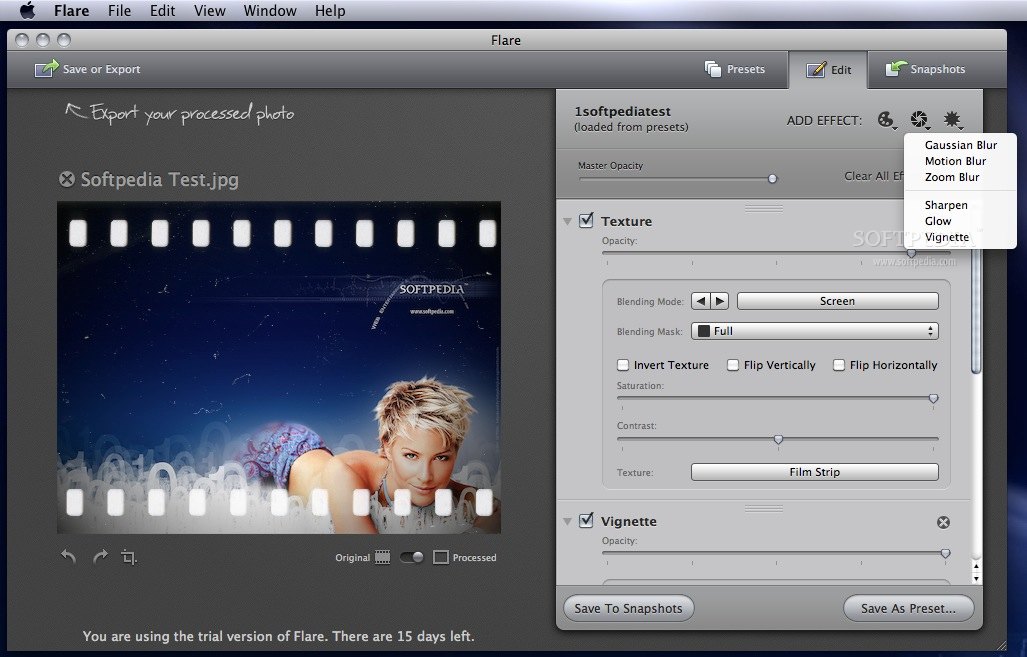
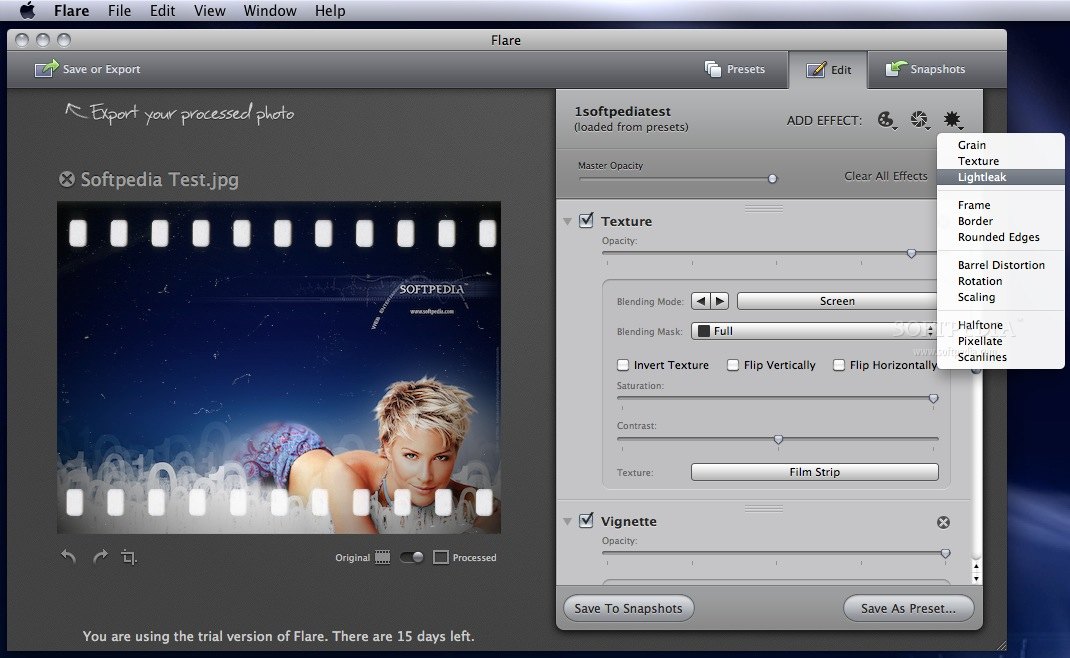
The effects offered by Flare are grouped in three main categories: color effects ( Exposure, Midtone Brightness, Saturation, Brightness, Contrast, Tint, Duotone, Color Filter, Color Gradient, Black & White, Crossprocessing), lens effects ( Gaussian Blur, Motion Blur, Zoom Blur, Sharpen, Glow, Vignette) and creative effects ( Grain, Texture, Lightleak, Frame, Border, Rounded Edges, Barrel Distortion, Rotation, Scaling, Halftone, Pixellate, Scanlines).
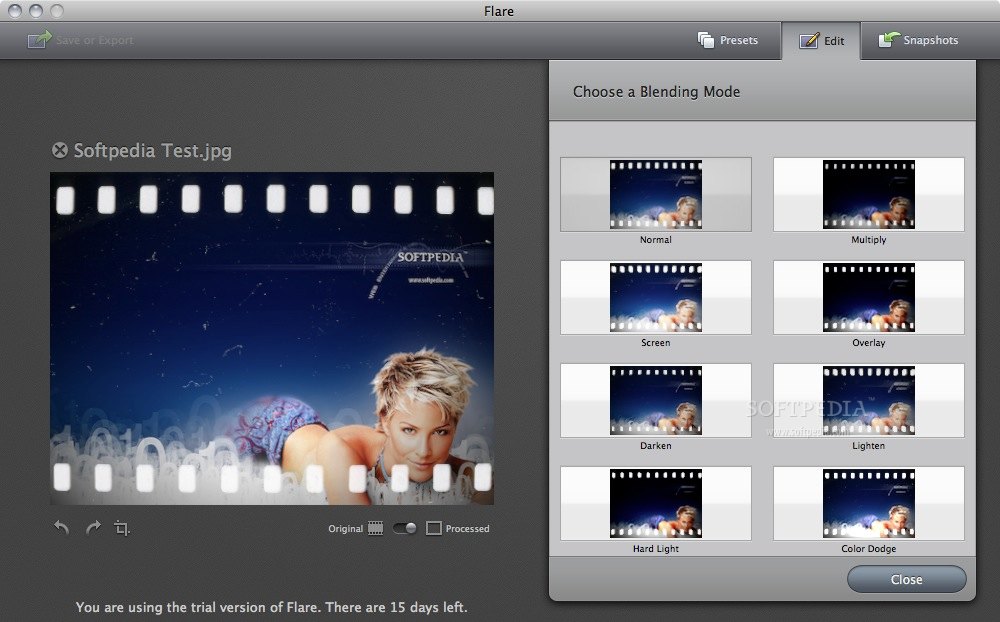
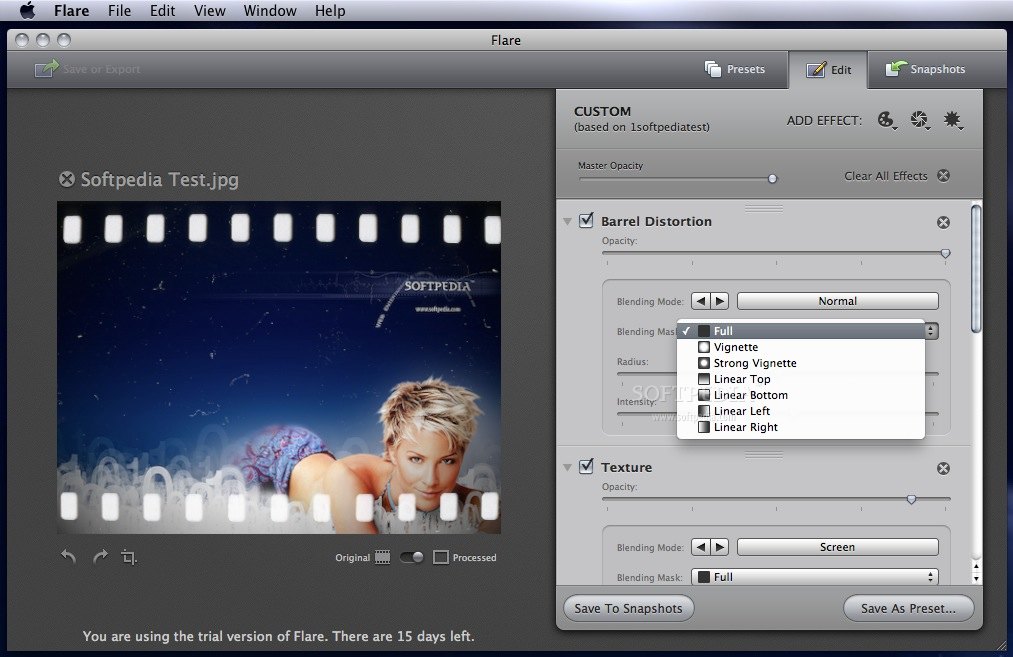
Each effect has its own settings but three of them can be found in every situation: opacity, blending mode (Normal, Multiply, Screen, Overlay, Darken, Lighten, Hard Light, Color Dodge) and blending mask (Full, Vignette, Strong Vignette, Linear Top, Linear Bottom, Linear Left, Linear Right).
I strongly recommend reading the user manual available on the Flare website that explains in detail how everything works (you will be able to see a link to the user's guide and to some video tutorials each time you open the application, before importing an image).
When it comes to opacity there is an interesting fact that caught my attention: the setting can be adjusted for each effect, but there is also a slider for the master opacity, designed to alter the effects overall result.
Some of the included effects, for example the texture, border or frame effects, contain their own templates, allowing you to quickly give a new look to your image with a minimum effort.
Last, but not least, the final result can be influenced by the order of the applied effects, so Flare allows you to change their position with a simple drag and drop.
Simply uncheck the box situated on the left of each effect to see how things would look without it. This way it will remain in the list even if it will not be active (to remove it completely, press the delete button that can be found on the right).
From the bottom of the tab you can choose to save the current group of effects in order to form a preset. Once you give it a name it will be automatically added to the main presets list. To share it with your friends, simply go to the list, press the gear icon that appears on the bottom left corner of each preset and choose “Save as” from the respective menu.
If you worked on a certain image but you are not quite satisfied and want to work on it at a later time, you can send it to the Snapshots database, that will open in a third tab.
The best part when dealing with snapshots is that Flare not only saves the images, but also the effects that have been used. Note that the snapshots database is limited to 24 images (the oldest entries will be erased to make room for the new ones).
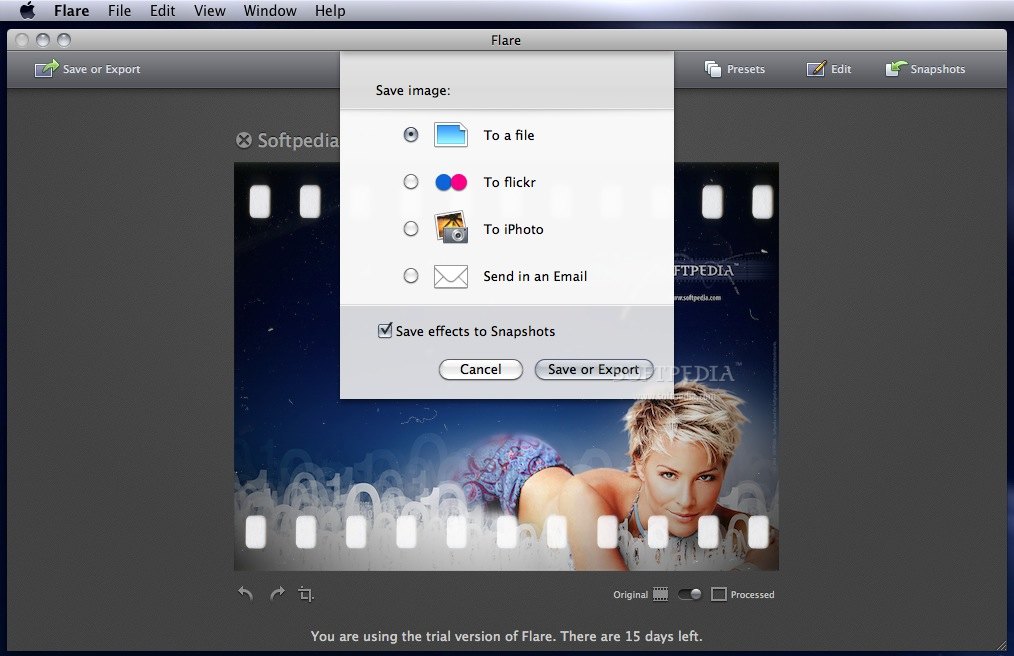
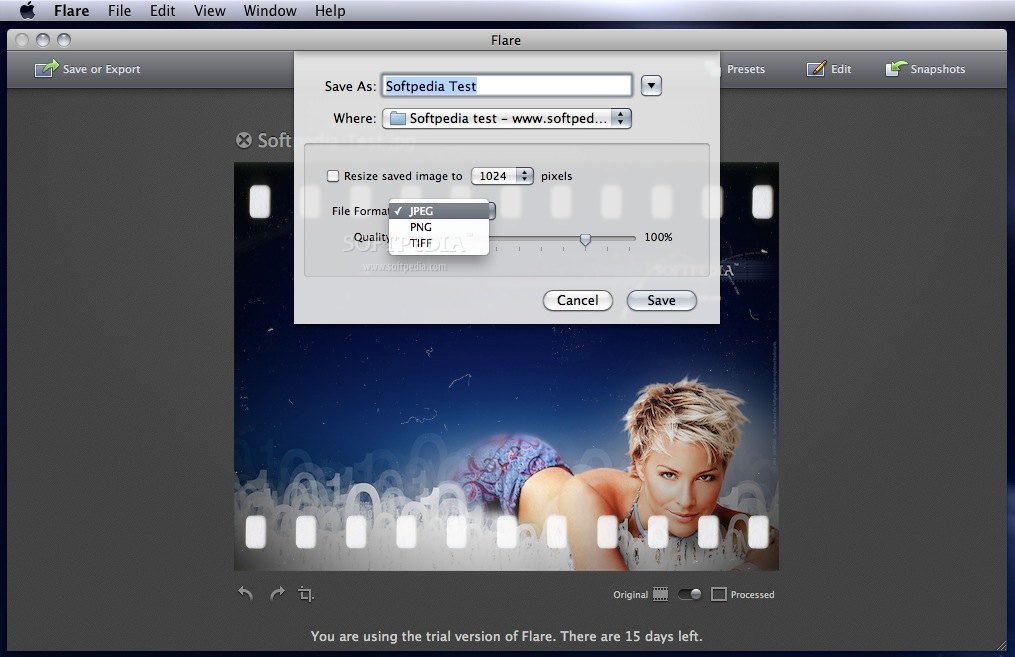
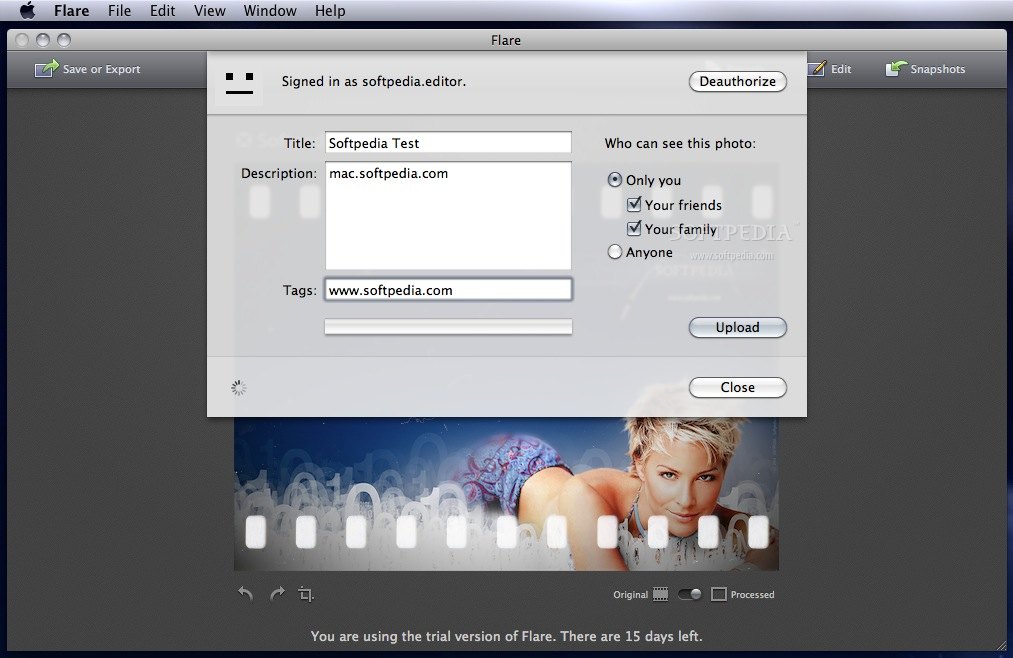
When you are done and you want to share the processed image, Flare provides different possibilities: save it as a JPG, PNG or TIFF file, send it in an email (Flare will open a new message window, containing the picture), add it to your iPhoto library or upload it to your Flickr account.
In the latter case, there are certain aspects that you should consider: pressing the upload button within the application will upload the image, but will also launch the Flickr upload page in your default browser.
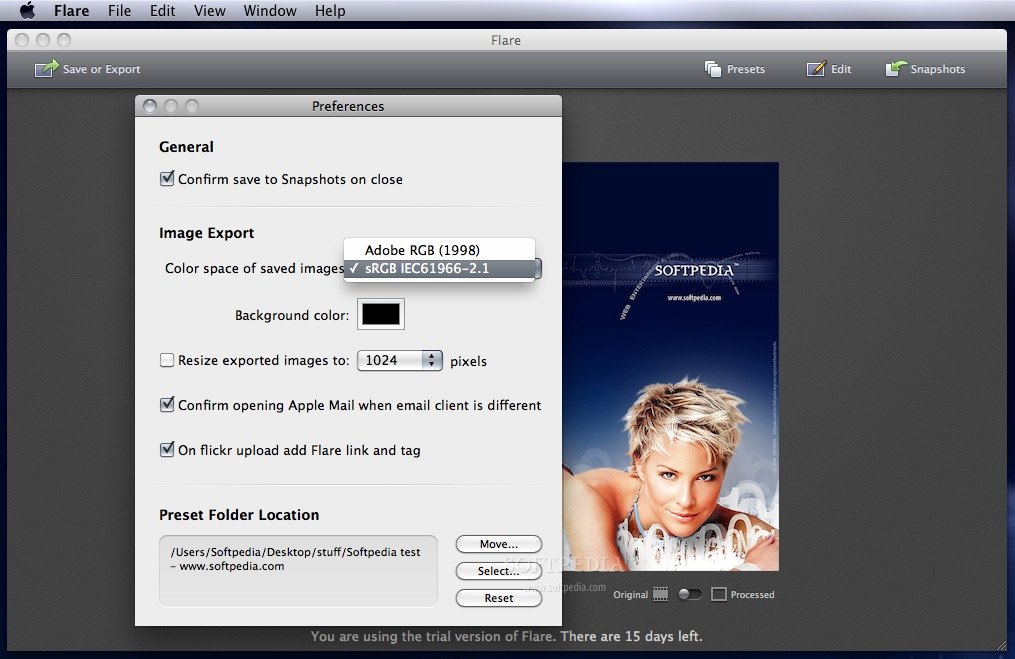
By default, for each uploaded image Flare will also add a “Processed with Flare” note in the description and in the tags, so accessing the Flickr website will be useful if you want to remove them (or you can remove them from the start, via the Preferences window.)
The Good
Everything is made available in a clean and intuitive manner, and I don’t think anyone will have problems finding his way around. As in the case of many other applications that deal with the same issues, exploring is the solution to learn all you can do with it.
The Bad
On the other hand, Flare seems to be a bit too task oriented: I believe that some basic image editing functions (like pencil, brush, the possibility to add text) could be useful, eliminating the need for another application.
The Truth
Some might say that in the end, the features offered by Flare are not unique or innovative, but the application scores points thanks to its design and intuitive workflow.
The only way to see if it is worth $19.95 (or $9.99 due to the latest AppStore promotional offer) is to actually try the 15 days trial yourself.
Here are some snapshots of the application in action: