14 DAY TRIAL //
 Performing numerous file operations with cut, copy, paste and delete functions as well as installing and uninstalling tools burdens the computer over time, slowing down file reading and writing. In this situation, you can either take the longer route to back up and reorganize disks, or resort to defragging utilities.
Some of us have been using Disk Defragmenter since it was first bundled with the operating system (Windows 95) and especially since Windows XP. It's capable of analyzing fragmented files and optimizing disk drives to improve PC performance by moving piece of data closer together.
However, Disk Defragmenter has a rather light set of features that makes it less versatile. A popular third-party application dedicated to disk defragging is Piriform's Defraggler. It can defrag not only entire drives but also individual folders or group of files. Defragmentaton is performed by collecting all free parts of the disk to create a single, wider free space, thus making room for larger files. We're going to break it down in the following article.
NOTE: Defraggler supports SSDs. Under normal circumstances, it's not necessary to defrag SSDs because file access speed is boosted by design (compared to HDDs). However, Defraggler can help optimize it (the Defrag button becomes Optimize) using TRIM or Zerofill, depending on the capabilities of your SSD type.
How to analyze disks
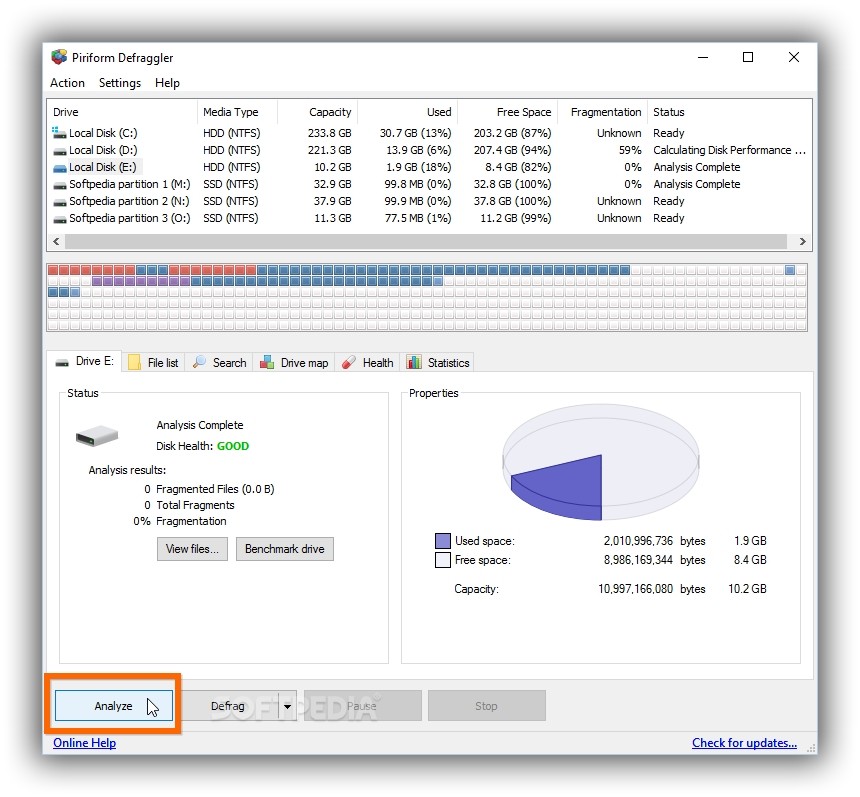
A list with all disk drives is displayed when starting up Defraggler, and you can view the Media Type and filesystem, Capacity, Used and Free Space, Fragmentation level (percent) and Status of each Drive.
The first step is running an analysis on one or more selected drives to figure out if defragmentation is actually necessary (this will be determined by the Fragmentation percent level). Select a drive (or more by keeping the Ctrl key pressed during selection) and click Analyze on the bottom part of the window or right-click to Analyze Drive.
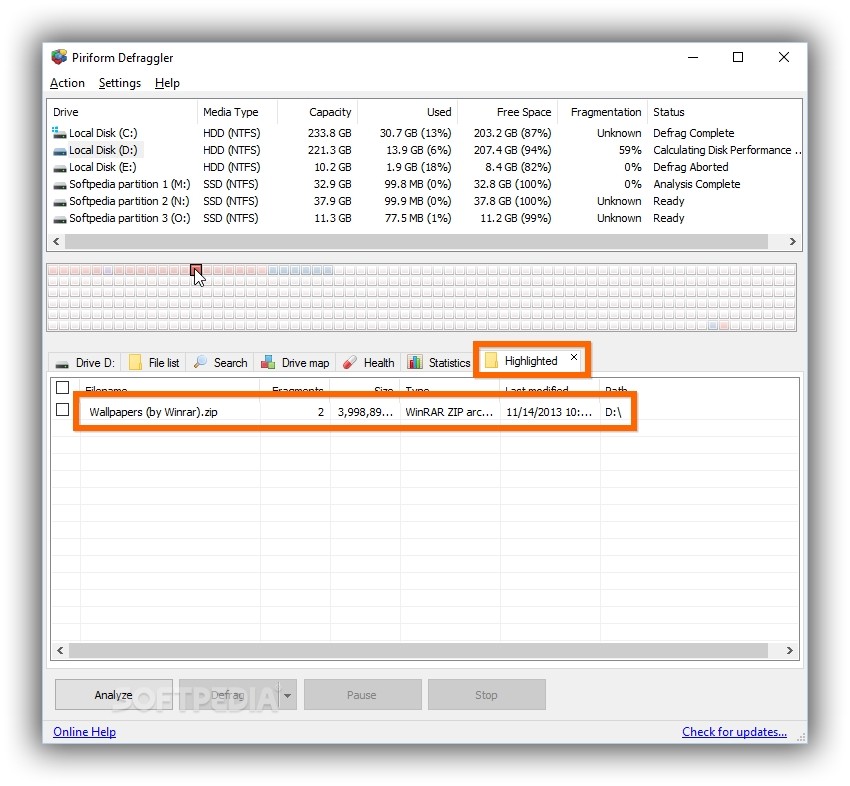
A drive map is displayed, which is a visual representation of the file fragments. The Drive map tab contains the legend with color-coded clusters to give you a better idea of how blocks are arranged and how they can be optimized. By clicking on a block, Defraggler goes to the Highlighted tab and reveals the exact file or files that occupy that block.
If the Fragmentation percent value is significantly above 0%, then defragging the drive is necessary. The higher the number is, the greater the need to perform defrag is, and the longer the task will take (depending on the drive size, fragmented files and total fragments).
How to defrag drives, folders and files
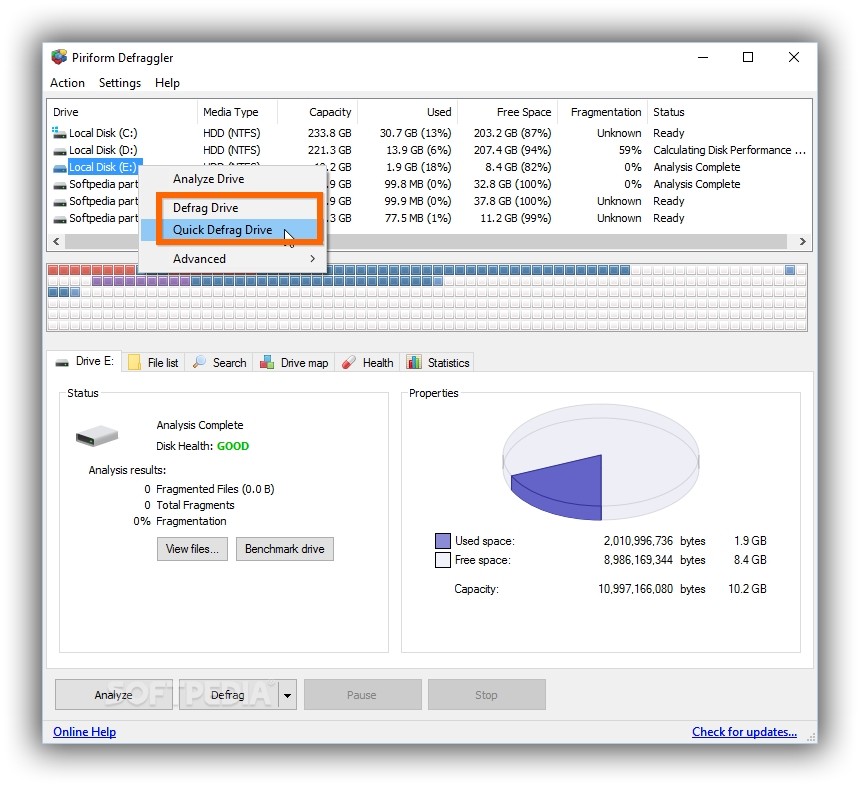
If you're in a hurry, run a Quick Defrag from the right-click menu or drop-down menu (click the arrow button embedded in the Defrag button on the bottom). It's faster than full defragmentation (Defrag button) but less effective, so it can be used regularly to deliver quick results.
The Quick Defrag options can be configured from Settings -> Quick Defrag by checking the Custom rules button. You can ask the tool to only defrag files that Have fragments smaller than n megabytes, Have more than n fragments, Are larger than n megabytes, or Are smaller than n megabytes.
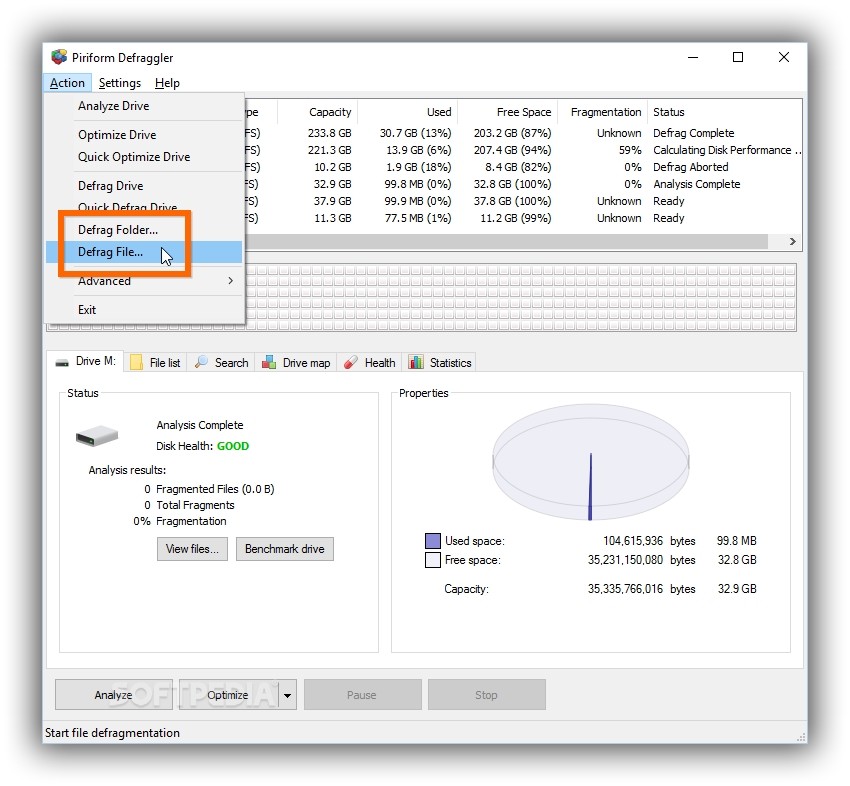
If you often work with files in a specific directory (like downloads), you can considerably speed up defragging time by instructing the application to defrag just that directory without taking the whole partition into account. Click Defrag Folder in the Action menu, browse a directory and click Ok (subfolders are included). A single file can be defragged by selecting Defrag file in the Action menu.
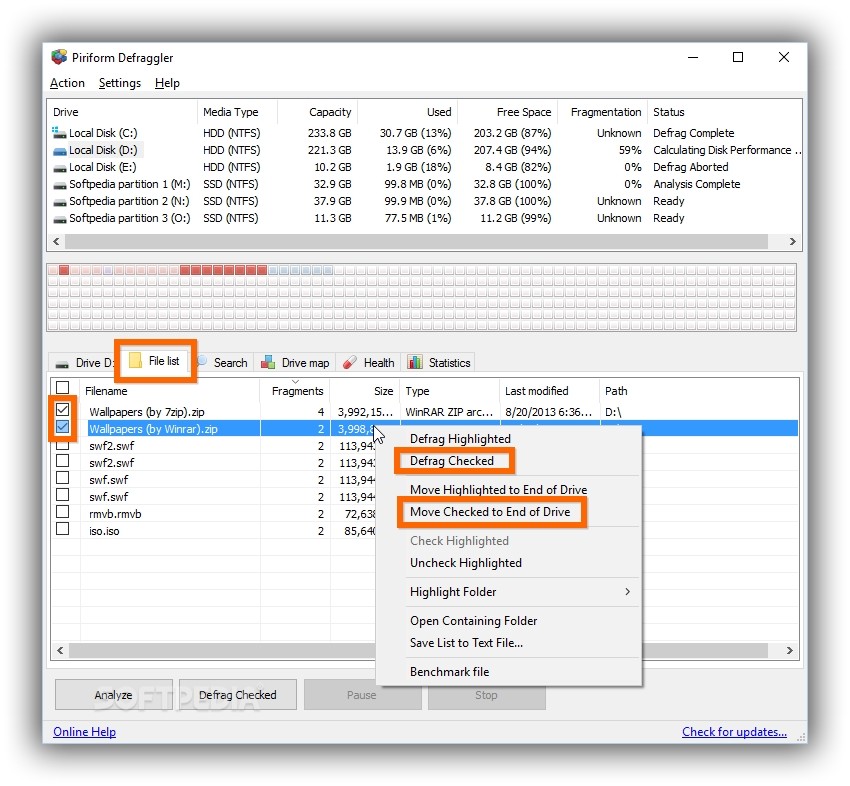
Multiple files can be defragged at the same time as well. Analyze a drive, go to the File list tab, check the boxes next to the preferred files for selection, and click the Defrag Checked button.
How to move files at the end of the drive
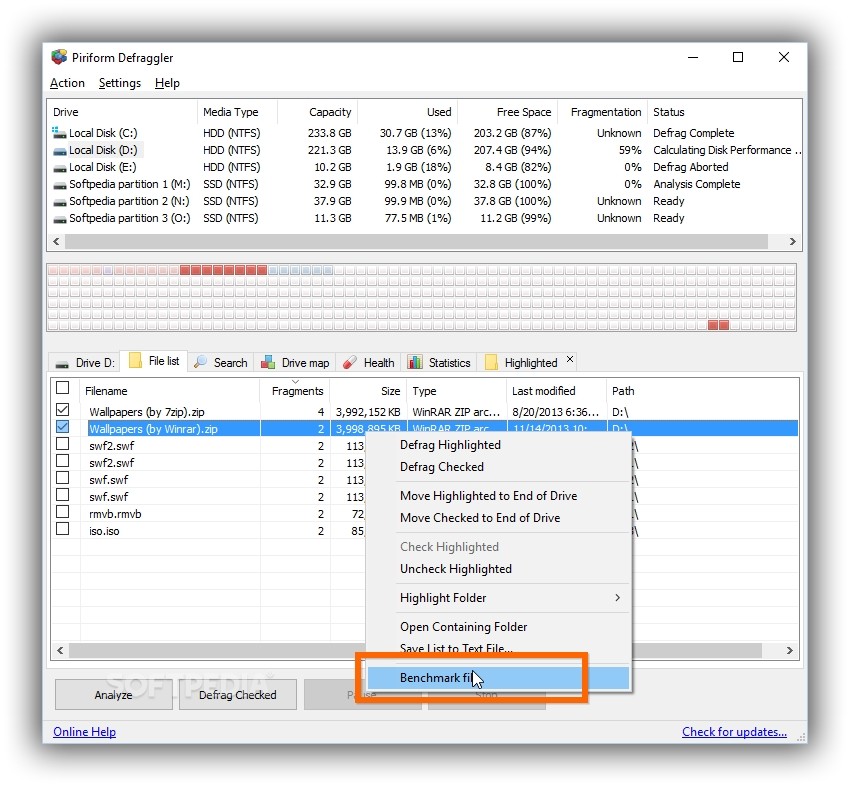
The utility is also capable of preserving the small files at the beginning of the drive and moving large ones at the end so that Windows can access the smaller ones quicker. To do this, select or check one or more files from File List, open the right-click menu, and pick Move highlighted to End of Drive or Move Checked to End of Drive.
The items are not physically moved, so you will find them in the same place in your file navigator. If you're unsure about what's considered big enough to move, right-click a file and select Benchmark file to calculate disk performance and find out the Random Read Speed (megabytes per second).
How to defrag freespace and check drives for errors
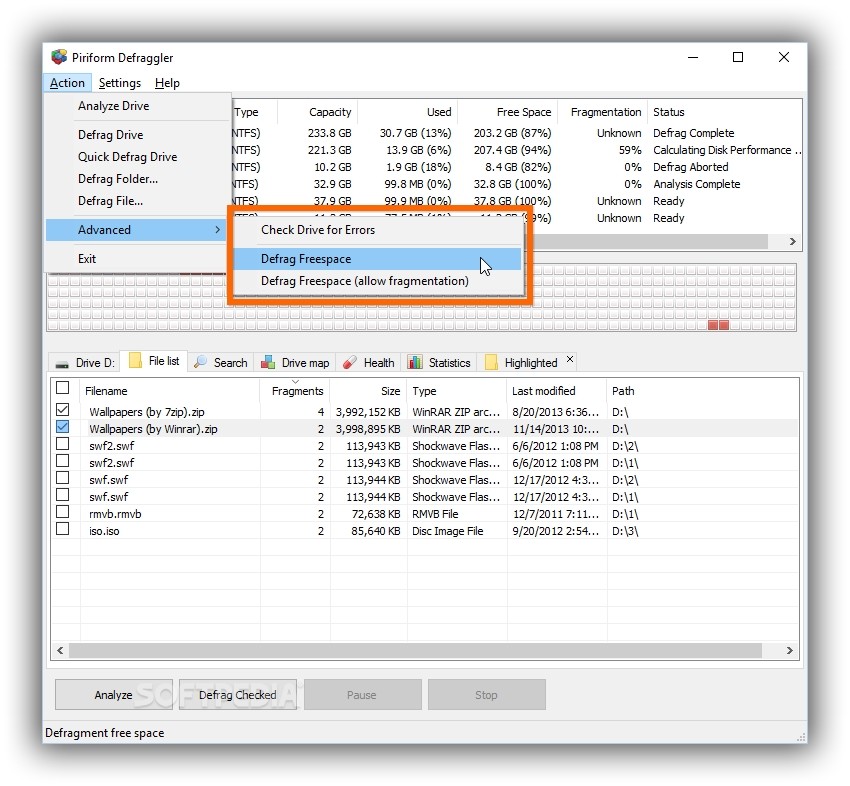
The free disk space can be defragged alongside your files to improve file writing as well as protect the disk by preventing further fragmentation. To do this, open the Action menu and select Defrag Freespace if you want to defrag only current files or Defrag Freespace (Allow fragmentation) to maximize freespace defragging. The tool can also use the Windows chkdsk command to Check Drive for Errors.
Defraggler cannot defrag multiple drives at the same time. On the other hand, it lets you select two or more drives to defrag them in the order displayed.
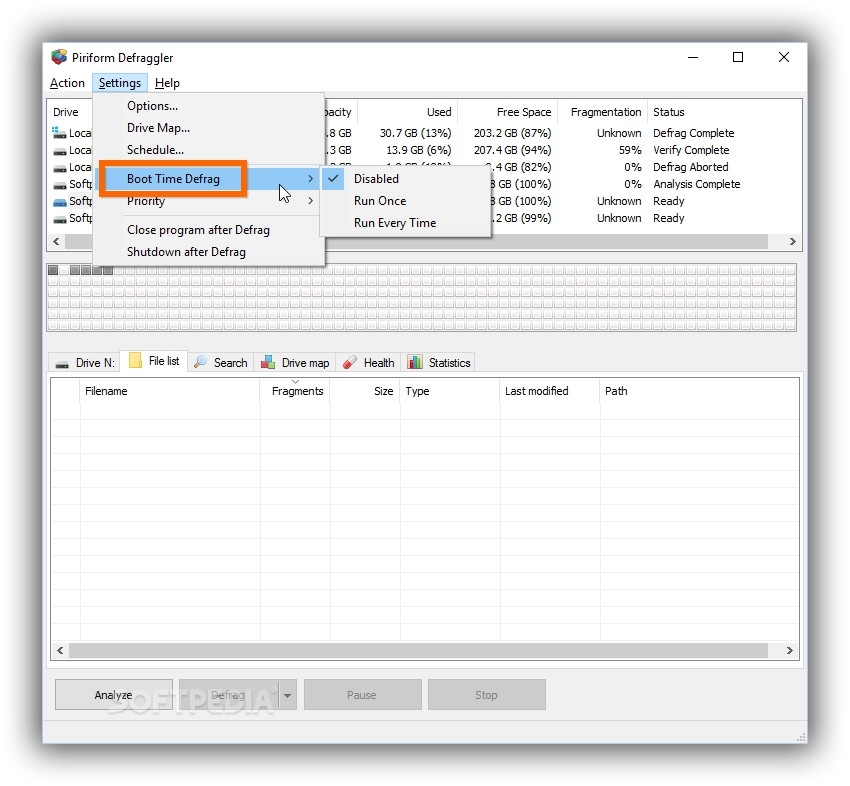
How to schedule Defrag jobs and Boot Time Defrag
It's advisable to perform defragmentation jobs periodically when you're not using your computer, due to the fact that it uses a lot of system resources. In this regard, you can Schedule tasks from the Settings menu, click to select a Drive, tick the Schedule defragmentation for chosen volume box, choose the preferred Period (Once, Daily, Weekly, Monthly, At Startup, At Logon) and configure the Starting from settings, and click to select the Defrag type between Full, Quick, Freespace and Freespace (allow fragmentation).
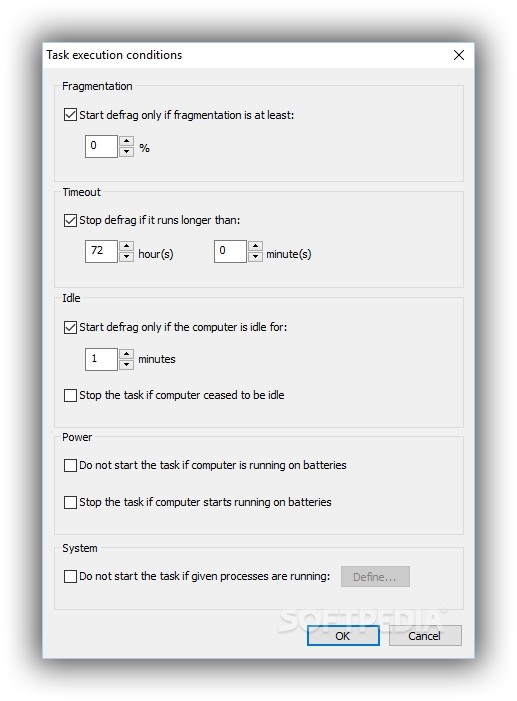
Optionally, you can Apply additional conditions, such as Start defrag only of fragmentation is at least n%, Stop defrag if it runs longer than n hours and minutes, or Start defrag only if the computer is idle for n minutes and Stop the task if computer ceased to be idle. Plus, you can check to Shutdown system after finishing the task if you plan to leave the PC unattended.
Boot Time Defrag can be set to Run Once (at the next Windows startup) or Run Every time (at every Windows startup) if you want Defraggler to defrag files being used by the operating system at boot.
Settings
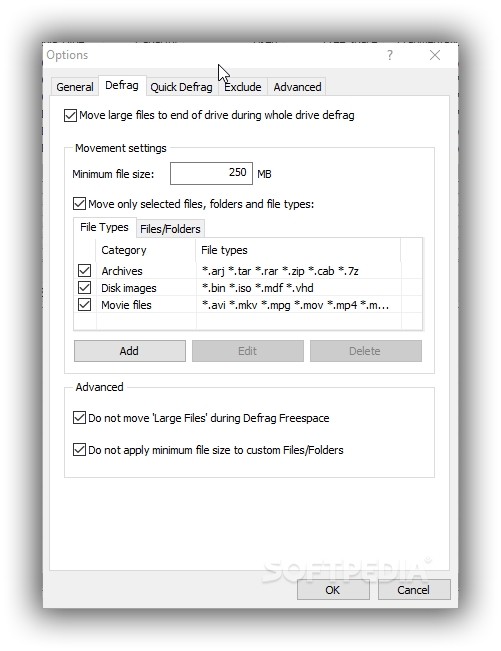
By default, the application is set to Move large files to end of drive during whole drive defrag, but you can disable this from Settings -> Options -> Defrag tab. It's also possible to modify the default Minimum file size (click inside the box to set a new number, in megabytes) and move large items during Defrag Freespace (clear the Do not move 'Large Files' during Defrag Freespace box).
Check to Move only selected files, folders and file types if you typically work with a particular kind of files, such as archives, disk images or movies. You can view the default Category and accepted File types for each content type, click Edit to make modifications to the existing entries, Add to create a new Category name with new File extensions, or Delete groups.
In Options -> Exclude, click Add to exclude All Drives, a specific Drive or Folder (browse for location) with All Files or custom File types (type file extensions) or a File (browse for file).
Check out our video guide and download Defraggler:
Defraggler Explained: Usage, Video and Download
Optimize your computer and improve file reading and writing access by periodically defragging disks. Learn how to correctly use Piriform's Defraggler for both HDD/SSD by checking out our video and article: http://www.softpedia.com/blog/defraggler-explained-usage-video-and-download-503775.shtml