The context menu, also known as the right-click menu, offers a quick way of accomplishing tasks using just a couple of right and left mouse clicks, from your typical cut, copy, move and delete actions, to more elaborate jobs, such as calculating checksums, changing timestamps or viewing EXIF tags.
In the following guide, we're breaking down three applications for Windows computers to show you how to effortlessly customize your Windows Explorer context menu. One is designed to hide the options you don't need to declutter the menu (ShellExView), and the other two have settings available for both removing unwanted context menu entries and adding new ones: FileMenu Tools (free) and Right Click Enhancer Professional (commercial).
ShellExView
ShellExView cannot add new context menu entries but is only able to hide existing ones and display them again if you change your mind.
At startup, it automatically detects all items and displays them in a list, along with many details, such as the Extension Name, whether the shell extension is already Disabled or not, Type (like Shell Folder, Thumbnail or Preview Handler), Description (like SearchFolder, Web Site Monitor or Network Explorer), Version, Product name, Company, if it exists in My Computer, Desktop, Control Panel, My Network Places, the Entire Network, full path to the Filename, CLSID in the registry, File Created Time, CLSID Modified Time, associated File Extensions, File Size, if it's a .NET Extension, and if it has a Missing File.
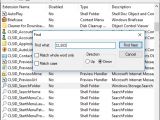
If you're looking for a particular item to remove from the context menu and know what it's called, open the Edit menu to click Find (or press Ctrl+F), enter a partial or full name in the Find what box, and click Find Next until you reach the item you're interested in.
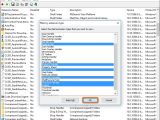
To filter displayed information by file extension, open the Options menu, choose Filter By Extension Type, and pick the shell extension types you want to view by holding down Ctrl or Shift while clicking to make a multiple selection. Click Ok when you're ready (the deselected items will not be displayed). From the Options menu, you can also Hide All Microsoft Extensions.
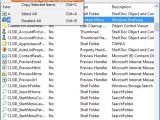
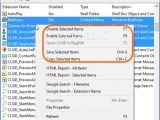
To remote right-click menu items, select an entry or hold down Ctrl or Shift while clicking to select multiple entries, right-click to open the context menu, and Disable Selected Items to hide them from the Windows Explorer context menu (or press F7 and click Yes for confirmation).
From the context menu in the main window of ShellExView, you can also Enable Selected Items if you change your mind and want to reuse the right-click menu objects (or press F8 and click Yes for confirmation), Open CLSID In RegEdit to view and edit the corresponding entry in Registry Editor (or press F2, works for just one selected entry), as well as Save Selected Items to a list for later examination (or press Ctrl+S) or Copy Selected Items (or press Ctrl+C).
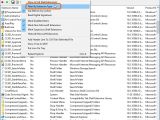
If you're unsure about what a particular context menu object does, choose Google Search - Filename or Google Search - Extension Name to look up more information on Google using the file's or extension's name.
FileMenu Tools
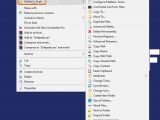
After installation, FileMenu Tools gets automatically integrated into the Windows Explorer shell extension. Right-click one or more selected files and folders, go to the FileMenu Tools entry to open the submenu, and select an action. There's a pretty long list, but you can customize all entries displayed here to extract the ones you don't need and keep the items that may be of use to you.
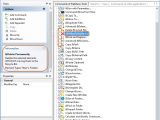
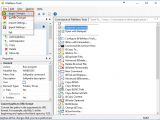
Right-click the Configure FileMenu Tools desktop shortcut to Run as Administrator and reach the main window that shows three tabs: Commands of FileMenu Tools, "Send To..." menu and Commands of other applications.
In Commands of FileMenu Tools tab, clear the boxes of the commands you don't want to see in the right-click menu, such as Copy To (copy items to any destination on the hard drive), Change Time (set the new creation, last write and last access date and time), or Calculate and Verify Checksum (supports MD5, SHA1, SHA256, SHA384, SHA512 and CRC32 hashes). If you're unsure, click an entry to view Information displayed on the left pane.
Go to the "Send To..." menu tab to view context menu entries that currently exist in the said menu, and clear the boxes of the ones you don't want to see there anymore, such as Desktop (create shortcut), Documents, Fax Recipient or Bluetooth device.
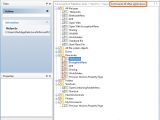
Go to the Commands of other applications tab to view right-click menu items of programs installed on your computer. They are organized into different categories, like All file types, All file system objects, Drives, Directories, Shortcuts, and My Documents. Double-click a group to expand its tree and view the context menu objects they refer to, and clear the boxes of the ones you don't want to be displayed anymore.
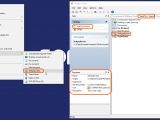
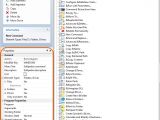
To add a new context menu entry to the Send To menu, go to the "Send To..." menu tab and click Add command from the Actions menu on the left panel to create an empty entry. Select it from the list (last one, doesn't have a name yet), go the Properties menu on the left pane, and click the empty boxes to enter a display Name, Target (indicate the path to an executable file using the popup file browser), Arguments (command lines), Working Folder (the program will be started using this directory), Icon to be shown in the context menu, and Description (comments).
To add a new context menu entry to the FileMenu Tools submenu, go to the Commands of FileMenu Tools tab, click Add Command, select the New Command item that appears on the list (above all the others), and go to the General tab. Here, choose the Action from Run program, Copy to a folder, Move to a folder, Delete specific files, Send to mail recipient and Rename files. Depending on the selected action, you have to mention additional properties at the bottom. For example, if you want to Run a program, then you can indicate the path to the program, write command-line Arguments, set the Working Folder and Window State at startup (Normal, Minimized, Maximized), allow or deny Several Instances, require to Run As Administrator and Convert paths to URL format.
Afterward, choose the Modifier Key that must be pressed while right-clicking to make it appear in the menu (Shift, Ctrl, Win or none), edit the Menu Text (display name) and Description (comments), assign an Icon, and pick the Element Types to apply the new item to: Files, Folders or Drives. In the case of Files, you can also filter them by Extensions. For example, if you type jpg in Extensions, then the new command will be displayed only when right-clicking a JPEG image. In the case of folders, you can either apply the command to all folders or just Specific ones (write full or relative paths). Meanwhile, Drives can be filtered by Types (Fixed, Removable, CD-ROM/DVD-ROM, Network, RAM Disk).
All modifications you've made until this point are not automatically applied. To do this, open the File menu and click Apply Changes.
Right Click Enhancer Professional
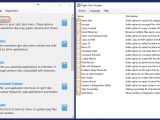
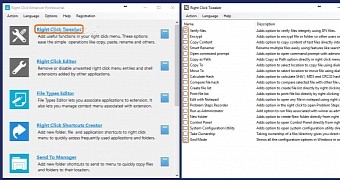
In the main window, click Right Click Tweaker if you want to add new commands to the context menu. The app loads a list with all possible actions, and you just have to tick the boxes of the ones you're interested in. Each command Name is accompanied by a Description to let you know what it does. For example, check the Verify files box if you want to be able to check file integrity using SFV files, the Smart Renamer box to rename two or more files in bulk by replacing patterns using tags (for MP3 audio track), EXIF tags (for JPEG photos) or file attributes. After making the selection, you don't have to click any buttons to confirm modifications. Simply exit this panel, check results by right-clicking a file on the spot to see the new entries, and return to the main window of Right Click Enhancer Professional.
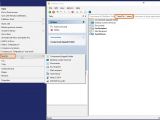
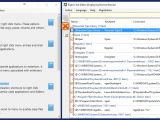
To hide unwanted right-click menu entries and shell extensions created by other apps, click Right Click Editor in the main menu to view the Name, KeyName, Command and associated Extensions for each item. Select one or more objects by ticking their box and click the red X button on the left or right-click to pick Remove.
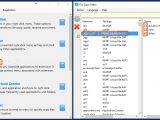
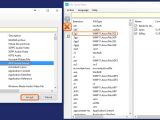
From the main app window, click File Types Editor if you want to reassociate file extensions and context menu objects with various applications you have installed. You can explore a list of all Extensions and FileTypes detected by the program, and click any entry to find out the name of its corresponding context menu Name as well as Command (full path and arguments), along with the MenuKey.
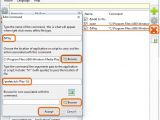
To edit existing file type associations or create new ones, select an entry from the left column, click the settings button on the left, choose a new filetype, and click Accept.
To edit existing commands or create new ones, choose an entry from the right column, click the settings button on the right, change the display name, Browse the hard drive for an application or script to carry out the associated command, enter arguments, and Browse for an icon. Click Accept when you're done.
Returning to the main window, click New Menu Editor if you want to hide unwanted or unnecessary objects from the New submenu of the right-click menu. The program loads a list with everything, showing the Extension, Description, Menu type, File Path and Registry Path of each item. To remove an item from the New submenu, select an entry from the list and click the X button on the toolbar or right-click to choose Remove from the menu.
Right Click Enhancer Professional also features options for creating shortcuts in the right-click menu or the Send To menu to copy files and folders, as well as of frequently used applications and folders. Plus, you can add new file types to the context menu and configure settings for each new function added.
Play our video guide below to see how you can easily customize your context menu using these three apps. You can also download ShellExView, FileMenu Tools and Right Click Enhancer Professional.
How to Replace Useless Context Menu Entries with Helpful Ones
Customize your Windows Explorer context menu to speed up your tasks and gain more control when right-clicking. Check out our article for more info: http://www.softpedia.com/blog/how-to-replace-useless-context-menu-entries-with-helpful-ones-505328.shtml
 14 DAY TRIAL //

