14 DAY TRIAL //
 During a Windows installation, the OS offers to create one or more partitions, depending on how you wish to organize data. It's generally recommended to make at least two volumes, one for keeping Windows and installed programs, and another for storing regular files.
If you change your mind at any point after setting up the operating system, you don't have to reinstall it just to be able to modify the partition configuration. Instead, you can turn to Disk Management (diskmgmt.msc Run command), the Windows built-in tool that allows you to create, format, extend, shrink and delete partitions. However, there are numerous third-party applications that have taken partition handling to a new level, providing more tasks than Disk Management and making them easier to understand and use.
We're breaking down three popular and free-to-use partition managers to find out the quickest and safest route for creating a new partition: EASEUS Partition Master Free Edition, MiniTool Partition Wizard Free and AOMEI Partition Assistant Standard Edition.
Getting started
Elevation is necessary to create volume partitions, so you must have administrator rights when launching any of the three applications. Also, unallocated or free space must be available on an extended partition of the hard disk. Unallocated disk space can be obtained by decreasing the size or deleting an existing partition.
EASEUS Partition Master Free Edition
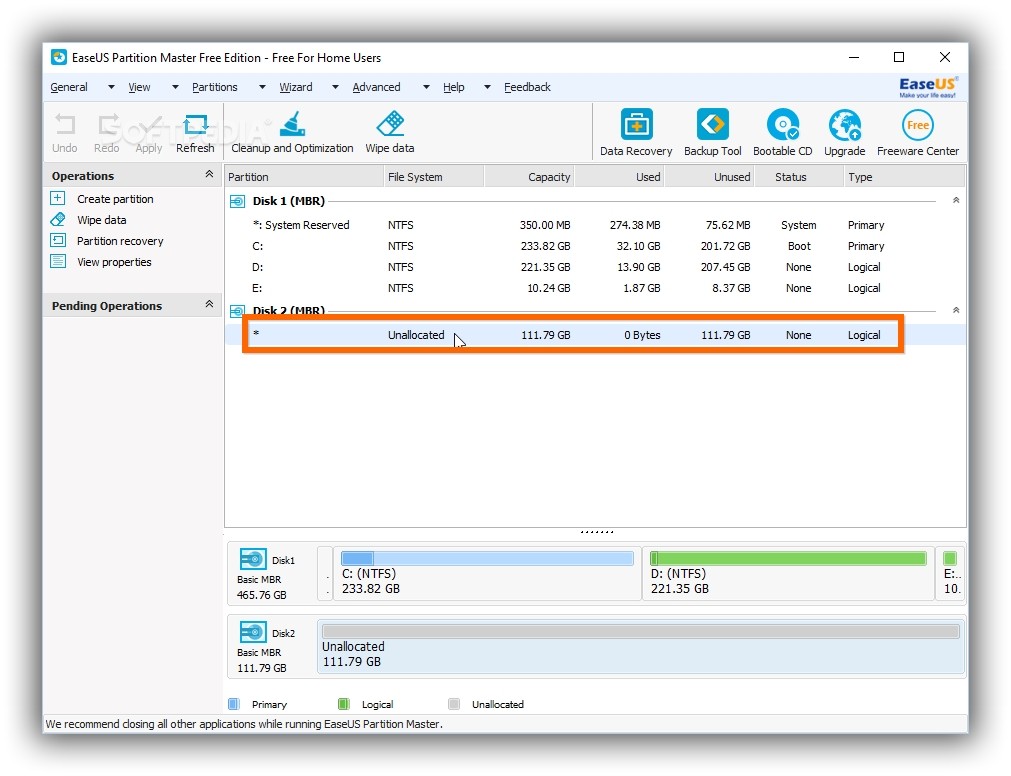
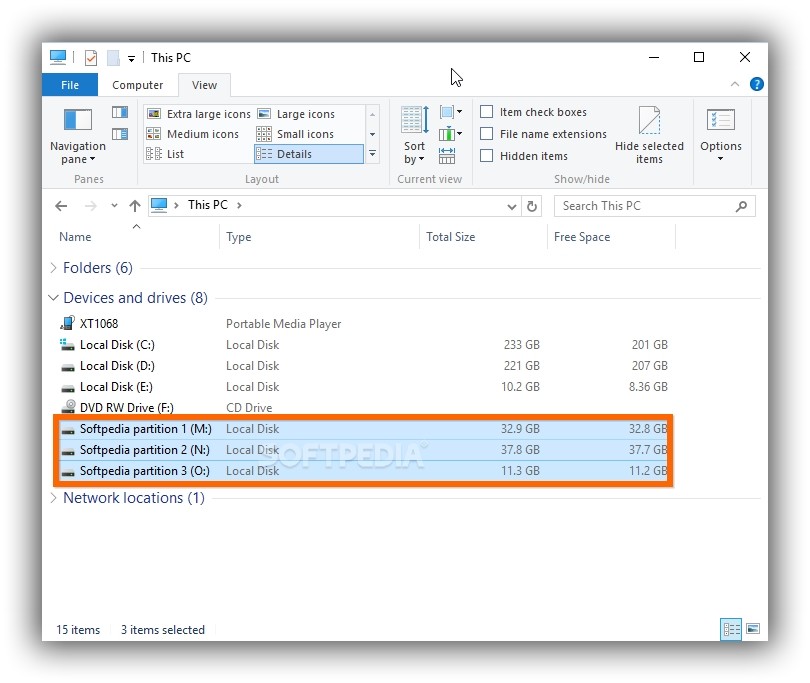
At startup, click Launch application to gain access to the main window, where your disks and partitions are listed and you can view the File System, Capacity, Used and Unused space, Status and Type for each Partition.
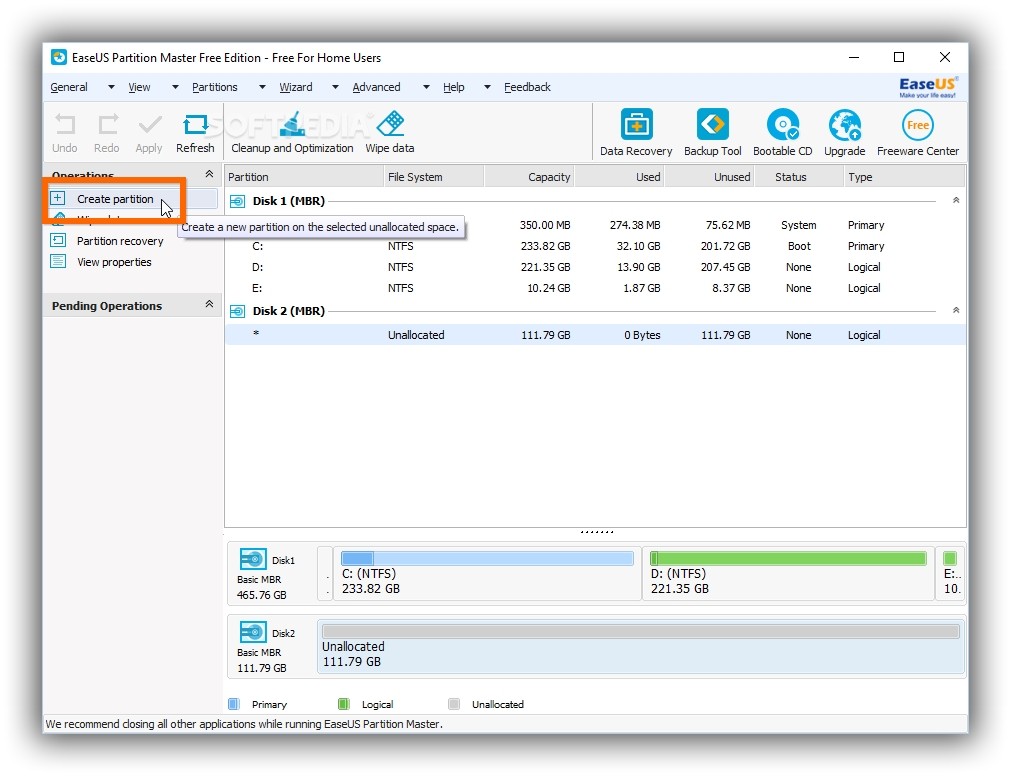
Click the entry that has Unallocated displayed in the File System column. All Operations possible for the selected partition are listed in a column on the left side. Click Create partition to bring up a new window and configure settings.
Click inside the box next to Partition Label to type a preferred name for the new partition, tick the Optimize for SSD box if you have an SSD instead of HDD, as well as set Create As to Primary if you plan on installing an operating system on the new partition, or to Logical if you want to use it for regular data storage.
Next, you can set Drive Letter to a letter that's not already occupied by a partition, File System to NTFS, and Cluster Size to Default. To specify the desired partition size and position within the unallocated space, click and drag the green horizontal bar until you obtain the right dimensions. Alternatively, set the Unallocated Space Before, Partition Size, or Unallocated Space (megabytes) by clicking two arrow buttons to increase or decrease the dimension, or the text boxes to edit the numbers.
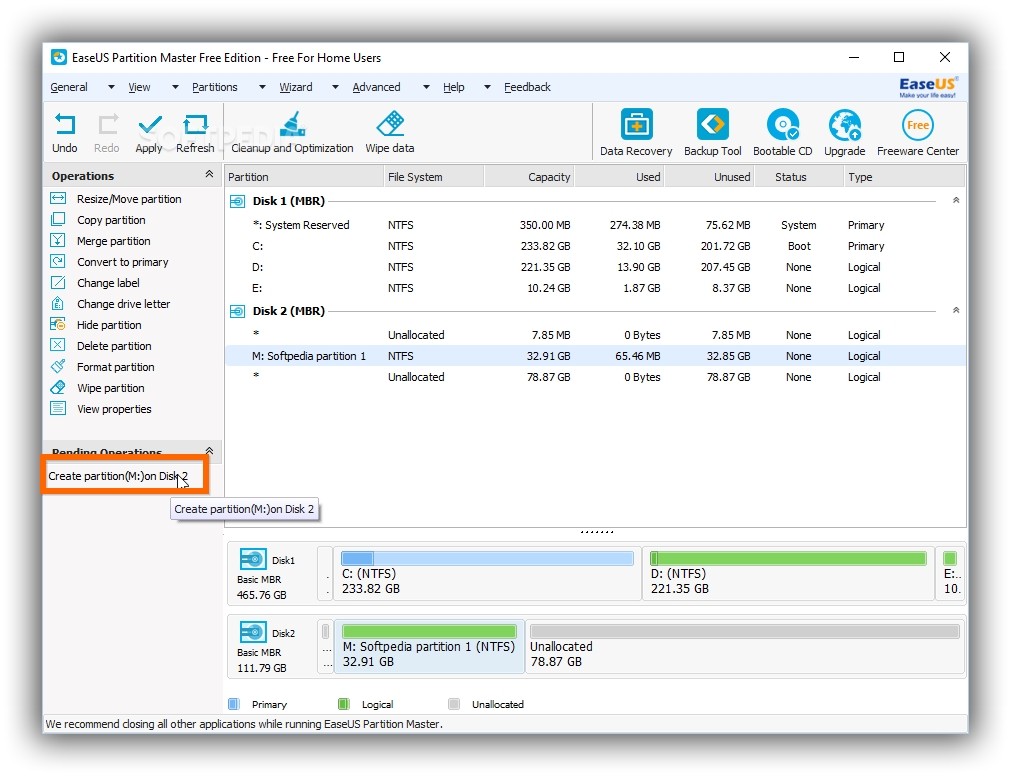
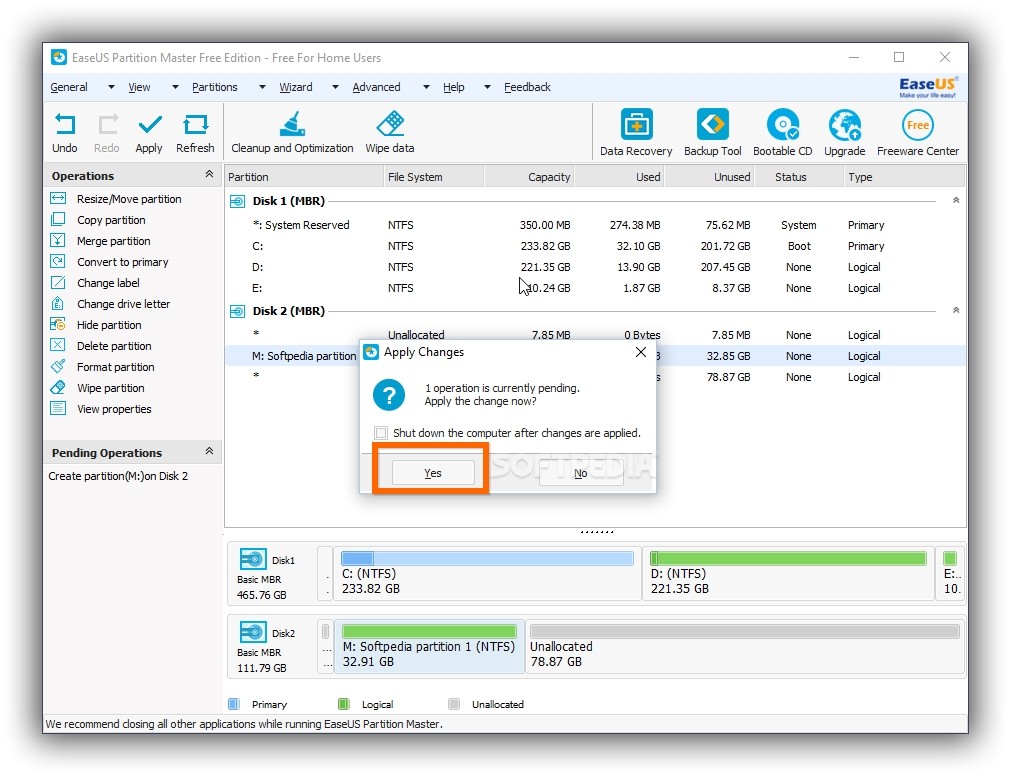
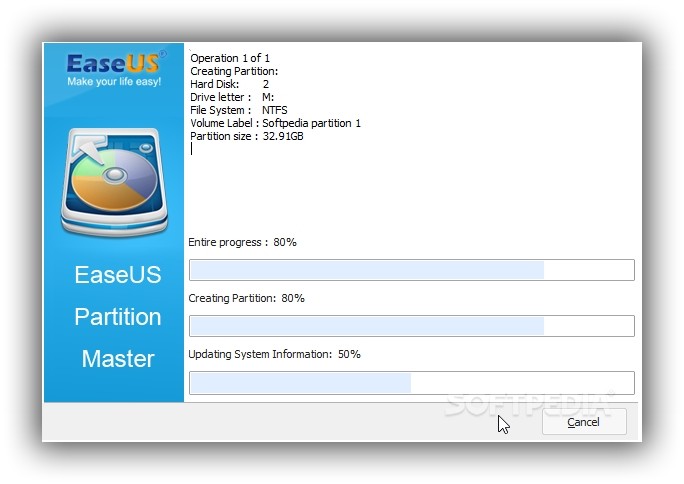
Click Ok to continue. However, the task is not over yet. The Create partition task is recorded by EaseUS Partition Master and shown in the Pending Operations list (below the Operations column).
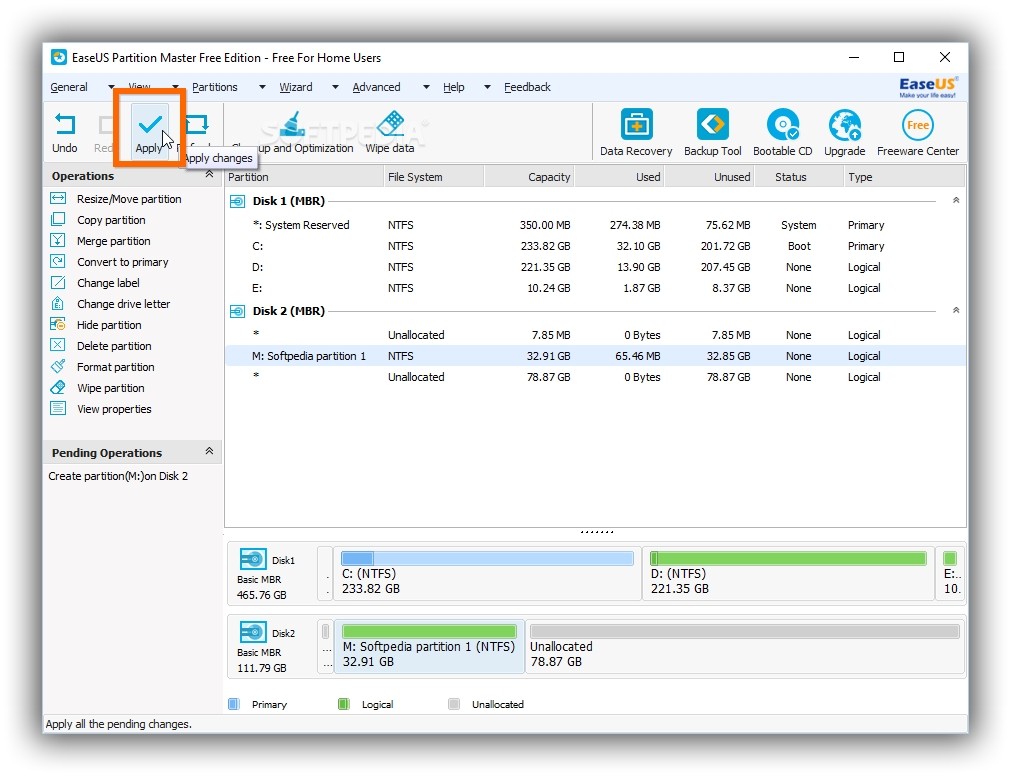
If you made mistakes or changed your mind, click Undo on the toolbar to disregard the Create Partition job and start from scratch. Otherwise, unless you want to perform additional tasks using the program, click Apply on the toolbar to commit changes and Yes in the prompt message for confirmation.
It's not necessary to restart the computer. The new partition can be now viewed in the list of the main application window. You can also open your file navigator to explore the new drive.
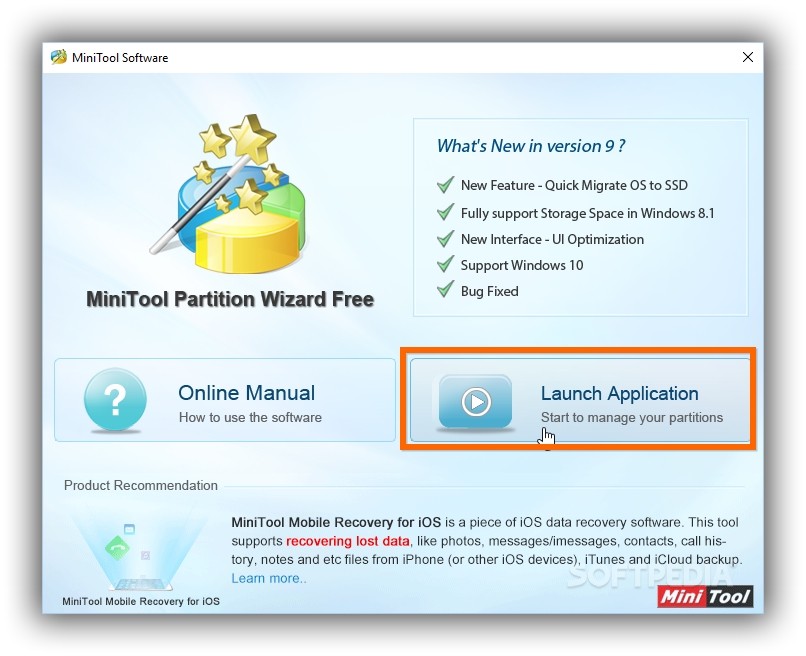
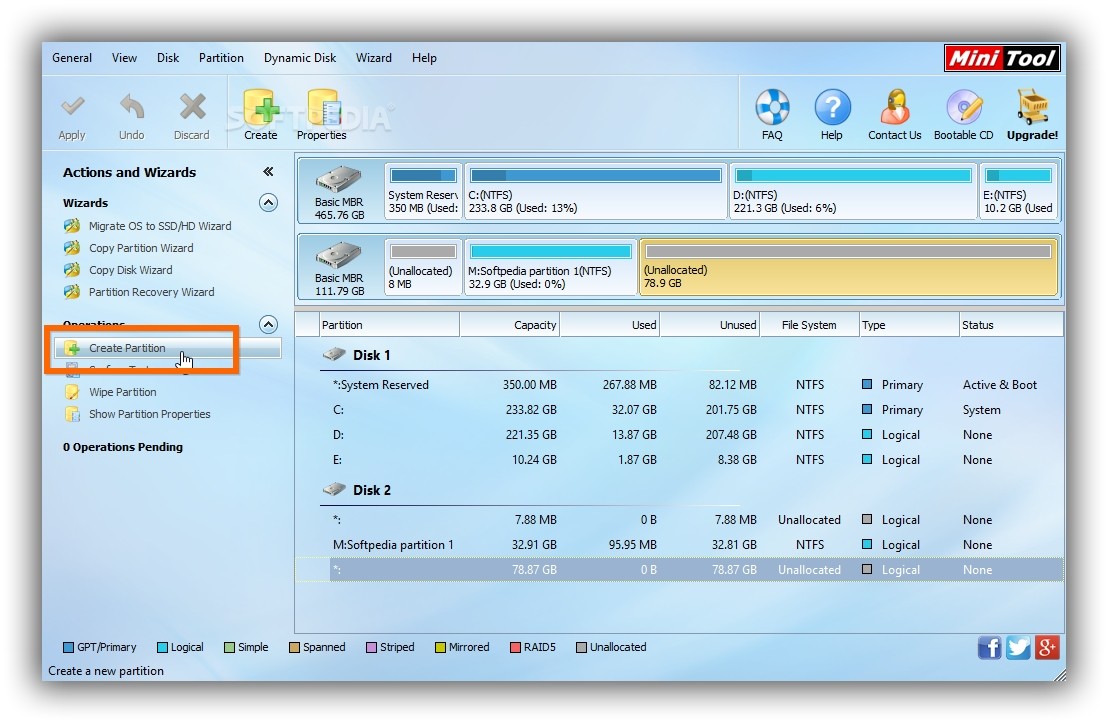
MiniTool Partition Wizard Free
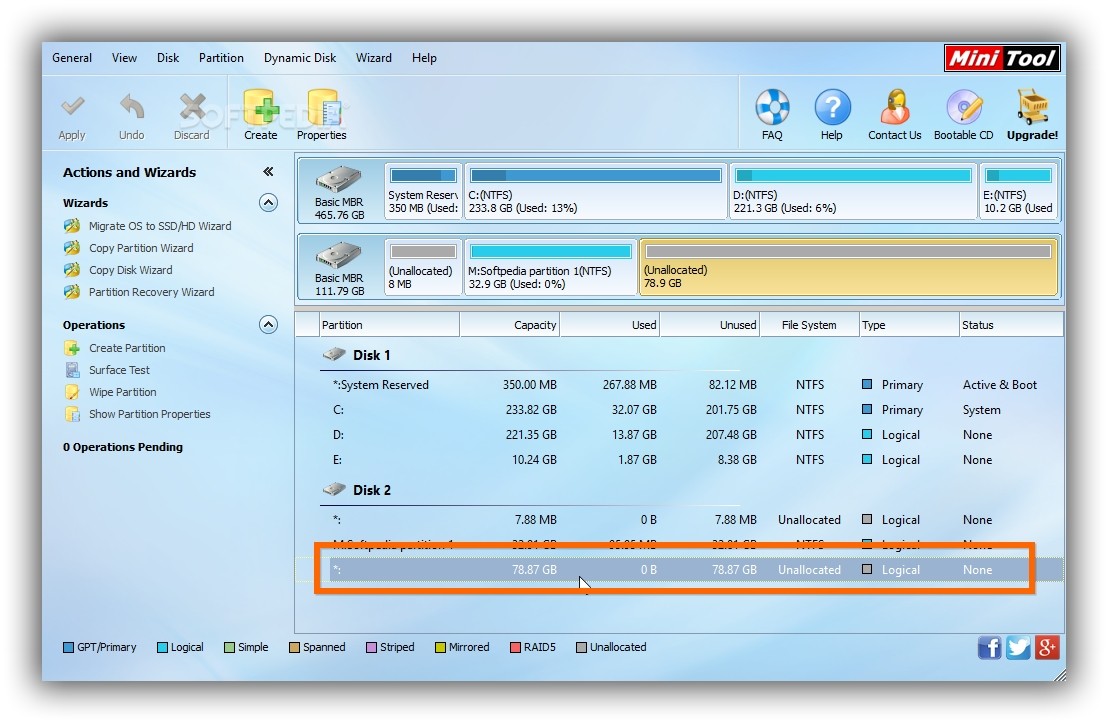
Once fired up, click Launch Application. In the central panel of MiniTool Partition Wizard, you can view a list of your drives and partitions, as well as the Capacity, Used and Unused space, File System, Type (primary, logical) and Status (active and boot, system, none).
Click on a partition with Unallocated in the File System column, then Create Partition in the Operations columns on the left side, below Wizards.
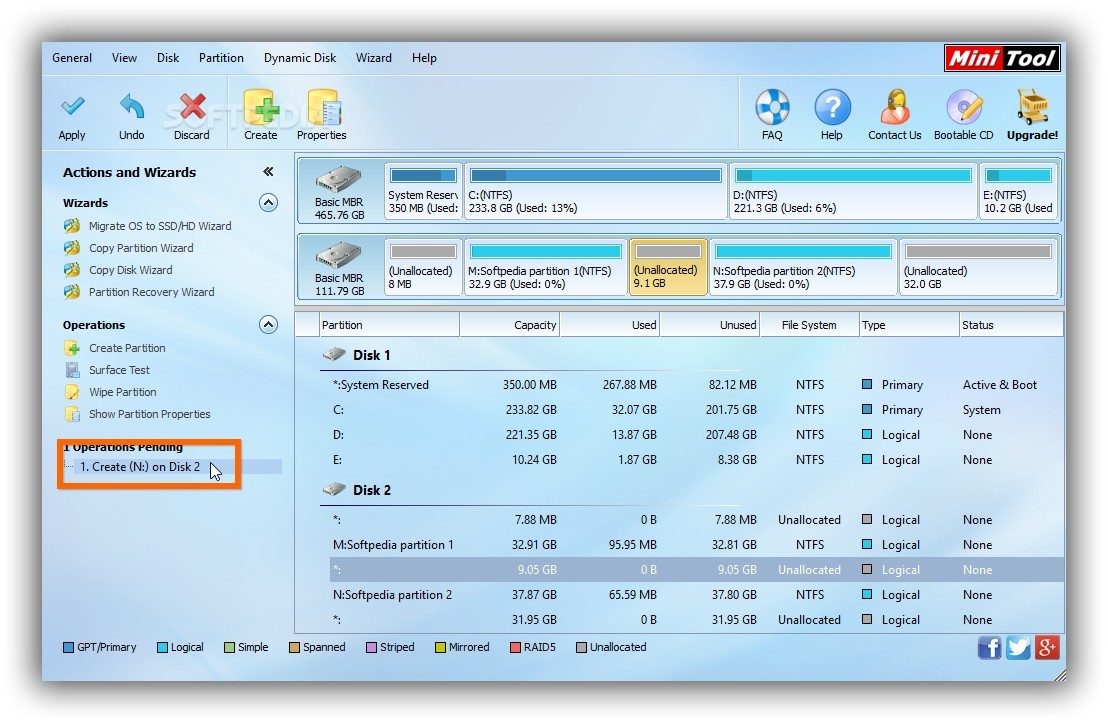
The following steps are similar to the partition settings we've covered for EaseUS Partition Master: type the Partition Label, set Create As (drive type) to Primary (for installing an operating system) or Logical (for data storage), pick an unused Drive Letter from a list, as well as set File System to NTFS and Cluster Size to default.
The Size And Location of the new partition can be configured by clicking and dragging the blue horizontal bar, entering numbers for Unallocated Space Before, Partition Size or Unallocated Space after, or by clicking on the two arrow buttons next to each box to increase or decrease the corresponding number.
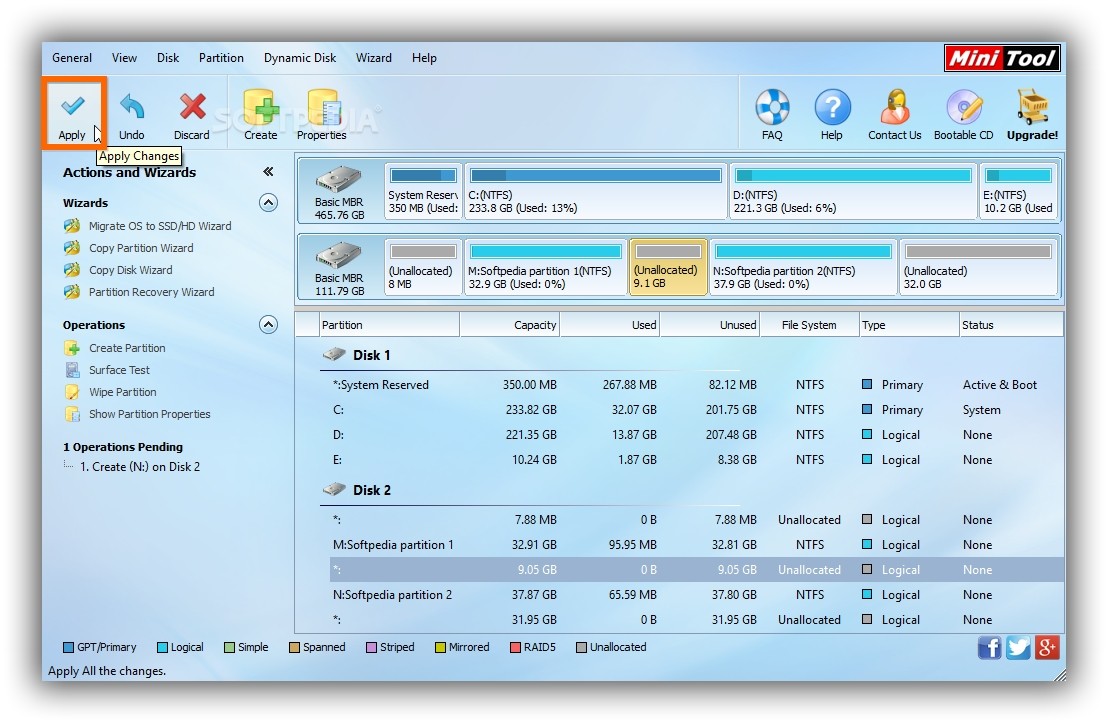
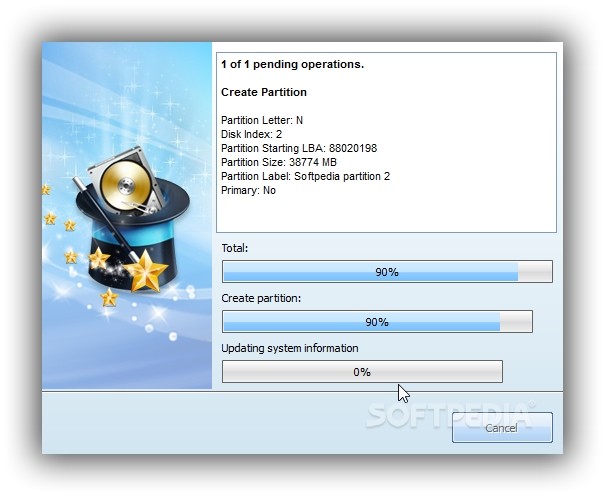
Click Ok to proceed and Yes for confirmation, wait for the task to finish, then view the new partition in the list of MiniTool Partition Wizard Free (open Windows Explorer to find it).
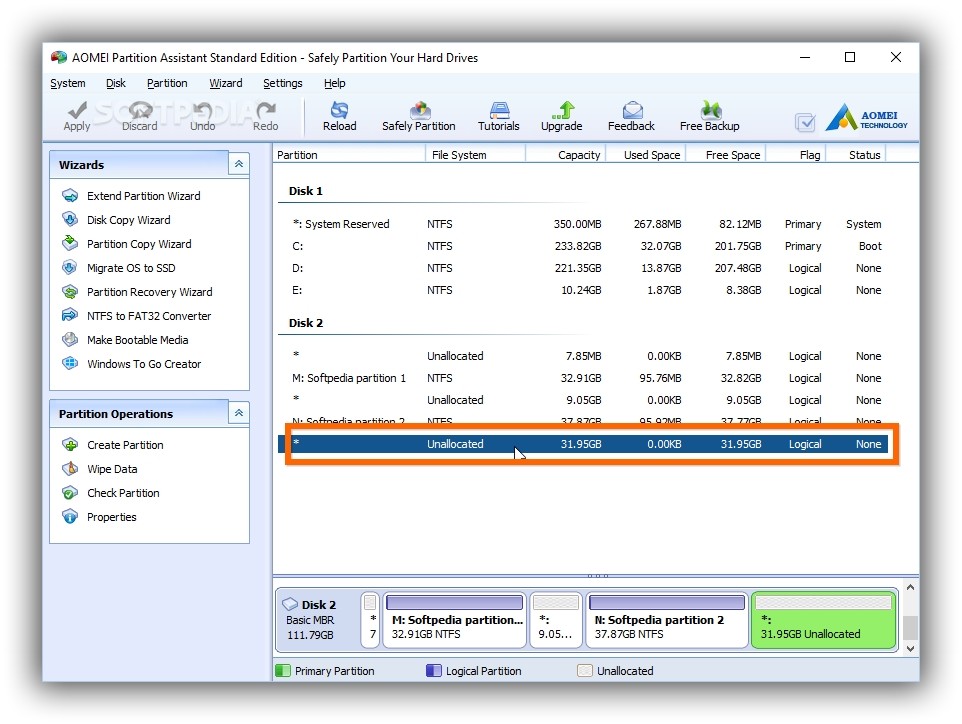
AOMEI Partition Assistant Standard Edition
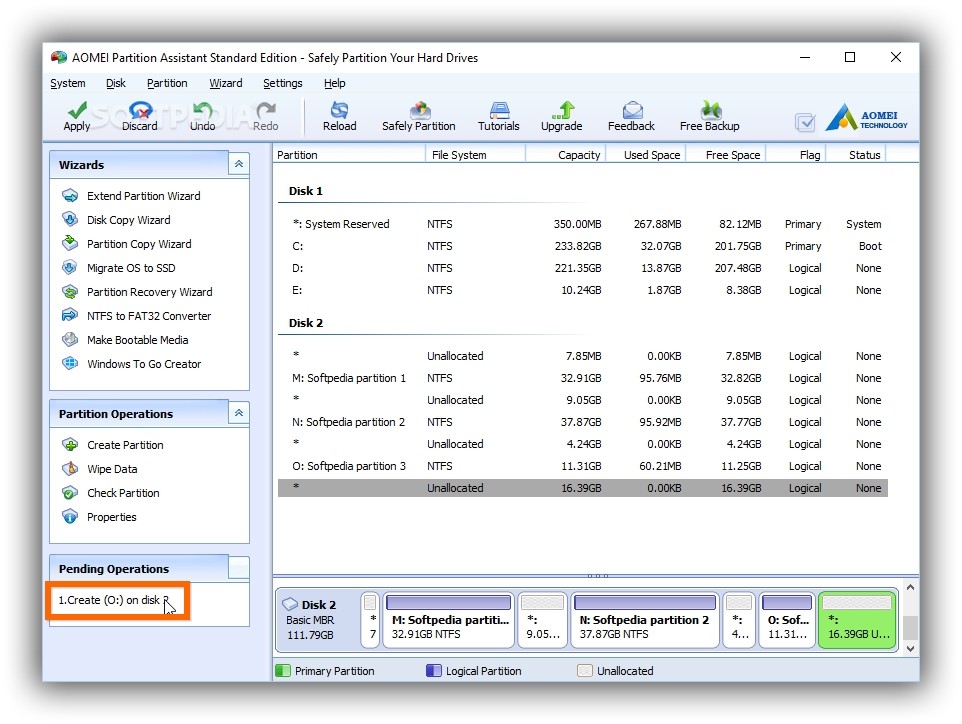
After launching the tool, AOMEI Partition Assistant displays a list with all hard disks and partitions detected. You can view their labels (Partition), File System (like NTFS or unallocated), Capacity, Used Space, Free Space, Flag (logical, primary) and Status (system, boot, none).
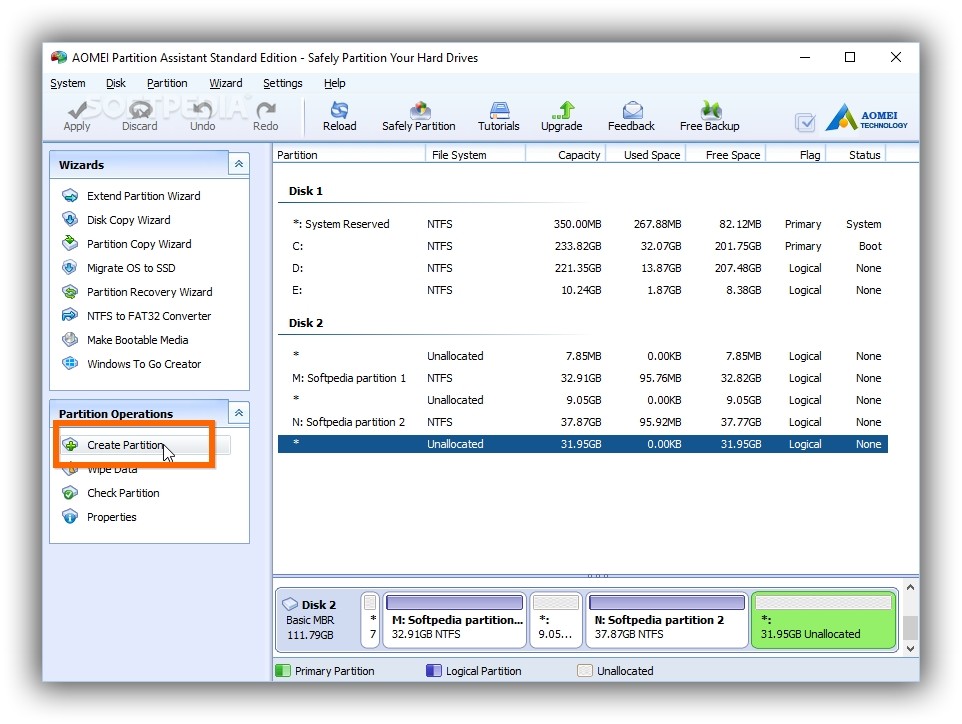
Find an entry with File System -> Unallocated space after making sure the Capacity is large enough for setting up a new drive, and click Create Partition from the Partition Operations column on the left of the window, below Wizards.
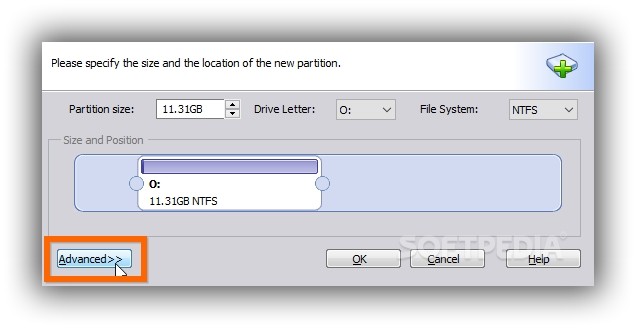
A new window pops up on the screen, where you can manage options. Set Partition size to the desired number by clicking inside the box to type or the two arrow buttons to increase or decrease the shown number. Otherwise, click and drag the purple horizontal bar to set the partition dimension and position on the unallocated space. Pick the preferred Drive Letter from a list and set File System to NTFS.
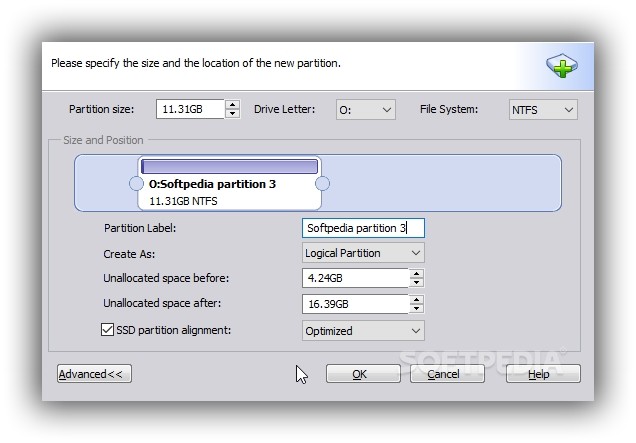
Click the Advanced button on the lower-right corner to extend the panel and configure additional settings. Type the Partition Label, set Create As to Primary Partition if you want to install an OS or to Logical Partition if you want to store regular files on it, as well as check the SSD partition alignment box if you have an SSD instead of HDD and leave it to Optimized.
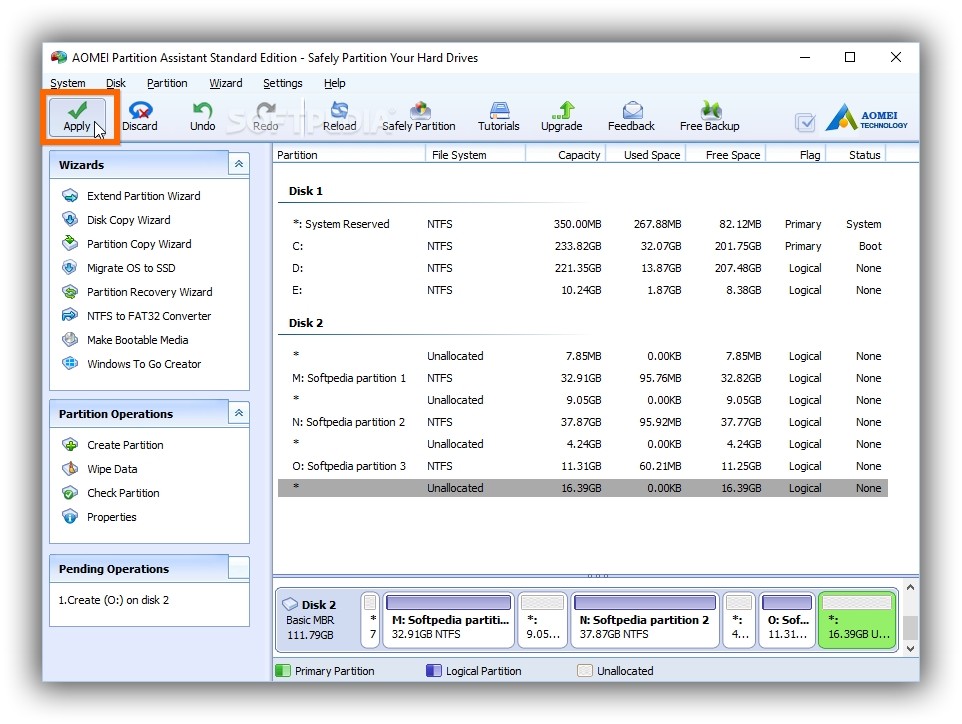
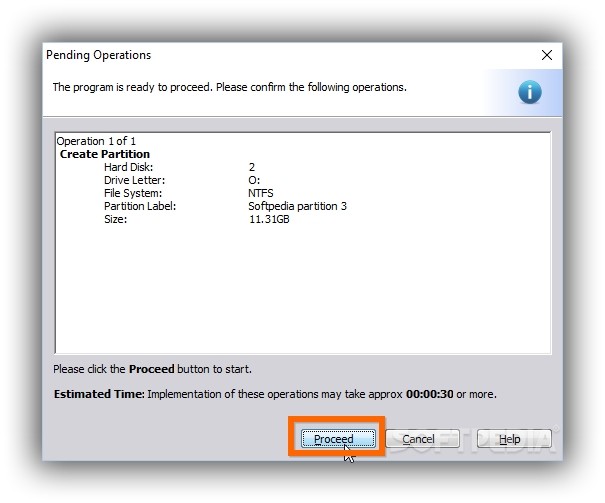
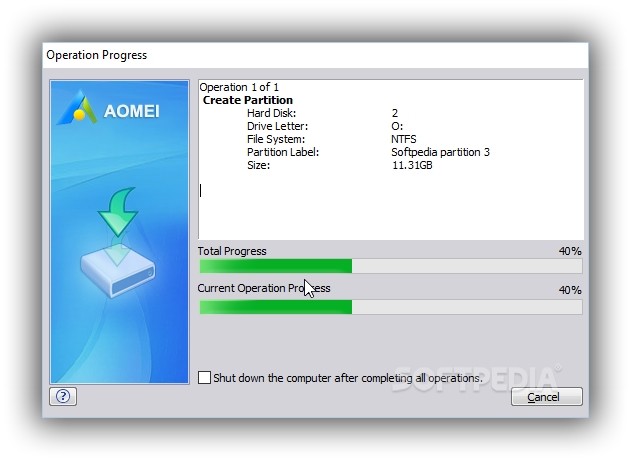
Click Ok to continue. AOMEI returns to the main window, where you can view the task in the Pending Operations panel on the left side, under Partition Operations. Click Apply on the toolbar, Proceed in the following window after reviewing configured settings (including Estimated Time), and Yes for confirmation. The new drive is now visible in the list of partitions (use Windows Explorer to locate it).
View our video guidelines to see the exact steps you have to take, as well as download EASEUS Partition Master, MiniTool Partition Wizard and AOMEI Partition Assistant.
How to Safely Partition an Old or New HDD/SDD
Learning how to safely create partitions helps you manage files easier and separate the operating system and installed application from personal data. Check our video and article to find out how to do this using EASEUS Partition Master, MiniTool Partition Wizard and AOMEI Partition Assistant: http://www.softpedia.com/blog/how-to-safely-partition-an-old-or-new-hdd-sdd-503762.shtml