14 DAY TRIAL //
 iExplorer is a Windows application that gives you the possibility of exploring the contents of your iPhone, iPad or iPad in a user-friendly interface, as well as exporting files to the computer. Before proceeding, you should know that it doesn't come equipped with features for copying files from the hard drive to the iOS device, so it cannot sync data like iTunes or other similar tools.
We're breaking down iExplorer in the following guide to show you how it works. It's not free to use, and the demo edition doesn't allow you to export contacts, messages, call history, bookmarks, calendar items, notes and photos.
Getting started
Make sure your iPhone, iPod or iPad is plugged into the computer unit through a cable. Also, download and install iTunes and .NET Framework 4.0 unless you already have them. During installation, iExplorer offers to install QuickTime. If you don't already have it and wish to view videos from your device, make sure to allow its installation (can be later installed too).
Once launched, select your device's name from the column on the left to view its Capacity, Software and Firmware Version, Serial Number, Used and Free space, along with buttons that you can click to access the remaining menus shown in the left column.
Media Library
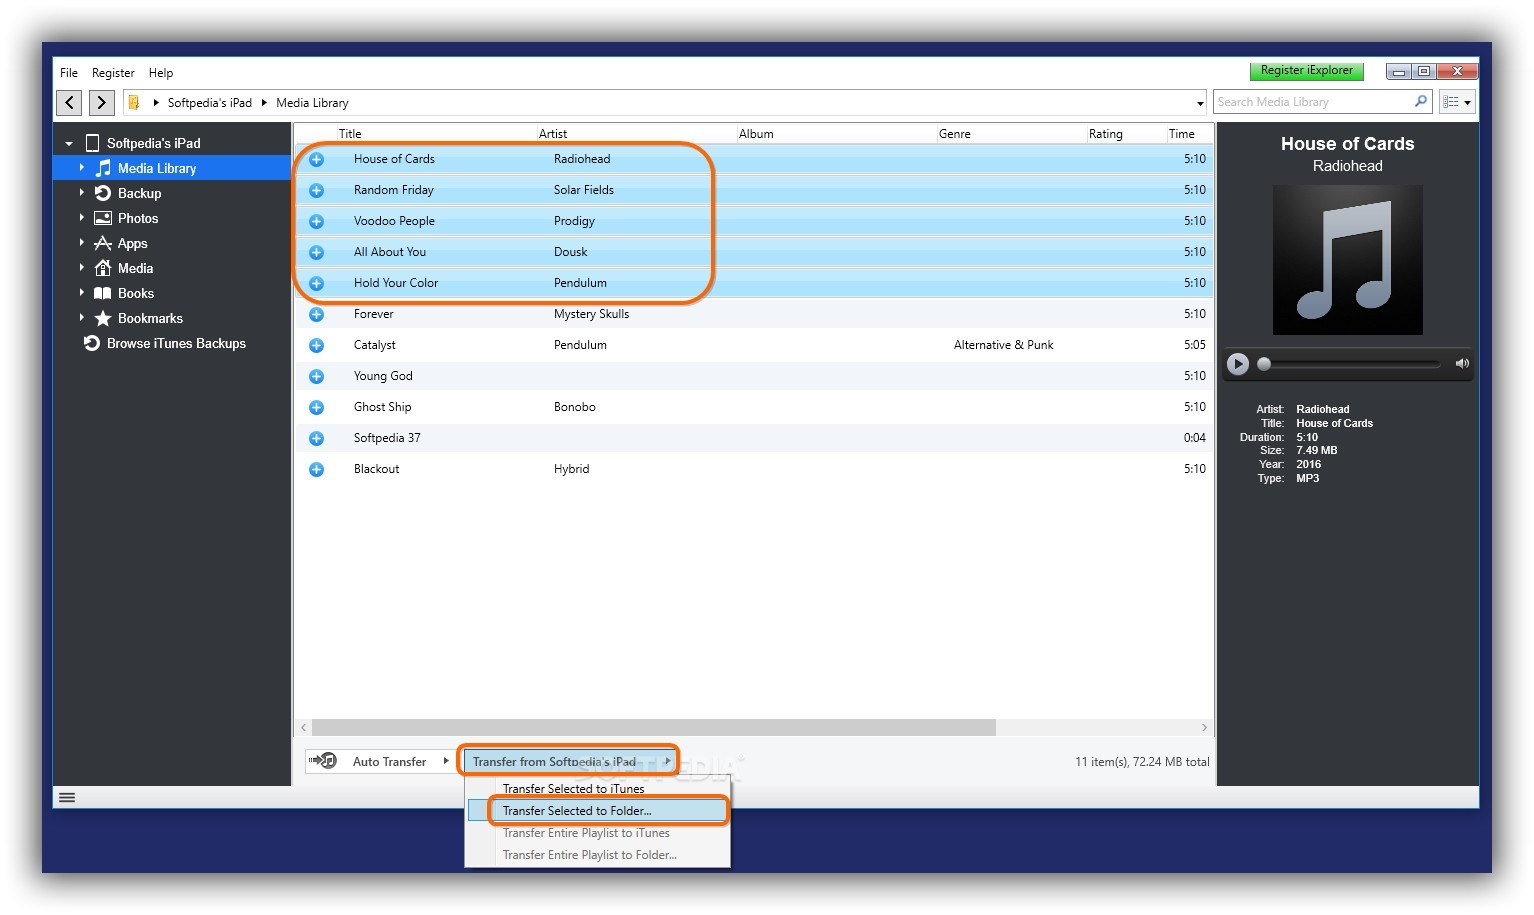
Go to Media Library to view all audio and video files on your device, including the Title, Artist, Album, Genre, Rating, Time, number of Plays and File Type for each entry. To filter media files by type, open the Media Library menu to select Music, Movies, Ringtones or playlists.
To copy media items from the device to your computer, click an entry from the list or hold down Ctrl or Shift while clicking files to make a multiple selection. Then, open the Transfer from Device's Name menu and pick Transfer Selected to iTunes if you want to import them into your iTunes library, or Transfer Selected to Folder and tell iExplorer where you want to copy the items to (click Ok for confirmation). Otherwise, right-click and choose Export Selected Track(s) to Folder or Export Selected Track(s) to iTunes.
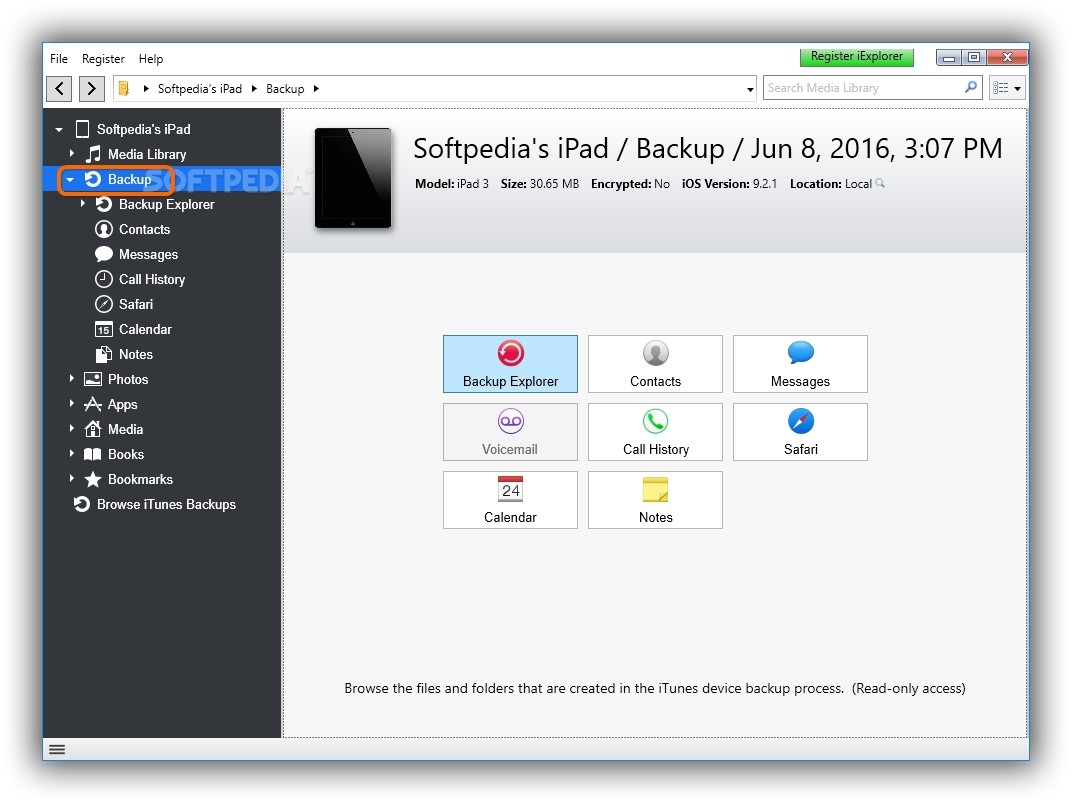
Backup
Go to Backup to view all backups performed for the iOS device, along with buttons to subsections that can also be accessed from the left column.
In Backup -> Backup Explorer, you can navigate folders to view files backed up to iTunes. However, this is a read-only operation, since editing or removing the items isn't possible.
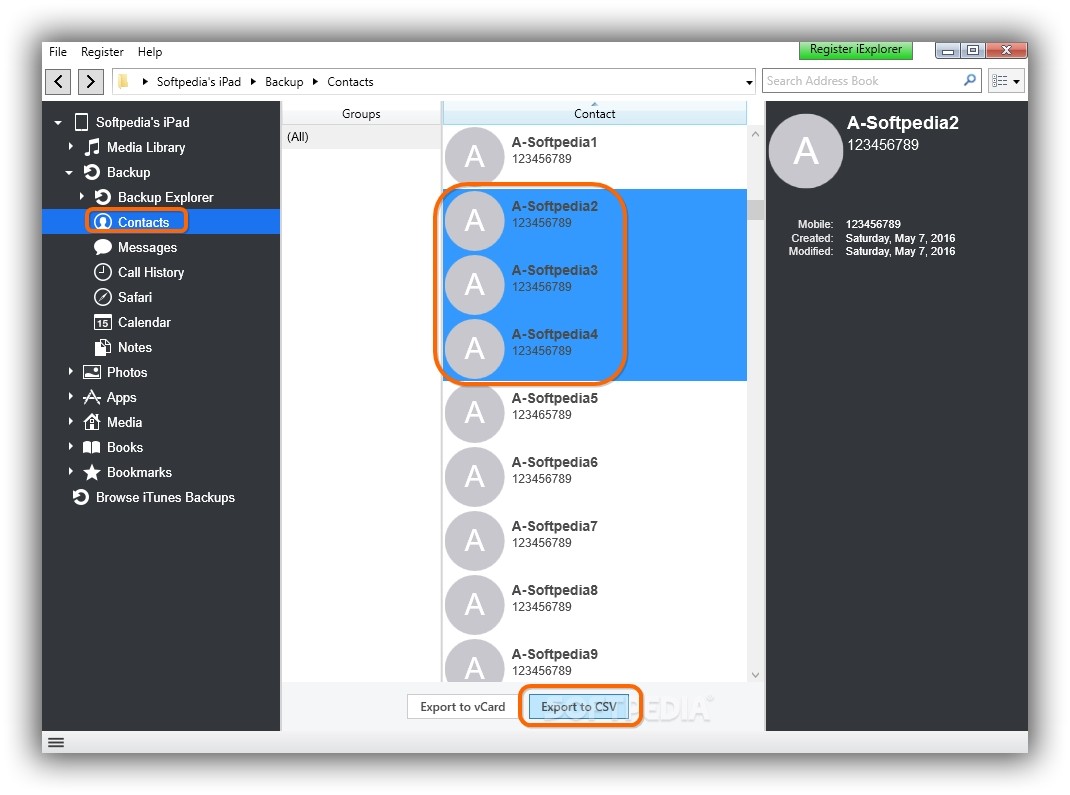
In Backup -> Contacts, you can view and export contacts from your device's address book to your PC. To do this, select a contact or hold down Ctrl or Shift to make a multiple selection and click the Export to vCard or Export to CSV button on the bottom, depending on which two of these file types you prefer. Select Export to CSV if you're unsure. Once you click the button, click Export All, Export Selected Contacts or Export Selected Group.
In Backup -> Messages, you can view all sent and received SMS texts. Click Export All to Export all conversations as TXT, CSV or PDF files, as well as to Export all attachments from all conversation.
In Backup -> Call History, you can view past calls, select an entry or hold down Ctrl or Shift to make a multiple selection and click Export Selected Calls (to CSV or TXT) or Export All (to CSV or TXT).
In Backup -> Safari, you can view all Bookmarks you have saved while surfing the Internet, along with a History of visited websites. Choose one or more entries from the list and click Export Selected (to CSV or TXT) or Export All (CSV or TXT or Bookmarks to HTML).
In Backup -> Calendar, you can see all events marked in your device's calendar, including the Start and End time, Duration, number of Repeats, Summary, Location, Description and URL. Pick an event or multiple ones and click Export Selected Events to save them to the computer. Otherwise, you can pick a calendar and click Export Selected Calendar or Export All Calendars.
In Backup -> Notes, you can view all notes available in the iCloud, as well as on your device or device's iCloud. One or more selected notes can be saved to the workstation for safe keeping. To do this, click Export to TXT or Export to PDF (Selected Note, Selected Folder, All Notes).
Photos, Apps, Media, Books
Go to Photos in the left column to view all pictures stored on your iOS device, including the Name, Date Modified, Type, Size, Resolution and Location. You can Export Entire Library or select one or more images to Export Selected Items, specify where you want to save them on your hard drive, and click Ok for confirmation.
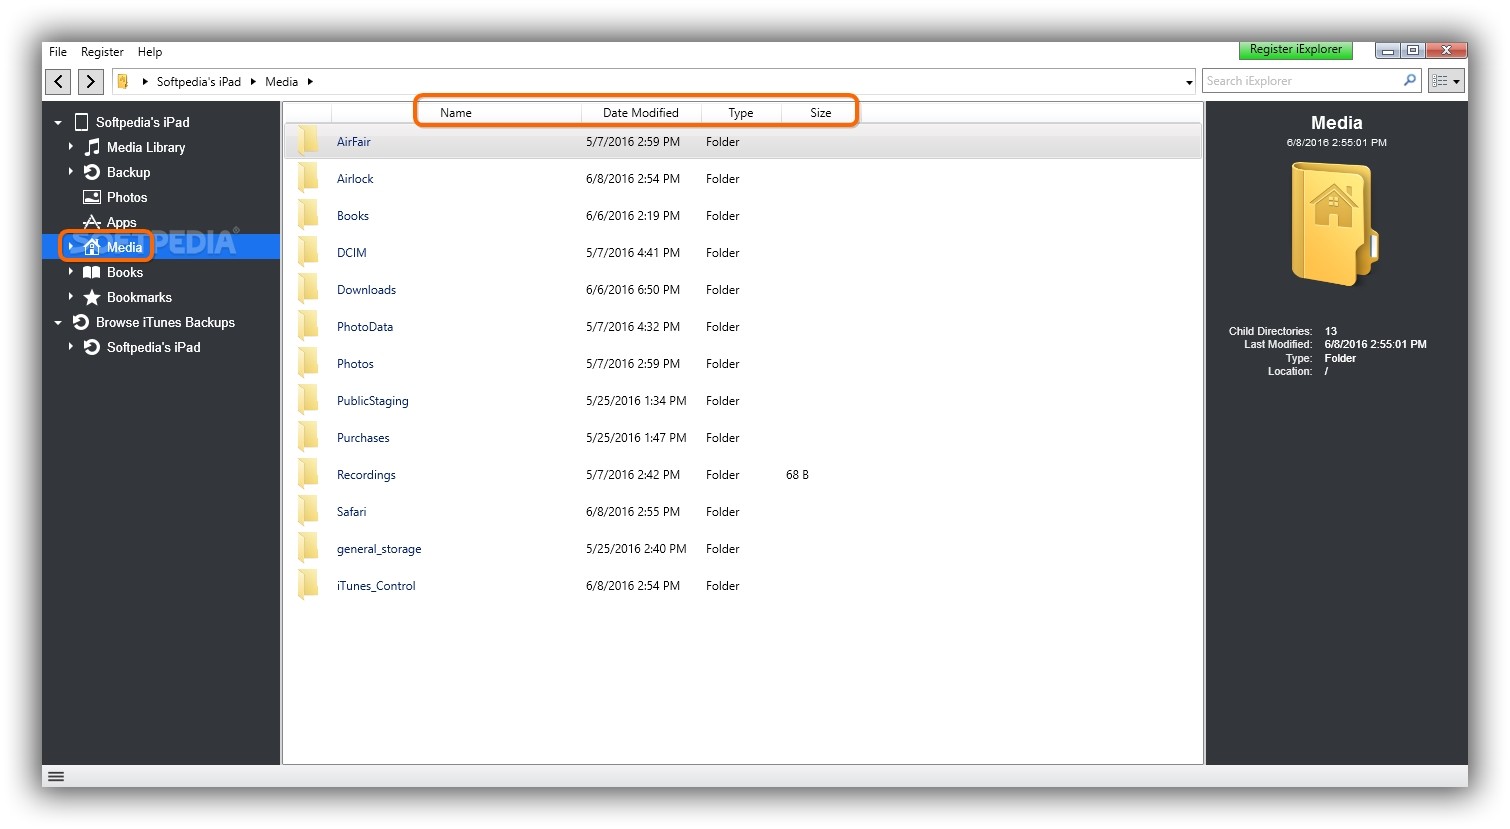
Go to Apps to view all applications installed on your iPod, iPad or iPhone, to Media to explore the filesystem of the device's contents, or to Books to see all text documents. Right-click one or more selected items to Open, Delete, create a New Folder or Export to Folder (set a destination using the tree view and click Ok for confirmation). Moreover, you can Browse iTunes Backups from the left column.
Play our video guide below to get a visual rundown of this iOS manager. You can also download iExplorer.
iExplorer iOS Manager Explained: Usage, Video and Download
iExplorer is an iOS manager that helps to easily transfer photos, music, movies, documents and other types of files from your iPhone, iPod or iPad to your Windows computer. Play this video to see how it works and check out our article guide for more info: http://www.softpedia.com/blog/iexplorer-ios-manager-explained-usage-video-and-download-505011.shtml