14 DAY TRIAL //
 When you're taking photographs as a profession or hobby and share your portofolio with the public, you risk someone stealing your work and using it for profit unless you apply digital watermarks.
There are many applications dedicated to this task, helping you prevent other people from stealing the intellectual property of your photo collections. We have gone through a large selection of Windows software to find free tools capable of applying watermarks to multiple photographs at the same time, providing essential customization features, and offering support for a wide range of graphical filetypes. In the following article, we're going to break down FastStone Photo Resizer, Image Tuner and IrfanView to show you how to apply watermarks while skipping any additional options.
FastStone Photo Resizer
The main app window of FastStone Photo Resizer has two panes: Batch Convert and Batch Rename. In the Batch Convert area, you can explore disk directories using the built-in file navigator to find and select the images you want to protect with watermarks.
All types of supported photos are displayed by default, and they are numerous. You can view them on the bottom part of the panel - All Image Formats (*.jpg, *.jpe, *.jpeg, *.bmp, *.gif, *.tif, *tiff etc.). Click this menu and select only one file extension if you want to view only graphic files matching a particular format.
Click to select a photo or hold down Ctrl to make a multiple selection and Add items to the Input List, which is taken into account for the watermark operation. Click Add All if you want to include everything from the list, without having to make selections.
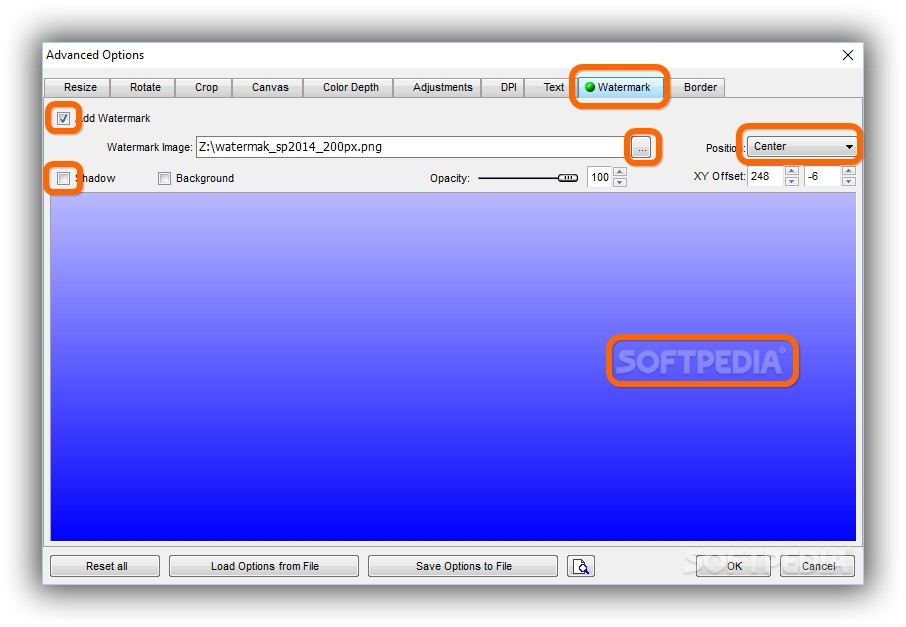
Check the Use Advanced Options (Resize...) box, click Advanced Options, go the Watermark window, and check the Add Watermark box to configure watermark settings.
Click the button with the suspension marks to use the built-in file explorer to find and select the photo you wish to apply as the watermark. A large image with gradient colors is shown in this area to help set the object's position on the images (it's only used as a sample).
Click the menu next to Position to embed the watermark on the Top-Left, Top-Center, Top-Right, Center, Bottom-Left, Bottom-Center or Bottom-Right corner of the pictures, or click and drag it with your mouse to move it to the exact position you want. The transparency level can be adjusted by clicking and dragging the Opacity slider. You can also check the Shadow box to apply this effect and put emphasis on the watermark. Click Ok to confirm modifications.
Returning to the Batch Convert panel, you can check the Output Folder box to indicate a directory on the disk where you want to save the new photographs. Otherwise, FastStone Photo Resizer overwrites the original items and you might not be pleased with the results. However, this means that you have to choose a common format for all new images to perform conversions. Click the Output Format menu and pick *.jpg, *.bmp, *.gif, *.png, *.jp2, *.tif, or *.pdf documents. There is no option integrated for keeping the original file extensions, so conversion is unavoidable in the case of FastStone Photo Resizer.
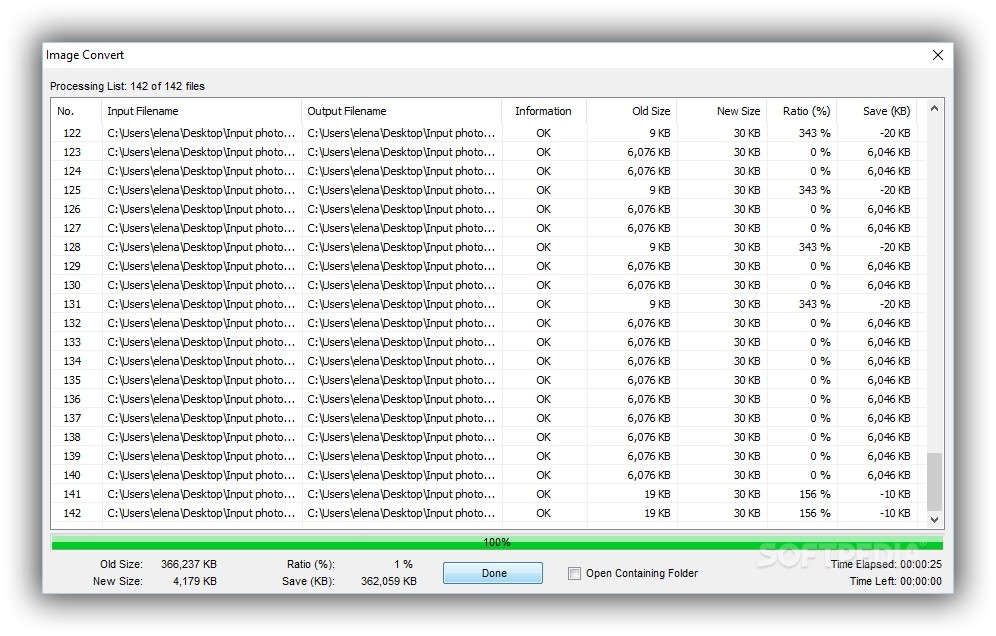
Click Convert to start the task. If files with the same names already exist, the tool asks for confirmation to overwrite them.
Image Tuner
In the main window of Image Tuner, click Add Images to insert individual photos into the task list with a wide array of formats, such as *.tif, *.gif, *.jpeg, *.bmp, *.emf, *.tga and Camera RAW (from digital cameras). Otherwise, click the folder button to select a directory and add all containing files.
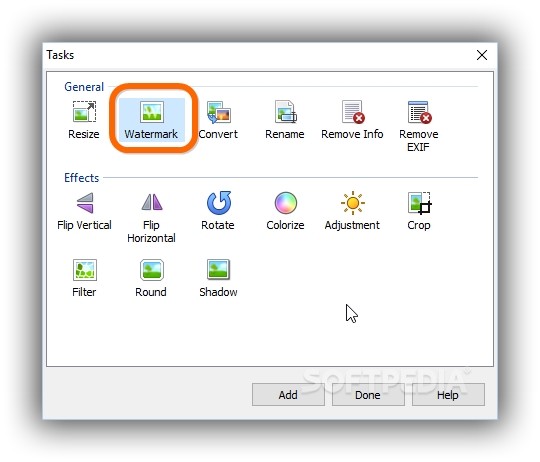
In the following step, click the plus sign next to Tasks to open a menu and select Watermark. In the Image panel, click the button with the suspension marks and use the file browser to point out the graphical file you want to embed as the watermark.
Set the Position to Top Left, Top Center, Top Right, Left, Center, Right, Bottom Left, Bottom Center or Bottom Right, level of Opacity (ranging from 0 - transparent to 255 - opaque), as well as finetuned position, relative to the left and bottom margin (Margin X and Margin Y, set 0 to both if unsure). Click Ok for confirmation.
The Watermark (Image) task is now recorded in the Action column (beneath Tasks). Right-click any photo from the list and select Preview to find out how the image will look like with the applied watermark (or press F3). Press the left and right arrow keys to navigate all photos.
If you're not satisfied with how they look like, double-click the Watermark (Image) entry in the Action column to go back to the Watermark window and reconfigure settings.
If you're pleased with the outcome, click Start on the toolbar, Start Process from the File menu or F9. A file browsing window pops up on the screen next to indicate the saving directory of the new files. If files with existing names already exist, Image Tuner asks for permission to replace them.
IrfanView
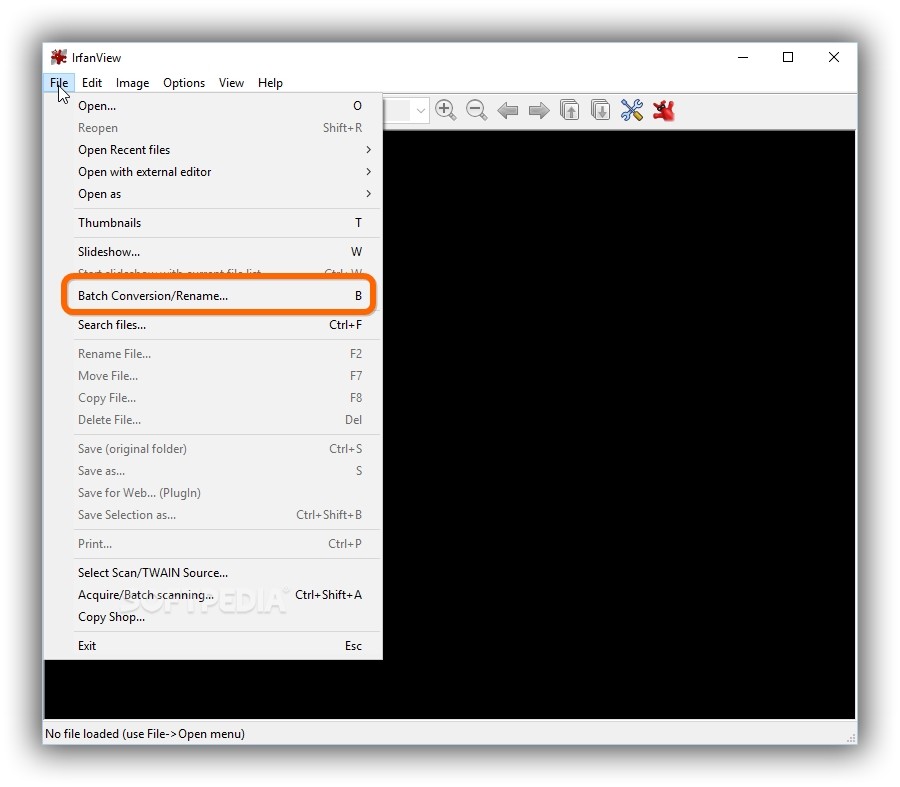
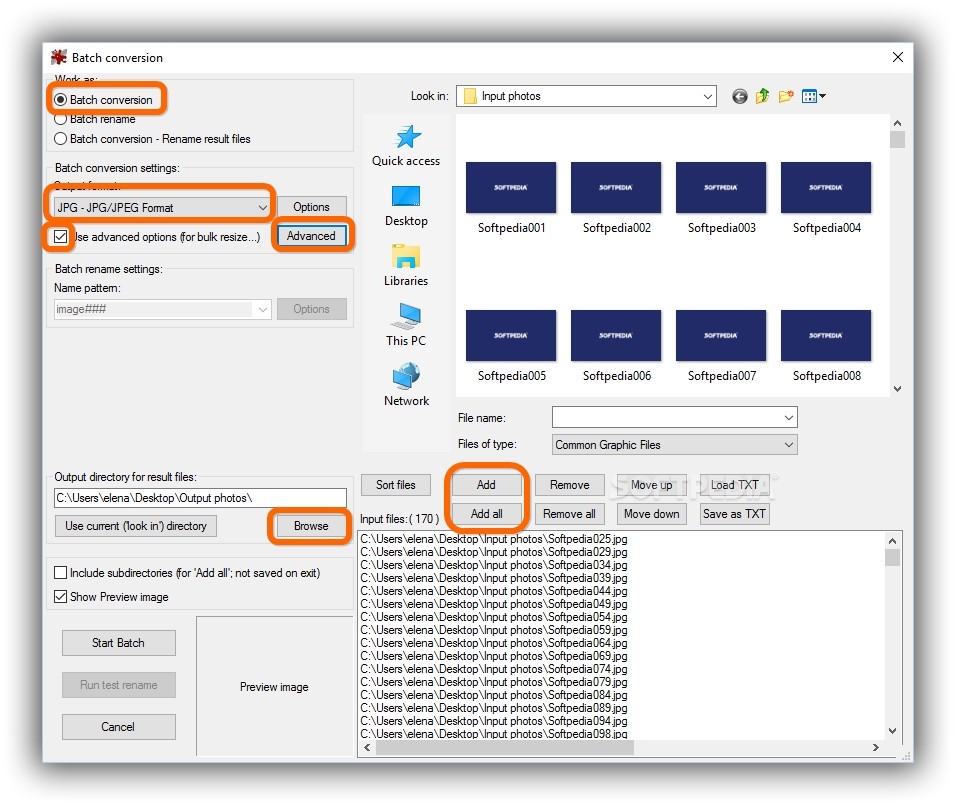
Open the File menu and select the Batch Conversion/Rename option or press B. Use the file navigator to locate files and add them to the task list by holding down Ctrl to make a multiple selection and clicking Add. If you want to add all items from the current folder, click Add All. Select Browse from Output directory for result files to specify the destination for creating the new images with watermarks.
IrfanView doesn't have an option for preserving the original file formats, so conversion cannot be avoided. Select Batch conversion from Work as, click the Output format menu to choose a preferred file type (like BMP, ECW, EMF, GIF, ICO, JPS, JPG or JNG), check the Use advanced options (for bulk resize...) box, click Advanced, check the Add watermark image box (bottom side of the middle column) and click Settings to customize watermark options.
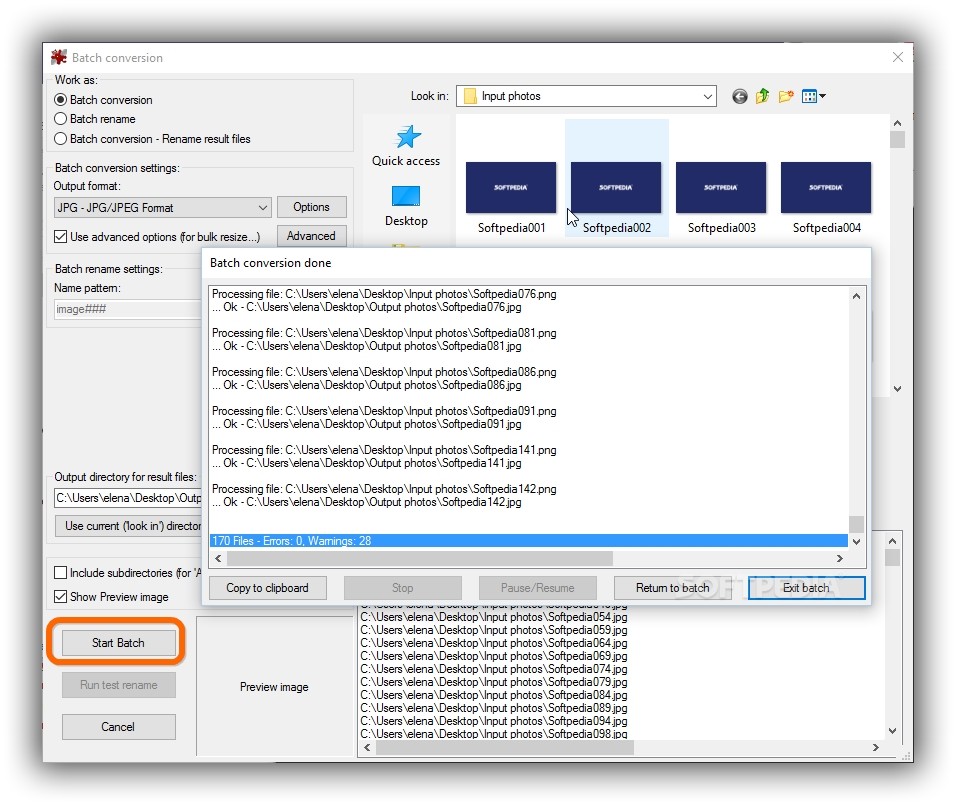
Click Choose to locate and indicate the file to apply as watermark, set the Start Corner (position on the image) to Left top, Right top, Center, Left Bottom or Right bottom, set the vertical and horizontal offset, relative to the Start Corner (X-Coord, Y-Cood, set 0 in both cases if unsure), as well as set the Overlay transparency level, which tells Irfanview how transparent the watermark will be (ranging from 0% - opaque, as is, to 100% - completely transparent). Click Ok -> Ok for confirmation, then Start Batch.
Get a visual rundown of the three apps in our video guide below. You can also download FastStone Photo Resizer, Image Tuner and IrfanView.
The Quick and Easy Way to Watermark Multiple Photos at Once
When you take photos and share them with the public, you risk someone stealing and profiting from your work. This is why you should apply image watermarks to protect your intellectual property. Find out how to do this using FastStone Photo Resizer, Image Tuner and IrfanView in our video and article: http://www.softpedia.com/blog/the-quick-and-easy-way-to-watermark-multiple-photos-at-once-503903.shtml