14 DAY TRIAL //
 Encryption
An old saying goes something like this: Keep your friends close and your enemies closer. With BitDefender's Encryption module I say let your enemies bust their chops with finding out your secrets. Encryption comes with two tabs: one for IM encryption (Yahoo Messenger and MSN messenger) and File Vault, a component for locking important files in a digital safe that can be mounted as a virtual drive on your system.
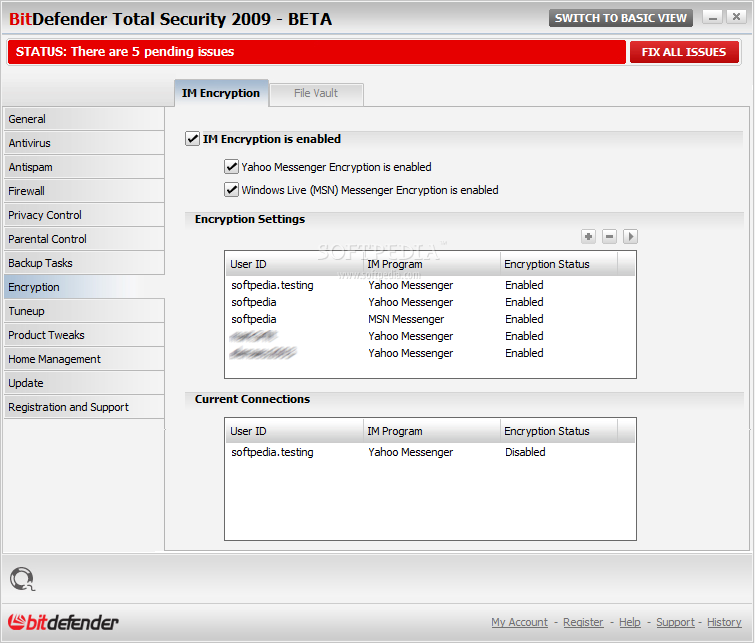
First things first, so IM Encryption is the starting point. Yahoo Messenger and MSN are the only instant messaging software supported by the application and you can enable the encryption for either one or for both. The two panels in the window allow you to make the encryption settings and provide you with a list of the current messenger connections.
Settings panel is nothing fancy or difficult to configure. All the adjustments you need to do consist in providing the user ID you want to add encryption for, set the instant messenger you are going to use and the encryption status. That is it.
The Current Connections window displays the users you are currently chatting with and the IM program used as well as the encryption status (on or off). The purpose of this window is purely informative and there is absolutely no setting to be made.
Looking for a downside did not take us long as during our testing, although we enabled the encryption for all user IDs, the Current Connections window still showed a disabled encryption.
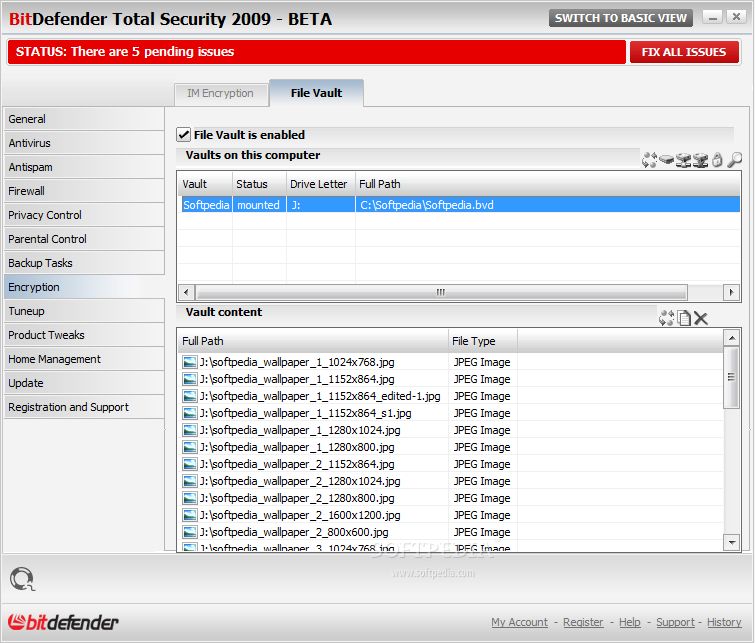
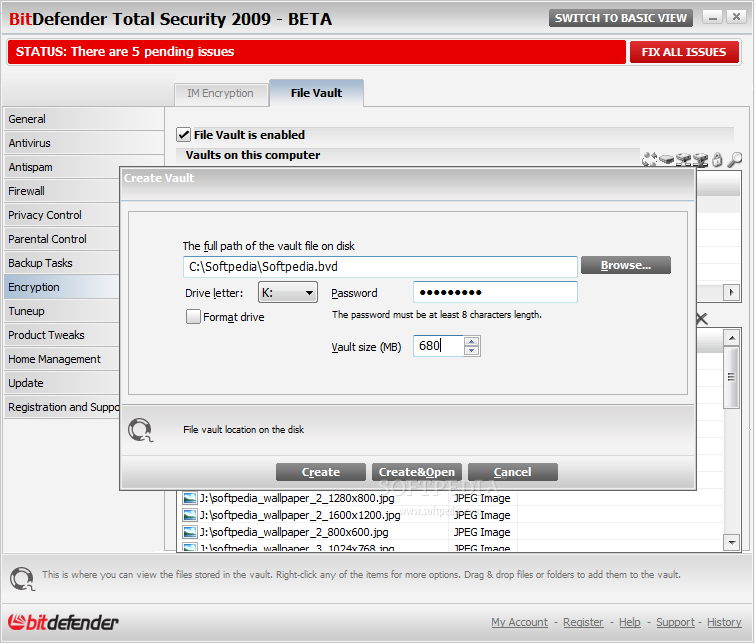
File Vault, the cyber safe to keep your files protected from prying malicious intents is the second component of the Encryption module. This will allow you to create containers for your important data and mount them as virtual drives on your system.
The panel displays all the containers you create, status (mounted or unmounted) as well as full path to its location. Once mounted, you can place your files there and work with them as if they were stored on a real drive and the window will show you all the files in the container. The vault content allows you to add folders/files or delete them, but these actions can also be undertaken directly from the mounted virtual drive itself.
Creating a new vault takes less than a minute and you can make it as large as you want provided that there is enough space to store it on one of your real drives. The application can automatically assign a drive letter or you can choose one from the available alternatives. Protecting it with a password is mandatory and it must be at least eight characters long.
Regarding the container, it will be a BVD file that can't be cracked open with anything but BitDefender using the protecting countersign and it can be moved anywhere on the disk. A double click will call the Mount Vault File screen asking for the password that mounts it.
For easier use, the File Vault component has been integrated into Windows Explorer and you can effortlessly add the desired files and folders to it with a right click (this action requires the vault to be already mounted; otherwise the options available allow you to create a new one).
The Explorer context menu will not, however, let you change the password to a virtual drive, although the option is present. Luckily, there is a way to this and that is going in the File Vault window and accessing the Lock option.
BitDefender Total Security 2009 is still on the case providing you with the necessary means not only to keep the system healthy and malware free but also bring it to a speedier rate by improving its performance.
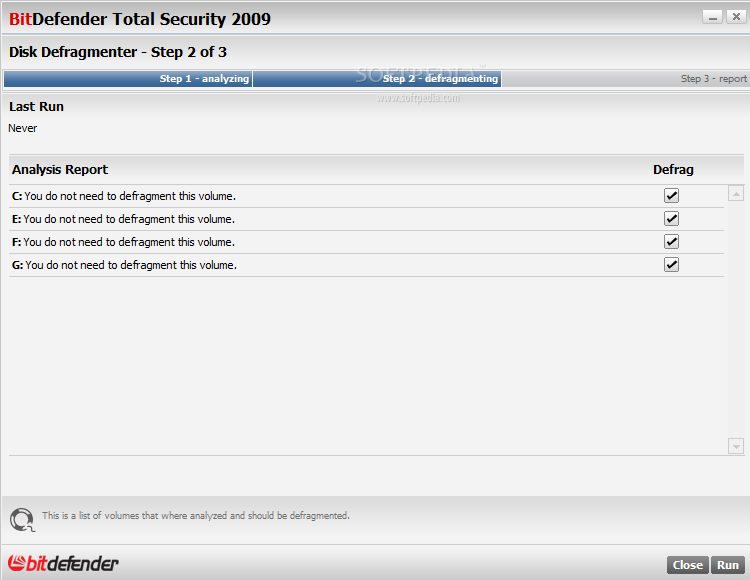
[]IMG=2The Tuneup module provides the necessary tools for defragmenting the drives on the system, getting rid of unwanted clutter, cleaning the registry and recovering it as well as throwing out duplicate files. Each of the components can be accessed via the corresponding Run Now button and works independently from the main application.
Defragmentation is head of the list and the entire process consists of three easy to use steps: analyzing, defragmenting and reporting. After analysis you will be alerted regarding the drives in need of defrag and asked to allow checking the ones the task should be run for.
After this the component will start doing the defrag and arrange the files on disk for lower read/write times and better overall performance of the disk. The third step of the guiding wizard displays the report for the ended job. Unfortunately, if the component does not find anything wrong with the selected drives there will be no report available, although during our testing it took it a couple of minutes to finish defragmentation and no accounting was done, the only message received being that the defrag process was complete.
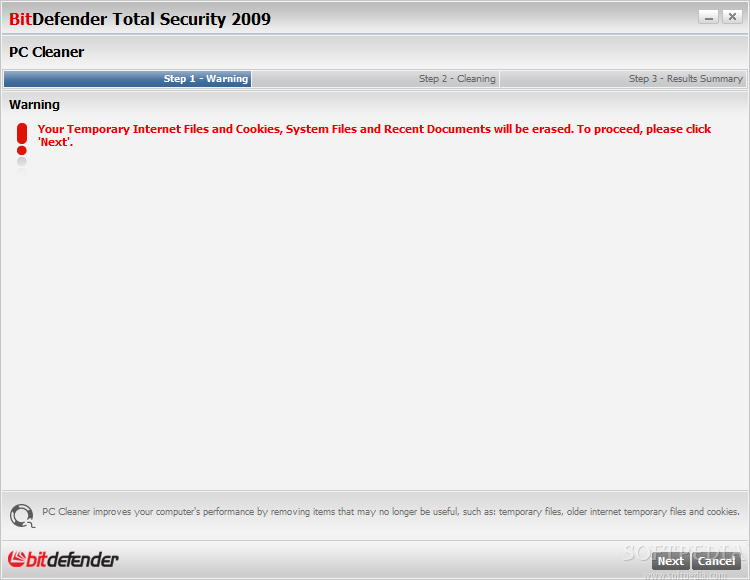
Cleanup operation starts strong, with a warning about temporary Internet files, cookies, system files and recent documents being deleted. This could be pretty scary for any user that likes to be in control of the data removed from the system and take a peek at the detected files first. The wizard is still three steps long and after the warning the app will proceed to scanning and deleting directly.
You will be informed of the number of files deleted for each of the sections scanned, although the operation may take some time to complete (at least so it did during our testing as it choked on temporary Internet files and then it got stuck deleting IE cookies). When it finally completed the job there were no results available for viewing, just the message that temporary files had been deleted and the total processed number.
Registry scanning comes with a difference with regards to the wizard provided. There are four steps to go through and the most important are scanning and action to be taken. Scanning takes a lot of time to complete and there is no say on the job completion time (half an hour and almost 69000 files scanned and the application did not find any issues and it did not show any signs of finishing the scan any time soon).
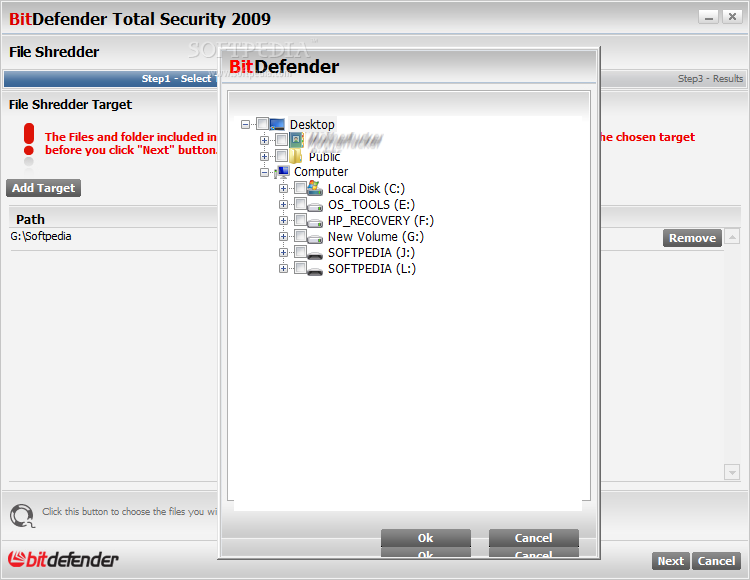
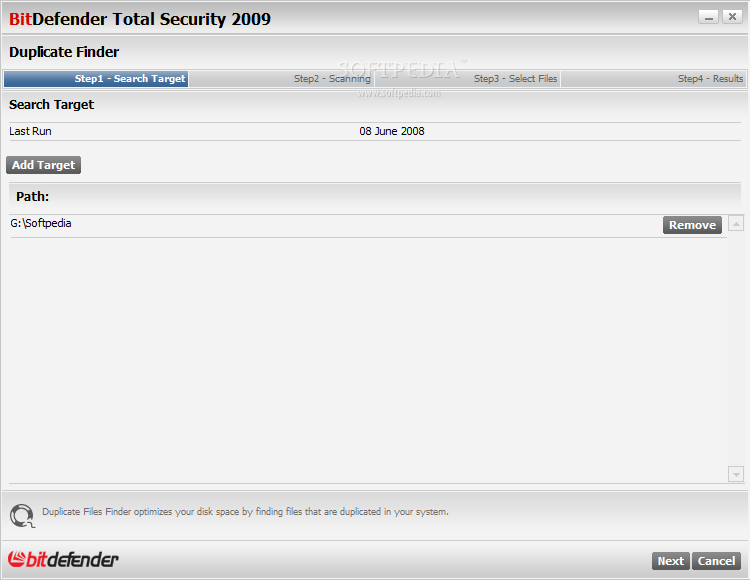
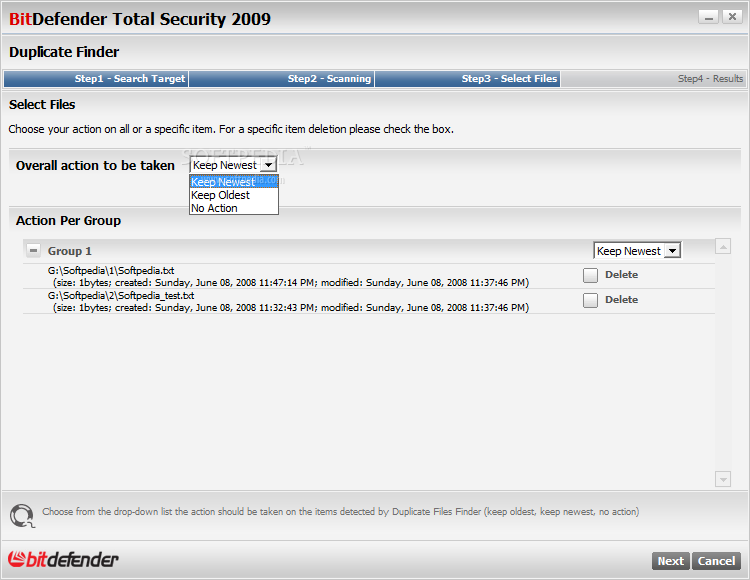
Duplicate file scanner on the other hand did its job swiftly and accurately. The wizard is also present and the four steps to pass through involve adding a target to scan, the actual scanning, file selection for deletion and the results page showing the number of scanned items, duplicate groups found and total number of duplicates.
I must confess that the component did a fabulous job detecting the duplicates even though the files had different names and there were no settings available. The files with the same content were accurately detected and removed.
The one glitch that is consistent with the entire module is related to the interface. Whenever I would return to the general view of all components I would be presented with a blank interface and all the options would appear at rolling the mouse pointer over them. For the Duplicate Finder component, upon starting it, every once in a while the interface would display the steps of the wizard in Romanian for a second.

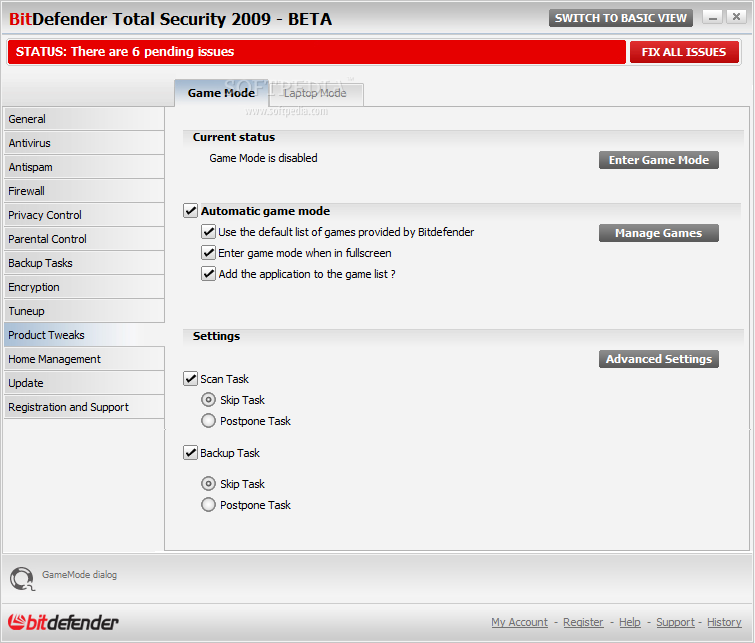
This is a special section destined for gamers and users running BitDefender Total Security 2009 on their laptops. There is no documentation available for these two components, but their purpose is to make BitDefender Total Security 2009 as light as possible so that computer resources are affected in the least degree possible.
The application comes with a list of games you can choose to be less influenced by BitDefender Total Security 2009 or you can add your executables of installed games. Either way, the options are limited. However, if scanning or backing up your files is on the schedule and at the time you are in the middle of a gaming session, the application automatically detects the situation and can perform either a skip of the task or a postpone. Both choices are yours to make and need to be configured beforehand.
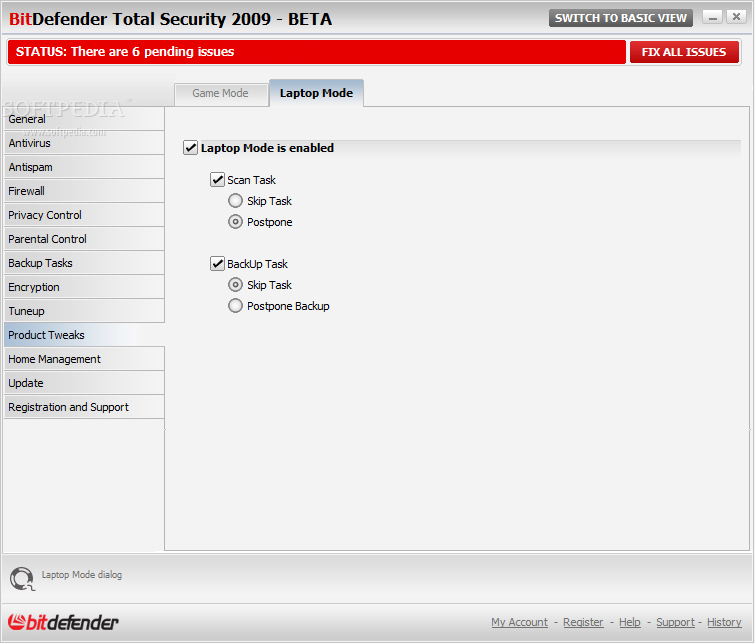
Laptop Mode is the "abridged" version of Game Mode and once enabled, you can save battery as well as resources by setting scan and backup tasks to be either skipped or postponed. I would recommend this activity mode whenever your notebook is not connected to a power source and relies solely on its battery. It would have been nice though for the software to detect this aspect as well and postpone the task until charging the notebook.